This post contains affiliate links. For more information, please see my Disclosure Policy.*
So you (or someone you love) is brand new to sewing and you’re SO excited to start!
WELCOME!! You’re now in an ultra awesome club where we say things like “it has pockets!” with a certain amount of genuine glee!
But where do you start??? There are so many machines, and tools, and patterns, and ACK!
Feeling overwhelmed? I get it! We were all there once, too.
So instead of trudging through a “learning the hard way” approach to what is and isn’t a good tool (or how many of a thing you actually need), I’ve created a comprehensive list of tools you definitely need, some “nice to haves,” and ones you can probably do without.
These are the tools for sewing clothes, and their uses.
And for ease of consumption, I’ve broken it up into a multi-part series.
Welcome to The Definitive Guide to a Sewing Starter Kit series! This will include the all-time best tools for a brand new sewer, including every essential sewing tool to get you on your way.
Before we start, I’m going to assume 2 things:
- That if you have any questions, you will let me know!
- That you are looking to become a garment sewist (as opposed to a quilter, etc).
Ready? Let’s dive in!
I’m dividing the list into sections for ease of scrolling. You can also jump to different sections when you need to.
Sewing Machines
Sewing machines are probably the #1 largest up-front expense when it comes to your new hobby. They vary wildly from the most basic for less than $100 up to super fancy embroidery machines that cost more than most cars!
Where to start?
If you’re unsure that sewing is for you, and don’t want to invest a lot of money, Brother USA makes great machines for less than $100. You can buy these at big box stores like Walmart or even Amazon.
Some veteran sewists will stubbornly claim that the only place to buy a machine is directly from a local sew shop so you can discuss what you want with someone who actually knows what they’re doing, AND take advantage of having your machine serviced there.
While that’s great in theory, not everyone has the privilege of a “local sew shop.” Or their “local shop” is the equivalent of a Joann’s (a crafting shop), which only sells very basic Singer models and no one in the store actually knows how to use them.
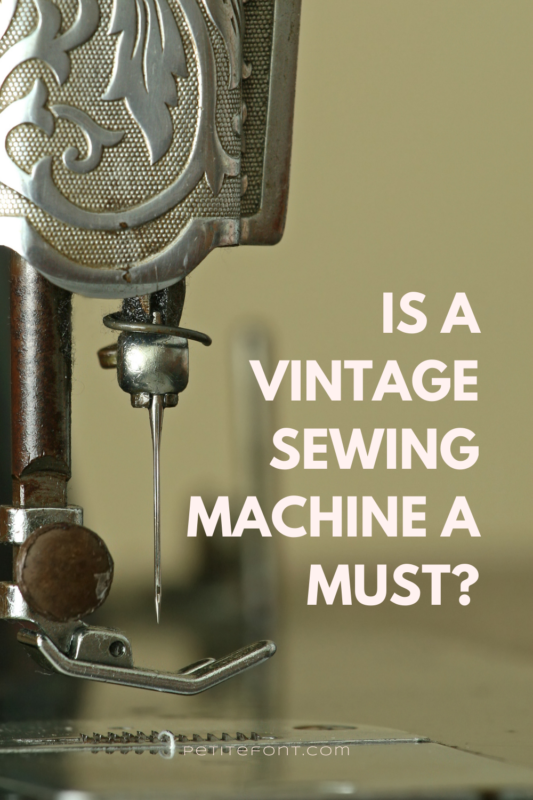
Other veteran sewists will argue that an all-metal vintage machine is the best machine to ever get. While that’s also great in theory, finding one in perfect working condition and becoming comfortable with the higher level of maintenance isn’t what newbies should worry about.
My best advice is to get a simple working machine within your budget. What you want in a machine is one that sews:
- Straight stitches
- Backstitches (it can go backwards, all modern ones should do this)
- Zigzag stitches (for knit fabric)
- Buttonholes
This is the bare minimum of stitches, but also the ones you’ll use 90% of the time!
Pro-Tip:
The more stitches a machine has does NOT equate to quality. You will rarely—if ever—use the extra 25-50 decorative stitches on your machine.
A note about buttonholes: your machine doesn’t have to have a one-step buttonhole stitch. This is when a single stitch selection sews up all 4 sides of the buttonhole (see, buttonholes are actually like little rectangles!)
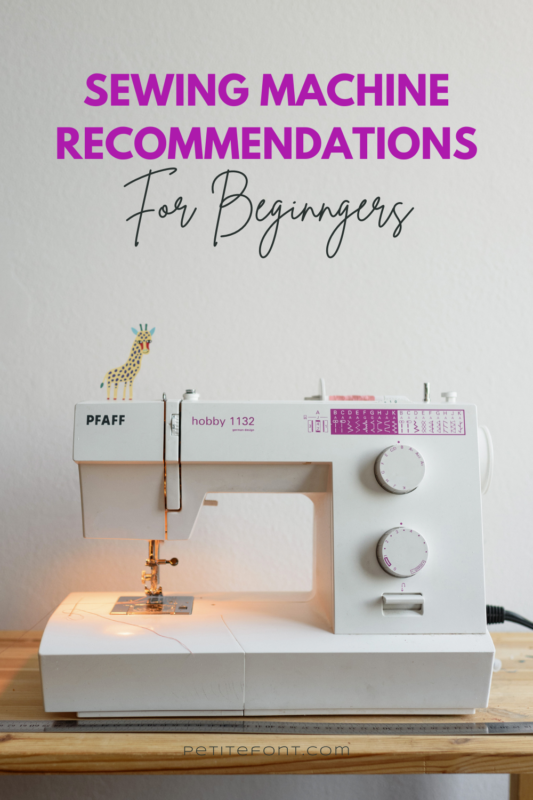
Those are really nice but can also increase the cost of a machine. My first machine was a Brother JX2517, which I’m not sure is made anymore (here’s a similar one). It has a 4-step buttonholer that works a hell of a lot better than all 5 one-step stitch options on my current Brother Innovís 40-e. But my Innovís is a lot quieter overall!
Basic machines like my original Brother can be as low as $70. Mid-range machines that are computerized and allow you to choose stitch width and length can run about $300-$1,000.
If you don’t have a local store to check out, some good brands are:
- Brother
- Bernina
- Pfaff
- Juki
- Janome
- Babylock (this brand tends to be the most expensive).
Pro-Tip:
Make sure you do get your machine serviced regularly. Like a car, regular maintenance will keep it running for a much longer time. Look for local sew-vac stores, or contact your brand manufacturer for recommendations.
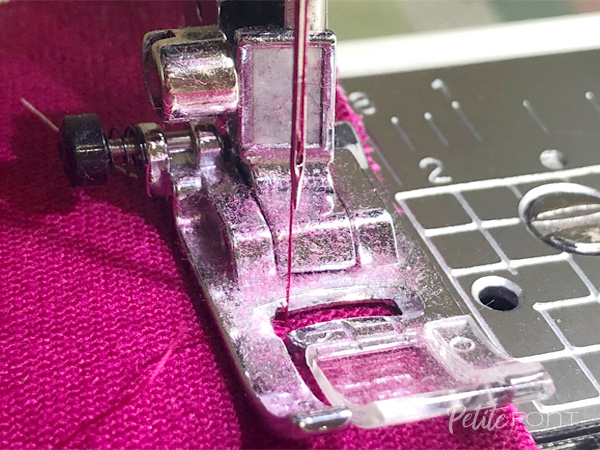
Sewing Machine Presser Feet
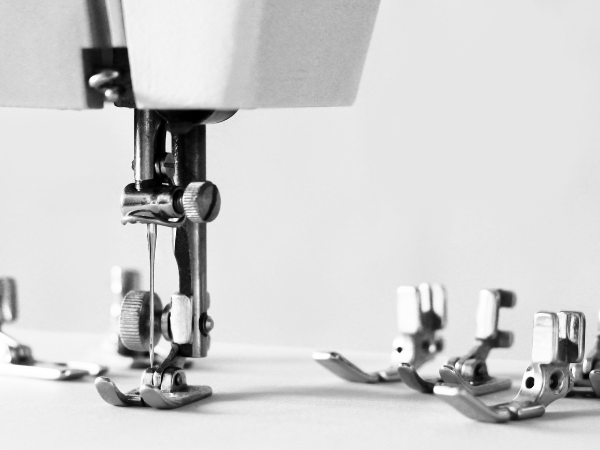
A lot of the accessories you’ll use for your sewing machine are dependent on your brand, especially when it comes to the presser feet. A presser foot is an attachment that holds your fabric in place as the needle makes stitches. Different feet have different objectives, and you’ll probably get the basic ones with your machine:
- Regular foot: for most of your stitching
- Zipper foot: for attaching zippers and it’s super great for edge- or topstitching
- Button foot: for attaching buttons
- Buttonhole foot: for making buttonholes
If these feet aren’t included in the box with your machine, they’re fairly easy to get online. Again, it’s recommended to buy your specific brand of feet. This is especially true of a walking foot, which allows you to work with knit fabric (think t-shirts and sweaters) without stretching out the fabric.
Pro-Tip:
Knowing the width of your zigzag stitch could impact which walking foot you want. For example, I learned the hard way that Brother makes 2 different walking feet. One is for 5mm and the other is for 7mm wide zigzags. My machine works better with the larger one.
Online you can also find boxes of 20-40 presser feet that can work with a lot of different brands. Unless you’re doing specialty work, you probably won’t need all 20-40 either. But some “nice to have” feet accessories are:
- Teflon foot: great for leather
- Overcast foot: for finishing edges of seams
- ¼” quilting foot: has a built-in guide for stitching “in the ditch” (a method for hiding stitches in an existing seam line)
- Walking foot: mentioned above
- Blind stitch foot: for making invisible hems
- Binding foot: sandwiches binding along edges to finish it all in one go!
The universal boxes should work with various models, but it’s always best to buy branded accessories. That said, I too have a box of 40 universal feet.
So now you have your machine and the necessary feet, what else do you need? Needles, thread, and bobbins!
Sewing Needles

Sewing machine needles are different from hand sewing needles. For one, the “eye” of the needle is closer to the pointy end!
Needles are rarely machine-dependent, but they ARE fabric-dependent, so what do you need?
The brand Schmetz makes a really great guide that is color coded for their needles, both in application AND size.
The rule of thumb for needle sizing is that the thinner the fabric, the smaller the number, which is presented as X/Y because of two different gauge systems (don’t bother worrying about it, the numbers go up or down in tandem).
Needles range from 60/8 for very fine silk, to 110/18 for tougher denim and leather, and beyond up to 130/21 for more heavy duty industrial-level fabrics (think building tarps or boat sails). Schmetz and other brands will usually label the needles along with the size gauge.
Check out Schmetz’s own Anatomy of a Needle guide for help with this.
I always keep a variety of universal needles in a range from 70/10 to 90/14 on hand. This will do well enough for most of your beginning sewing projects. But if you want to work with denim or knits, make sure to look for needles that say “jeans” (for denim) and ballpoint or stretch for knits.
(In fact, get both ballpoint and stretch needles. An open secret is that though the needles might be similar, some machines prefer stretch needles for knits while others sew better with ballpoints. You won’t know until you get your own machine and learn its nuances!)
If you’re a little confused, don’t worry! Here’s a great explanation from New Forest Fabrics for the differences between all the needle types and how to choose the correct one for your project.
Pro-Tip:
Keep a good supply of needles on hand. Needles will dull and should be changed out every project (like after 8-10 hours of sewing). But they can also break, and you don’t want to have to abandon a project right in the middle because you don’t have back-up needles! (This is also why they’re sold in 5-to-a-pack!)
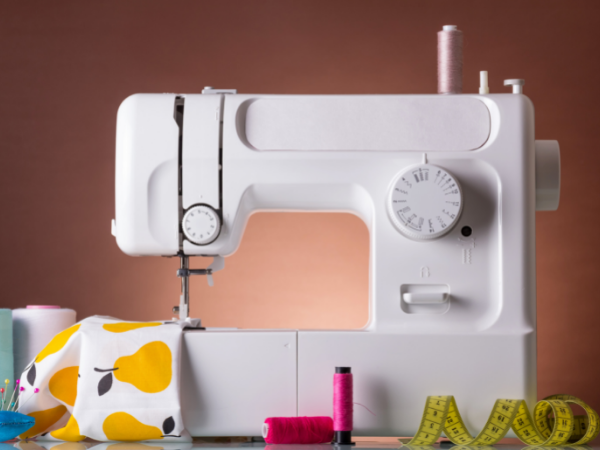
Sewing Thread
Sewing thread comes in a variety of colors and materials. When you first walk up to a display of thread, you might be overcome by the sheer variety (and rainbow beauty) of colors! Then you have to pick the type. Should you use cotton, poly-cotton, silk, embroidery????
The simple approach is to look for the words all-purpose on the thread. That will apply to polyester, cotton, or poly-cotton thread in the color that most closely matches your fabric. This will work for 90% of your sewing.
Can’t find the EXACT color match to your fabric? I promise, that’s not a very big deal. Most of your stitches will be hidden inside the garment, so you won’t even see it except on hems!
My rule of thumb is to buy 2 spools of thread whenever I need a color match (or ever so slightly darker), and keep large spools (about 1000 meters) on hand in basic black, white, and medium grey. But if you really want to be economical about your thread matching, check out this handy cheat code:
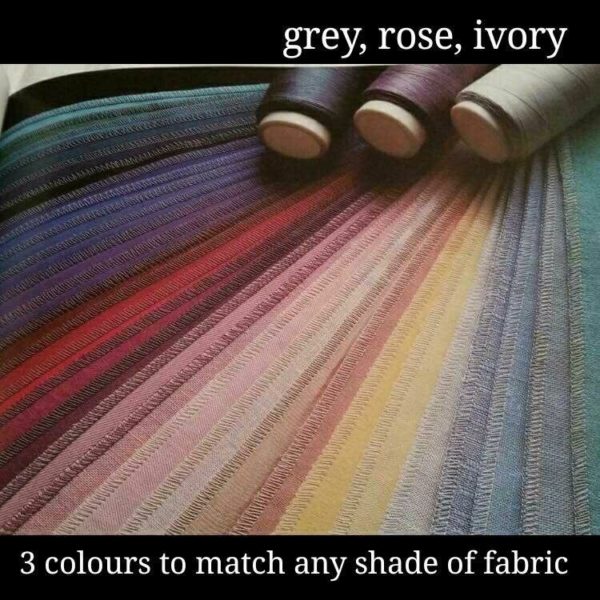
Grey, rose, and ivory supposedly work with about 99% of all your fabric colors. It might be a little more obvious in the finished product that a thread doesn’t exactly match but ONLY on visible stitching such as the hem or topstitching. I can also guarantee that NO ONE but you will notice that.
(Unless all your friends also sew, and then you’re going to point it out to them before they have a chance to say anything anyway. Trust me, we all do it. Non-sewists are going to think you’re magical no matter what!)
Some sewists swear by certain name brands. I like Gutermänn and Coats & Clark, which are available in most hobby and sewing stores. Slightly more expensive brands like Mettler create less lint, which if left unchecked can clog up your machine. But you should be servicing your machine regularly to avoid that anyway!
Pro-Tip:
Thread will age and disintegrate, especially if exposed to light. That means if you inherited thread from someone, or you somehow come upon old spools, be careful what you use that thread for. I’d recommend it only for hand-basting and other temporary uses.
Check out Fashion Wanderer for more on “Does Thread Go Bad?”
Sewing Bobbins
Quick, what’s a bobbin???
It’s a small spool that you wrap thread around. It goes in the sewing machine (as opposed to on top, where the large spool of thread lives).
Sewing machines create loop stitches between the top thread and bobbin thread. To see this in action, check out this great gif that illustrates how that happens, and you can see the green bobbin thread as it’s wrapped around the yellow thread:
Bobbins are another one of those things that are completely machine-dependent, so don’t buy any until you know what machine you’re getting. Some machines have larger or smaller ones, some are metal. Buy whatever size is necessary for your sewing machine.
The size of the bobbin is more important than the brand. For example, Class 15 bobbins (what my machines call for) are available in a variety of brands.
Always keep a few empty bobbins on hand, and thread 1-2 per project so you don’t have to stop in the middle of a seam when you inevitably lose at “bobbin chicken” (when the bobbin thread runs out before you finish a seam).
Pro-Tip:
If you have only a little bit of thread left on a bobbin, keep it for hand sewing or even hand-basting later on. I like these little containers for keeping my extra bobbin thread. And I use little round stickers to keep track of the exact color of the thread.

Sergers/Overlockers

Sergers (also called overlockers) are a specialty machine that uses a cutting knife and multiple threads to bind off seam edges. They’re typically used for knitwear, but also great for finishing seams in woven fabrics.
But the question is: does a beginning sewist need one?
Honestly, no. Beginning sewists should learn to SEW first. Putting fabric together to make a garment that fits should be the goal.
You may never “need” a serger. They’re definitely nice to have, no doubt about it. But any clothing you can make on a serger can also be done on a sewing machine. Buy a sewing machine FIRST.
Even if you do get a serger, you’ll probably still need a sewing machine. Because you can’t sew hems on a serger. (There are also coverstitch machines and combo coverstitch/sergers for this too, but if you definitely do NOT need that in order to get started with sewing.)
When you get to the point when you’re ready for a serger, the popular “beginner” machine has been the Brother 1034d or 1034dx. They’re basically the same (a dial moved on the DX version). And while they are both fast, they are LOUD. Of course there are many options in this category, including the air-threaded deluxe Cadillac of machines called Babylock.
I’d love to have a Babylock Triumph…but the last one I found was $3000 so I’ll wait a little longer for one.
Pro-Tip:
You don’t need a serger to get started sewing. Learn to sew first. If you find that making knitwear is totally your jam and that’s what you want to concentrate on, then maybe a serger is your second (or third) machine purchase!
Hand Sewing Needles
Hand sewing is a complement to machine sewing, but requires slightly different equipment. Hand sewing needles are not like machine needles.

Hand sewing needles have the eye on the opposite end of the pointy side. they’re also relatively slim across the entire shaft of the needle because the entire thing has to pass through fabric. Unlike machine needles, where only the tip pierces the fabric.
What kind of hand sewing needles to you need? Sharps are a good start, and they come in various sizes. Like their machine counterparts, the type of needle is dependent on the project. There are also specialty needles for working with leather, carpet, etc.
Pro-Tip:
Keep a variety pack of assorted sewing needles on hand. That way you’ll never find yourself in the awkward position of suddenly needing to hand sew without the right needle on hand.
So now you have all the basic knowledge you need for picking a sewing machine and some basic accessories like the right needles, threads, and bobbins. All that’s left is to grab some fabric and a pattern and SEW!
Interested in more tool talk? Check out the rest of The Definitive Guide to a Sewing Starter Kit series:
- Cutting tools
- Measuring tools
- Marking tools
- Pressing tools
- More fun tools (coming soon!)
I hope you enjoyed this! Please feel free to add your suggestions, reactions, or questions in the comments below.
Save me on Pinterest for later!