When you shorten or narrow a skirt, you save a bunch of fabric! Or, if you’re short on fabric, either is a good way to get a similar look more efficiently.
Today I’m going to use the Project Sew My Style pattern of the month, the Chalk & Notch Orchid Midi, as the basis for these two skirt hacks.
First, I’m going to shorten the skirt. Then I’m going to make it more narrow. I’m making it a skinny mini!
And then check back again on Friday when I make the most scandalous hack: moving the slit to the back of the skirt!
*Housekeeping: full disclosure, I received this pattern for free as a member of the #sewmystyle2019 leadership team.*
Because I’m short, the “midi” length of the original Orchid pattern is laughably long on me. It came all the way to my ankles! El Hubo actually asked if I was making a Mole Woman dress (*insert eye roll*).
I knew from the beginning I would make this into a knee-length version. The directions included for this are very easy, but here’s a visual guide.
Note: if you plan to do both of these hacks, make sure to shorten the pattern first!
How to Shorten a Long Skirt
Decide how much length to take off the skirt, keeping in mind your hem depth. This particular pattern’s hem is 1.375″ or 3.5 cm.
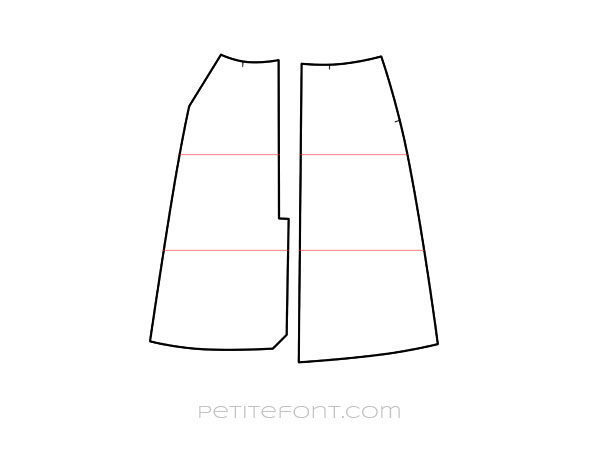
Locate the two shorten and lengthen (S/L) lines on the Front and Back skirt pieces (shown here in red).
Note: some patterns only have one shorten and lengthen lines included. If that’s the case feel free to add another parallel line of your own. This can be done around the knee area, or several inches below the hip point.)
- I decided to take off 11″ (27.94 cm). Divide this amount in half (5.5″ or 13.97 cm) and draw a line that distance above both S/L lines (indicated by blue lines).
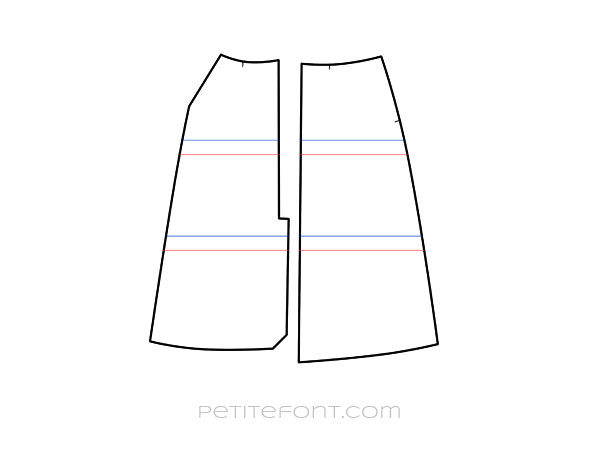
- Fold or cut your pieces along the red S/L lines and move this up to your newly drawn blue lines. Your side seams are going to look a little ragged.
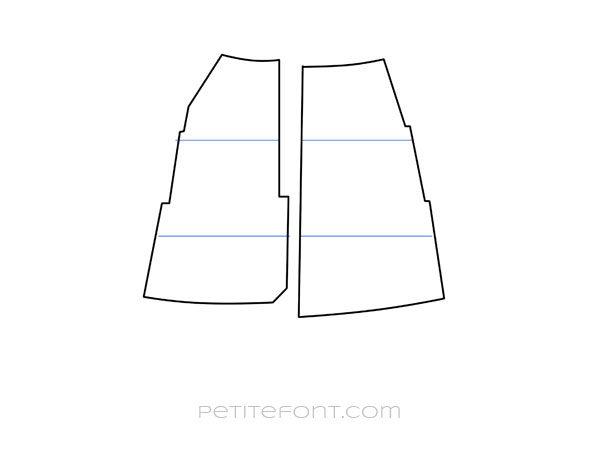
- Now retrace the side seams so they are smooth lines. This is called “truing” the seams.

On this particular pattern, you may have to adjust the slit as it might end up too high up your thigh. Keep that in mind! If it’s not an issue, then you’re done shortening!
How to Narrow an A-Line Skirt
Now that the skirt is showing off your amazing calves, it’s time to narrow the sweep. The sweep is the circumference of the bottom hem. My fabric was too narrow for the full A-line skirt, so this hack allowed me to still have an A-line skirt but only slightly narrower.
The key here is to decide how wide an A-line you want. According to Fashion Pattern Making Techniques Vol. 1, a standard A-line skirt is about 3-6 cm (1.25-2.25″ rounded up for even numbers) wider than a pencil skirt. Pencil skirts are cut straight down from the hip point (typically the widest point along your hips). We’ll use this point to make our adjustments.
- I’ll be using the new shortened Back Skirt pattern piece for this example.
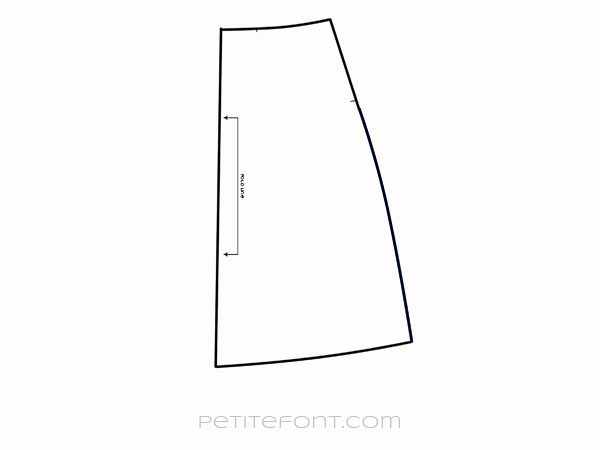
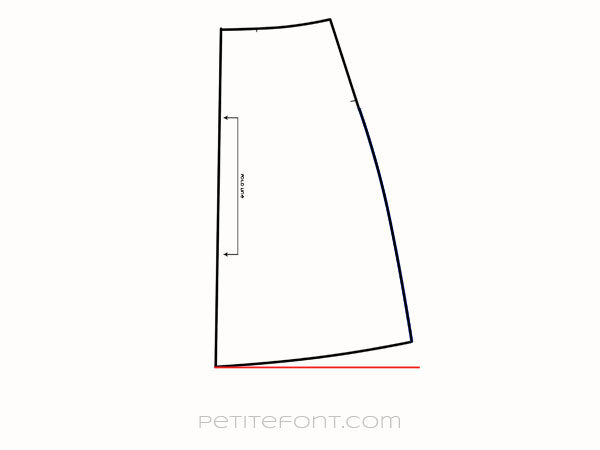
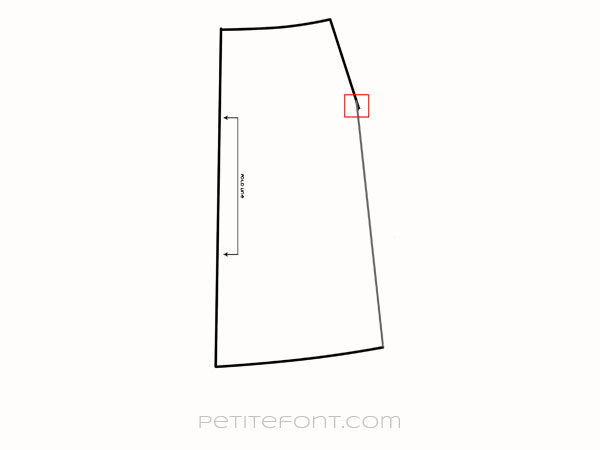
- Extend the hem from the center back out straight (not curved), exactly perpendicular to the center back or grainline. This is the red line in the illustration below.
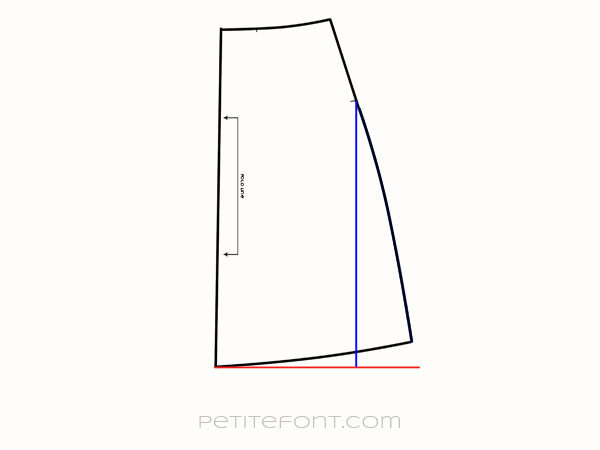
- Find the hip point or hip notch. Draw a line straight down (parallel to the center back or the grainline) to the extended straight hem (red line).
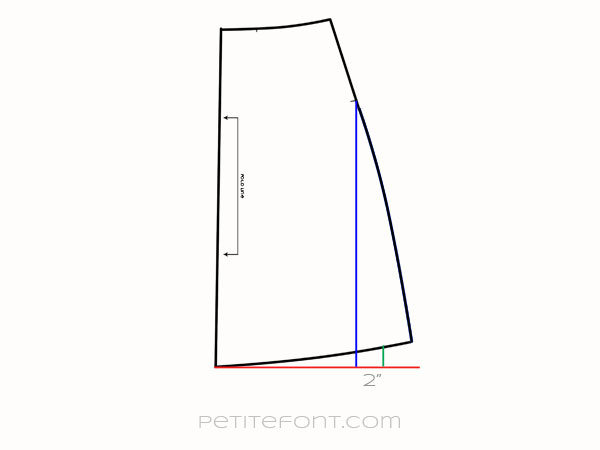
- For this example, I opted for a skirt 2″ (5 cm) wider than a typical pencil skirt. I drew a line 2″ away from the blue line in Step 3 and extended it up to the original hem (green line).
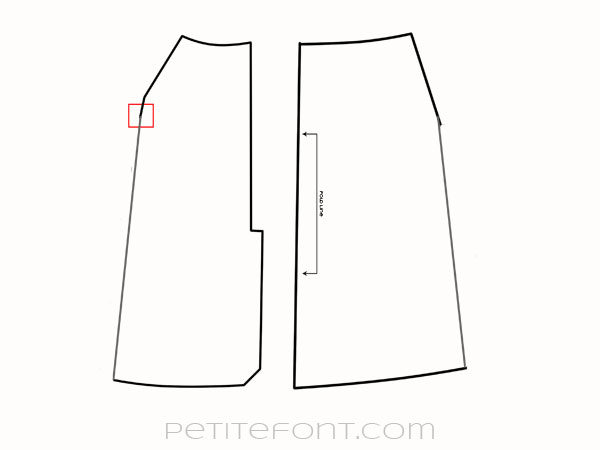
- Draw a straight line from the original hip point down to your new mark (shown in grey).
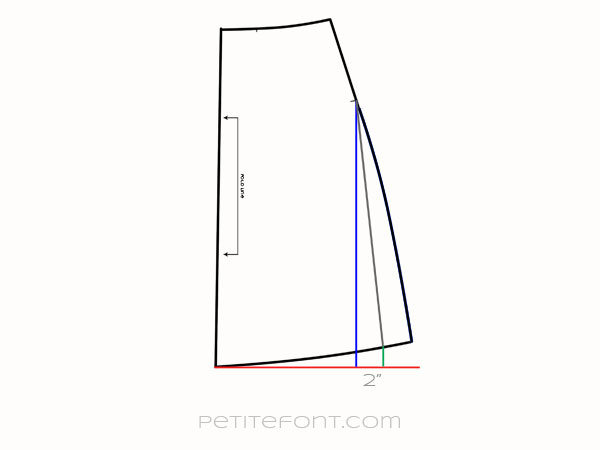
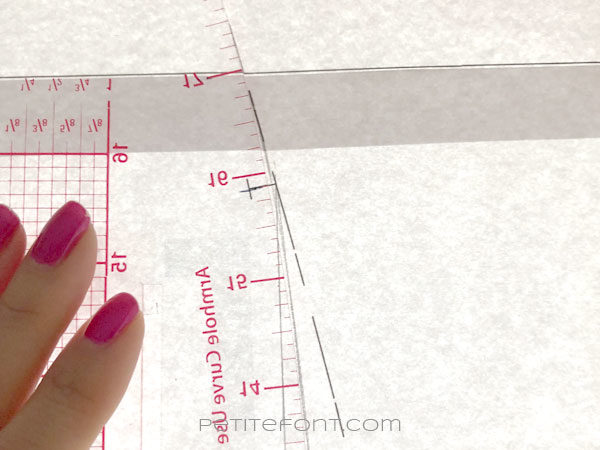
- True (or smooth) the seam at the hip point (shown in the red box) by curving it to meet the original seam line.
Here’s an example of using a curved ruler to smooth out that line.
- Do the same to the Front Skirt piece—OR to avoid doing the math, simply match this new cut line on the Front Skirt pattern piece. Make sure to smooth out the hip curve!
And that’s it! If you have any questions, please feel free to leave a comment. Note that because this pattern has an interfaced hem, narrowing it will also save you a little bit of that material. You will have to narrow pieces #18 and #19 for the hem fusibles.
Here’s a sneak peek at my finished Orchid. The narrower skirt is subtle, despite having a sweep that’s 10″ narrower!

Check back on Friday when I’ll show you how to reverse the skirt so the slit is in the back!