This post contains affiliate links. For more information, please see my Disclosure Policy.*
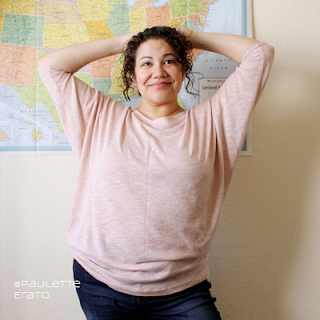
 Even if you weren’t yet born in 1983, you’re probably well aware of the iconic grey off-shoulder sweater that Jennifer Beals sported in Flashdance. Even my millennial husband, not born until later in the decade, called this my Flashdance sweater when I first showed it to him.
Honestly, it’s like El Husbando read my mind when I showed it to him. My first thought when I put it on was the exact same thing.
Yes, it has a wide-ish neck. No, it’s not meant to be worn off the shoulder. It isn’t even a raglan sleeve like the original. So why does it have that vibe?
Weird.
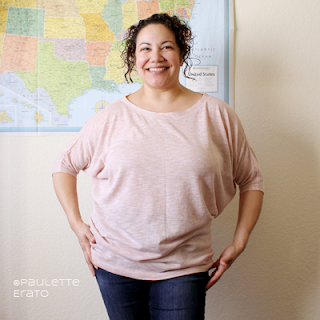
I made Simplicity 8089 in view B in a light peach knit fabric with incredible drape. It’s very similar to the fabric I used for the Drop Top, but in a different colorway. It’s 50/50 rayon and polyester.
My high bust is currently 42″ while my full bust is 45″, but I’ve learned that if I go by my high bust for tops, they are STILL too big. So I usually use whichever bust measurement lines up with 40″. In this case, that was size Medium or 14-16. I did a 5/8″ high round back adjustment and used the Fit for Real People kimono sleeve instructions for creating an FBA (like I did for the One Hour Top). I rotated the bust dart this created down to the hem, widening it by 2.5″ inches.
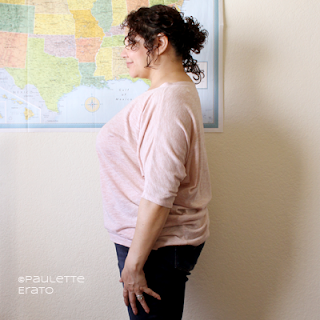
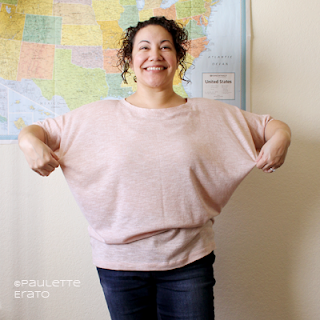 Note that this pattern doesn’t mark the bust, so I basically guessed where it might be. The pattern piece is very strange in that it creates a LOT of fabric under the arm by having the front and back pieces cut with the sleeve up in the air, as if you’re waving your arm. That being said, I’m glad I did a full bust adjustment, though given the amount of ease I likely didn’t need it. Even thought the finished measurements for the size I chose is only 44″, my fabric grew to accommodate a whole ‘nother set of tatas.
In order to make the most of the fabric I had leftover (I’d only started with 2 yards), I had to cut the neck binding on a bit of a bias. Not a true bias, but definitely not on the crossgrain as the pattern suggests. I’m not sure if this added to the stretch factor around the neck but it stands up ever so slightly at the left shoulder. Next time I will interface the neckline to keep it from stretching. I stay stitched it but that still wasn’t sufficient. Maybe I need to use a smaller stitch?
The cuffs started off a tad too tight. I left the cuffs from View A off since I didn’t think I’d have the fabric and frankly don’t need any more long sleeve shirts (winter has yet to arrive in Southern California). After a day of wear, though, they are perfectly comfortable in this fabric. If I were to make this again, I would add a generous half-inch to a full inch of width to the sleeve hem just to be safe.
I didn’t take any length off to accommodate my short height, and this allowed me to make a full inch hem, which I think looks nicer than a 5/8″ hem as the pattern called for. Why didn’t I shorten the pattern? After the two other alterations, I plain forgot! Then again, after the debacle with the Drop Top, it’s probably for the best. The shirt is a comfortable tunic length, and lightweight enough to be worn all year long with the appropriate layers if it ever gets cold here.
This pattern is super easy to make and took me less than a day, even with my alterations. My biggest challenge was the fabric since it’s thin and liked to roll in on itself (I used a lot of starch!). If I were to make this again, I would opt for a thicker knit. Maybe even a sweater knit, if it ever gets cold!
Pattern Recap:
Pattern: Simplicity 8089 View B
Size: Medium (14-16)
Modifications: 1″ FBA, 5/8″ high round back adjustment (which created a center back seam)
Notes for next time: add 1/2″-1″ of width to sleeves, interface neckline if using a very drapey fabric prone to stretching, possibly size down further


