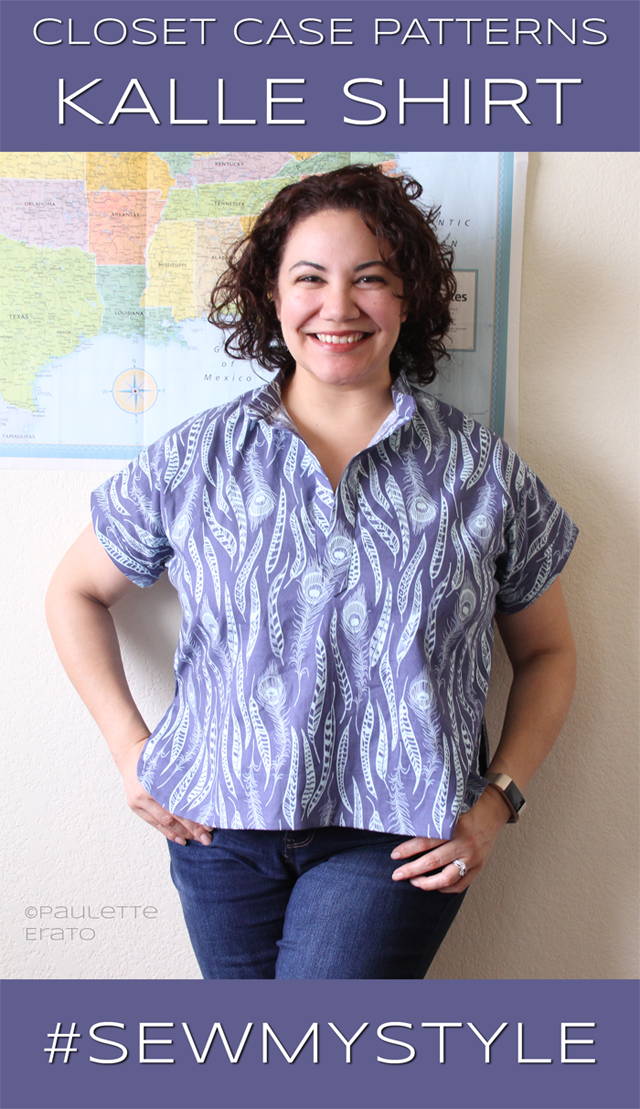
Hello from Cali, in my Kalle Shirt!
I have been unsure about the Kalle since it came out. It looks cute on so many people but I didn’t think it would suit my body type. Since it was the #sewmystyle pattern for the month, I decided to take a chance on it despite my misgivings.
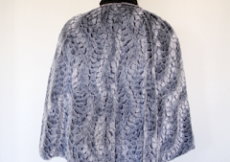
I had a plethora of quilting cotton gifted to me by a member of my local American Sewing Guild chapter, and since Maddie made hers out of quilting cotton, I figured I could at least use some of mine as a muslin. I had exactly 2 yards of this Anna Marie Horner Fine Feathered print in the denim colorway. We already know I really dislike blue, so what better way to use up a stash fabric than as a muslin?
The fabric was just enough to make the Kalle with an additional 3” long front. There really is only about a 6” square left along with the selvage. How’s that for efficiency? I guess I’ll save it for a future small project.
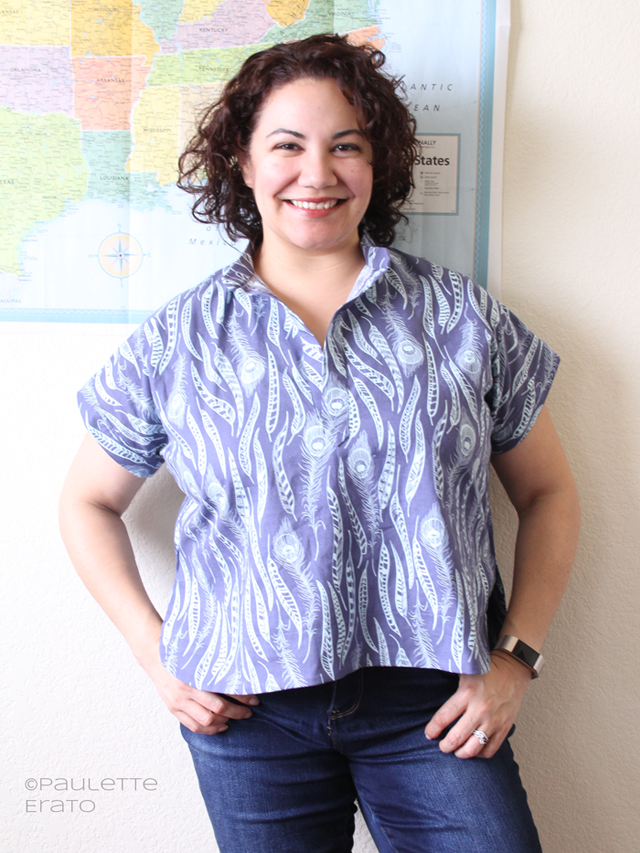
Because of the length of my fabric, I had to go with the cropped version, View A. There wasn’t enough for the collar and I didn’t want to make buttonholes anyway, so I opted for the popover placket sans buttons.
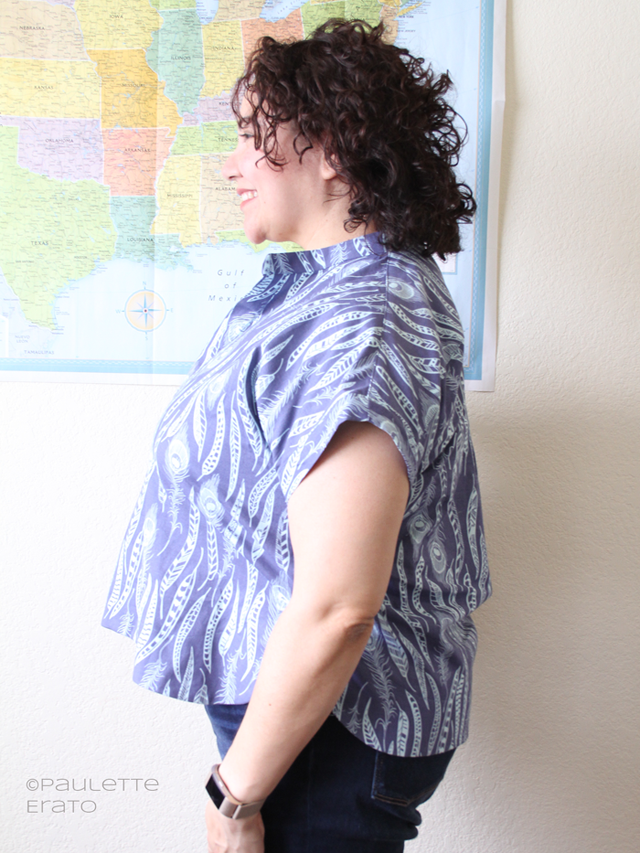
Let me be frank: while the Kalle looks really cute in this fabric and would probably look smashing on someone else, this is NOT a top for me. As soon as I realized that 3” weren’t going to be enough length to make this comfortable to wear out of the house, I got the sadz.
In fact if I were to make another Kalle, I would definitely opt for the tunic length. Where I probably have to SUBTRACT 3” of length!
Even though this was going to be a muslin anyway because of the variety of alterations I made (more on that in a sec), I was still hoping it would be wearable. I even topstitched all over! And ran out of thread!
People, I HAND STITCHED!!
View this post on Instagram
The alterations were:
- 5/8” no-dart full bust adjustment following the adjustment from the sew along (this added 1.125” of length by itself)
- 2” of additional length added to the front (3.125″ added total)
- shortened the popover placket by 2”, since I didn’t want to add buttons so I figured I only needed it low enough to allow my head through
Changing the length of the front required a redraft of the front facing and then the dots did not line up. This was easy enough to figure out once everything was pinned together, and I simply cut a bit off the top of the back facing side seam off to better match the front.
I could have saved myself time by just bias binding the hem which is actually a look I really like for just about everything. Bias binding (especially in a contrasting pattern) is my favorite way to finish necklines, and now, hems. But you know what they say about hindsight.
I find the collar very tight. I don’t think I have a larger than average neck for the size I chose, but I definitely should have cut the neckline back a little bit to give myself some breathing room. I do really feel like I’m choking in this. I intended to wear it with the placket splayed out but it actually doesn’t want to sit that way and that’s probably due to the weight of the fabric. Had I actually added the collar piece, it probably would have been fine but I didn’t have enough fabric for that.
Also I really hate dealing with collars. They’re just so fiddly and I never get them exactly right.
I mean, I’ve only made them twice but they were still annoying. This time, though, I almost got the collar band perfectly lined up with the placket so I guess third time’s a charm!
This also needed either a forward shoulder adjustment or a high round back adjustment, neither of which I have done on a shirt with a collar or yoke. When I wore it for filming yesterday, I kept having to pull the shirt down in the front because it would roll to the back, exposing even more of my midriff.
Overall this was mostly a fail for me, as much as I wish it wasn’t. It’s a really well-drafted pattern, with lots of illustrations and straightforward instructions. I always appreciate when a designer releases a sewalong with their patterns. The part about the cuffs wasn’t super clear to me in the instructions but the sew along post was invaluable. And I also learned a new way to do a no-dart FBA!
If I were to make this again, which I doubt but you never know, I’d use either a lighter and floatier fabric OR the same weight and attempt a full collar.
This is the second #sewmystyle pattern I make this year and it’s my second strike out. I won’t be making next month’s Marigold Jumpsuit & Trousers which looks darling on Rosa the model, but I know that style will not look good on me. I am really looking forward to some of the upcoming patterns though, especially the yet-unannounced Deer and Doe release in May.
But yay for trying new things! I’m including this in the #BreakingGround2018 challenge, which is also the theme for Sew Alongs & Sewing Contests on Facebook, since it was a new-to-me pattern company AND in a color I do not normally wear. It’s also the first time I’ve ever flat felled seams (did this on the sides). Plus I serged the exposed end of the facing, which is something else I’ve never done but was so quick, easy, and professional looking on the inside!
The color of the feathers can also count as aquamarine, so it also falls into my Signature Color of the Month scheme. I have also submitted it to the 52 Week Sewing Challenge and 2018 ~ 100 Items Sewing Challenge!
Pattern Recap:
Pattern: Closet Case Patterns Kalle Shirt & Shirtdress
Size: 14
Fabric: blue & aqua quilting cotton
Modifications: 5/8″ no-dart FBA, added 3.125″ of length, shortened placket 2″
Notes for next time: bring shoulder seam forward, cut neck larger for comfort


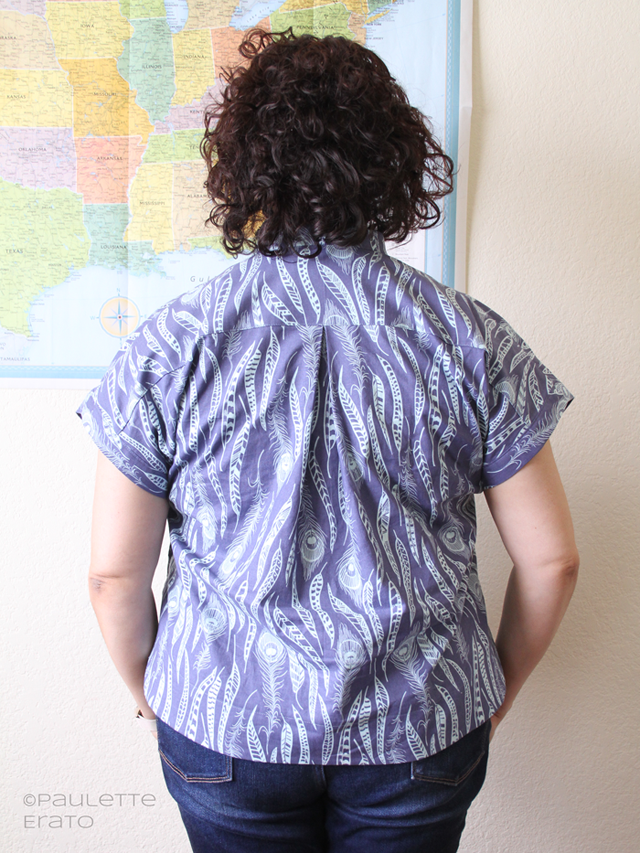
I always try to look at it as practice on my skills. I practiced topstitching, hand stitching, working with quilting cotton, managing mistakes (I accidentally only cut one yoke and had to make the inner yoke out of two pieces), and just plain patience. That’s not wasted time.
Worth following your instincts. A shame to put all the work in on something that doesn't suit you.
Hey there! Thanks for the honest post. I have had a similar problem with the back of yoked butten downs. I actually solved it simply by adding an inch across the back, about the height of the yoke. You can take away a tad in the front to compensate. My shirts hang great now! So not an angled round back adjustment but a straight inch across
Hey Stabh. Which piece did you add an inch to, the yoke or the shirt itself? Is this more like a broad back adjustment?