The path to having a fur cape started back in October when I became a tad bit obsessed with a faux rabbit fur I happened upon at a distant Joann’s.
It was on sale, and oh-so-soft! But I simply couldn’t justify the purchase without a concrete plan for it. What does one make with fur to wear in Los Angeles where it’s currently in the 80s this winter?
I finally asked the lovely sewists at the Curvy Sewing Collective Community what they would do with it, and the winning idea was a GOT-inspired cape. I had no plans for a cape, like ever. But things change.
My local store never seemed to have the fur in stock, though they had faux bear and other tough animals. None of them were even close to as soft as my beloved rabbit, so I kept searching. Finally the after-Christmas sales started and there was my fabric, discounted AND available at the original store. I ordered online and waited for the email telling me my rabbit was ready.
And waited. And then waited some more.
I ordered the fabric on a Tuesday. I didn’t get to pick it up until Saturday. Finally the rabbit came home, all three yards of it because of nap and having extra fabric never hurts. Then I set about learning how to work with fur.
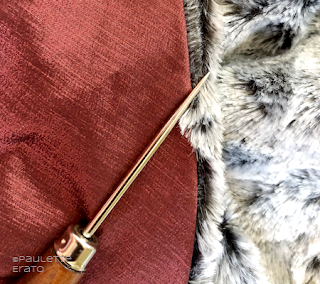
This stuff takes patience! You can only cut one layer at a time, and only through the backing fabric (not the actual fur). Then when you sew it, you have to pull it out of the seams! Awls are great for this.
I already knew this was going to be made into New Look 6475. I originally wanted to do pullover version of View D, but the January Sew Along Challenge was for a coat, cape, or cardigan with a front opening, so I opted for View B. (They’ve since changed the rules, but it was too late for this one.) This meant fiddling with front closures, the pattern pieces for which I didn’t like, so I had to figure that part out, too.
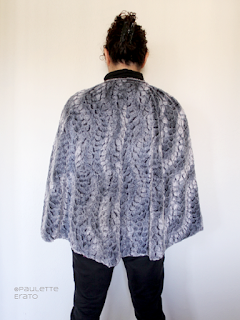
Now onto the pattern itself. I made a muslin out of the size medium in a scratchy wool plaid (great practice in pattern matching), and noticed the neck was a bit tight. So instead of cutting the back in two pieces, I simply flipped the pattern piece to create one single mirror image and left in the 5/8″ seam allowance for a slightly larger neck. That meant one less seam to sew in the fur, and only TWO seams total. Win!
And that’s when I learned that seams in short hair fur are a bit more obvious. Turns out the shorter the hair, the more difficult it is to hide the seams. You must also cut and sew with the nap. Cutting went slowly, but sewing was extremely fast (TWO seams!). I did use Sonja from Ginger Makes‘ advice to simply sew slowly and leaving the pins in to keep things from slipping. I only bent one needle doing this! But once I combed and pulled all the little hairs out of the seams, I could still see the line of demarcation at the shoulders. I honestly do not know how to fix this, so it is what it is.
Then came time to figure out lining. I had no idea what to use for lining, but then I came across Peter Lappin’s post of his fur coat and fell in love with the idea of a red brocade.
View this post on Instagram
Once a month my mom and I spend an afternoon in the DTLA Fashion District and this time it was to find the lining. As soon as I laid eyes on this iridescent red stretch taffeta, I knew it was it. Mom called it vampire cape lining. AND it satisfied my garnet #sigcotm plan!
Yes, I know my experience thus far with taffeta has sucked. That was not the case here (thankfully). The deep red drew me in and I was in love. I also toyed with the idea of adding an interior pocket, even researched welt pockets, but then couldn’t figure out exactly where to put it and the whole thing became a headache so I decided against it.
I didn’t like the way the machine-stitched understitching looked, so I only did it around the neckline. The rest of this cape lining is understitched by hand, which allowed me to watch two episodes of Shark Tank and one of Queen of the South (still catching up on that show, which I love). That’s how long it all took.
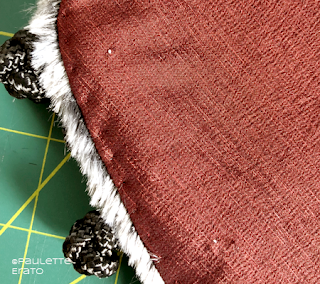
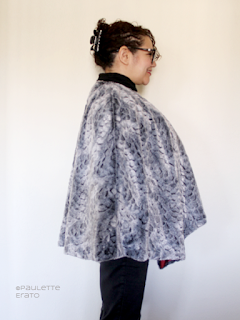
Also somewhere along the way, the lining and fur didn’t match up at the bottom. This sucks because I was super precise with the cutting process. I think it’s actually due to how I pinned them together: flat instead of hanging down, which would have alleviated this mess. Right now the front points curl in a bit where the lining is a tad short. I tried fixing it and hand sewing it back on, to no avail. I could put it on a hanger, I suppose. But I just wanted this done. (Note to self: buy a dressform.)
I did teach myself a new trick though. I’m sure this is old hat to experienced sewists, but I thought I made it up. I never trust my marking implements because the marks all fade before I can get to them, especially final steps like buttons. So instead of using markers or chalk, or even tailors tacks, I made one little prick stitch where all the closures needed to go. I then interfaced over the back of them for stability. The lining is red so I used a light pink thread so I would be able to easily find it but it wouldn’t be too obvious to the casual observer.
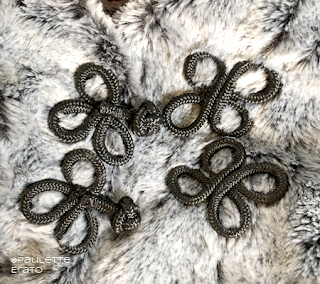
The pattern calls for sewing the closures through all thicknesses but I didn’t want the thread to show up on the lining. So the interior snap closure on the right side is on the lining only, the corresponding snap on the left is on the fur only, and the frogs are only on the fur. That was fun, since I had already attached the lining and closed it up about 90% of the way, but luckily I had prickstitched the fur in red, so the marks were easy to find on it. Hand stitching frogs, on the other hand, a bit more challenging. I basically rough tacked them in with the intention of more thoroughly sewing them on later…but my hands are still tired from that exercise and they seem to stay on just fine so I’ve closed the lining up and called it a day.
If you look really closely, you can see my hand basting down the center of the frog loops.
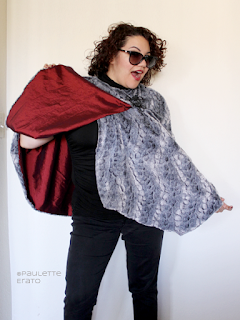
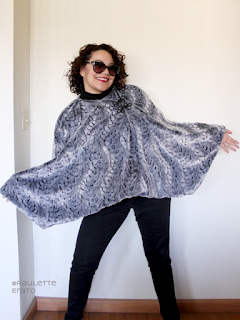
The cape itself is beautiful, even if I have no place to wear it. I’m sure some day I’ll find myself riding a dragon or fighting White Walkers, and then I’ll be super glad I know how to fight with my bare hands AND look fabulous in this cape. In the meantime, since it’s now my “fancy” cape, it will be my go-to garment for the sophisticated version of capers—hijinks! Matched with large sunglasses, a black turtleneck à la Archer, and I’m ready for some proper hijinks!
Pattern Recap:
Pattern: New Look 6475 View B
Size: Size Medium
Modifications: removed center back seam but left 5/8″ seam allowance for more neck room
Notes for next time: join lining while it’s hanging, not flat




Love your faux fur cape. I like your blog post about The making of this.