
The Sabrina Slims were recently re-released by Love Notions in an expanded size range. To see how it looks on a variety of bodies, a group of bloggers is experimenting with the fit.
Welcome to the Fitting Experiment!
We also have a giveaway! Scroll down for details.
*Housekeeping: please note that I received this pattern for free but all opinions are my own. Some links on this page are affiliate links. This means that I get a tiny commission from purchases you make using them, but it does NOT cost you anything extra. Also, as an Amazon Associate I earn from qualifying purchases.*
Pattern Description & Cost
The Sabrina Slims are Love Notions’ take on the cigarette pants popularized by Audrey Hepburn in the 1950s. I am a huge fan of this style! Most of the pants I bought before I gave up RTW were cigarette pants. I was planning to make my first pair this year when the pattern suddenly popped up on my radar thanks to my blogger friends!
From Love Notions’ site:
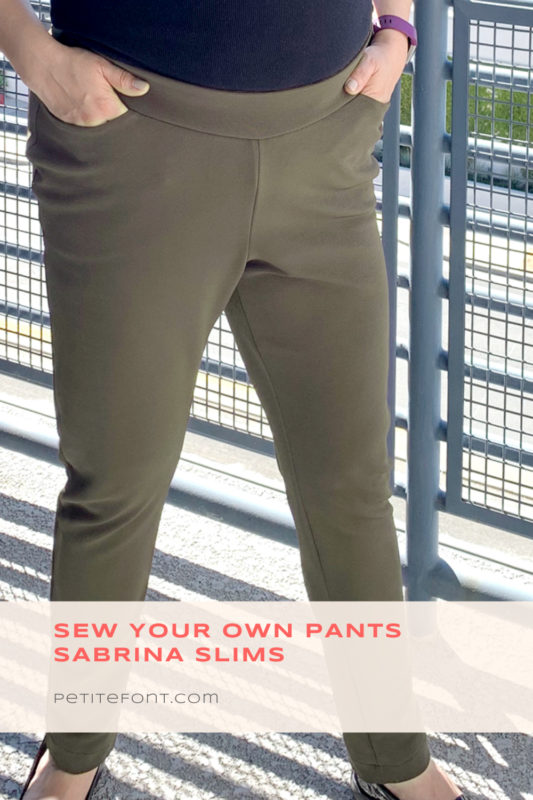
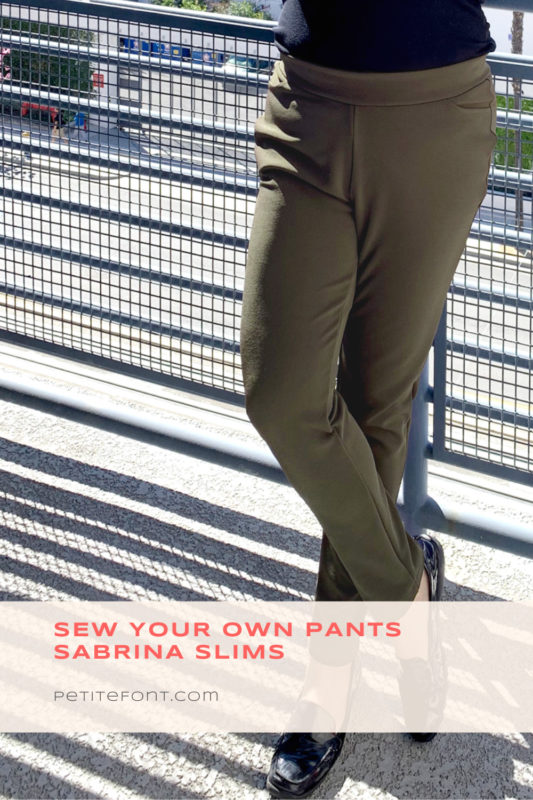
The Love Notions take on this classic style features a wide, contoured waistband that sits at the natural waist. This is a slim-fit pant with negative ease. The Sabrina Slims are meant to hit at the ankle. Also included are optional welt pockets, back patch pockets, split hem, zipper hem and center front and back seaming. Three inseam lengths are included. Make the pants maternity by adding the overbelly waistband. These pants are meant for stretch wovens and stable knits.
The pattern runs $12 but also includes a nifty and comprehensive 19-page fitting guide. Unlike a few other guides that exist, this one is specific to the Sabrinas. But you can use it for just about any pants (not just knit ones).
I was originally drawn to the View B version with seams down the front and back. I think there’s something really sexy about them. But since this is my wearable muslin, I kept it simple.
Sabrina Slims Size Chart
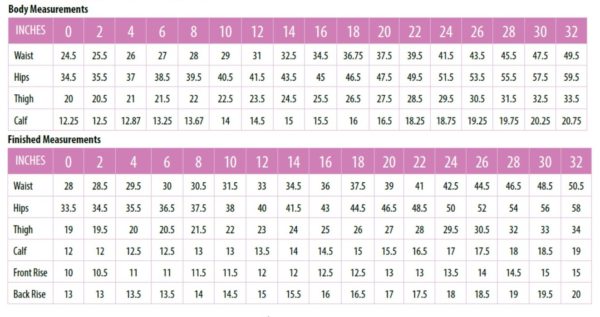
The size chart encompasses sizes 0-32, which for hip measurements is 34.5″ to 59.5″ (87.6 – 151 cm). Because the Sabrina Slims have negative ease through the legs, the finished measurements are slightly smaller. Think of them like leggings with pockets!
Don’t want pants that tight? You can easily blend between sizes or add a little more to each leg. You’ll notice my version are NOT skin tight…at least not at first!
I made a size 20.
Fabric
The recommended fabric is a stable knit or stretch woven with 20% stretch. Think fabric like double knits (which is what I used). Some others include:
Stable medium to heavyweight knits such as ponte, scuba, French terry, interlock and cotton/lycra. Medium weight wovens with at least 20% stretch such as sateen, corduroy, twill, jacquard and denim. For the maternity waistband use a cotton/lycra knit.
It’s also recommended that if you’re making back welt pockets, to use a lightweight woven fabric. This will keep your butt from having unsightly bumps where those pockets lie.
PDF Criteria
Here is how the PDF stacks up:
A projector file is also included with this pattern. What’s that? Check out this blog post about the latest “craze.”
More Love Notions patterns with projector files.
Pattern Instructions & Tips
The instructions and pattern file is 82 pages long. The first 20 pages are instructions, followed by some inspo and technical troubleshooting, then the pattern pieces start on page 26. There are guides for both A4 and US Letter printing.
The instructions themselves are really clear, though there are some steps illustrated with pictures instead of line drawings. This is not my favorite, as backgrounds can be distracting. But overall they’re fine. There are also clear directions for printing only specific pages for each view. No wasting paper and ink!
Pro tip: if you think you’ll have to make a lot of adjustments, do yourself a favor and make a muslin. You can even print out View B if you want, just tape both leg pieces together overlapping the seams to create one front and one back. This will save you if you have to adjust the waist or pockets, especially!
Another tip: the seam allowances are all 3/8″ (1 cm). I highly suggest using 1″ (2.5 cm) seams, which requires adding 5/8″ (1.5 cm) to everything. It’s worth it though, especially if you have to let anything out!
Pattern Notions
The notion all views need is a 2″ wide knit elastic. This will be inserted through an opening in the back seam of the waistband after it is attached.
If you’re going to add side zippers or welt pockets, you’ll also want some stretch fusible interfacing. And 2 non-separating zippers 4″-6″ (10-15 cm) each for the ankle zips.
Pattern Adjustments
This felt like it took forever.
Pants fitting is part art and part alchemy, and always really personal, too. There’s something called “overfitting” which I don’t really understand other than to say I reached a point where I was over the fitting process. I fixed the crotch as best I could and said F it about looseness in the legs.
Then I took the first round of pictures and realized the legs did not look good. Especially around the crotch. So I took in 1/4″ (6 mm) along each seam, giving me 1″ (2.5 cm) less room in both legs. This basically amounted to a size 18. Clearly I should have started there.
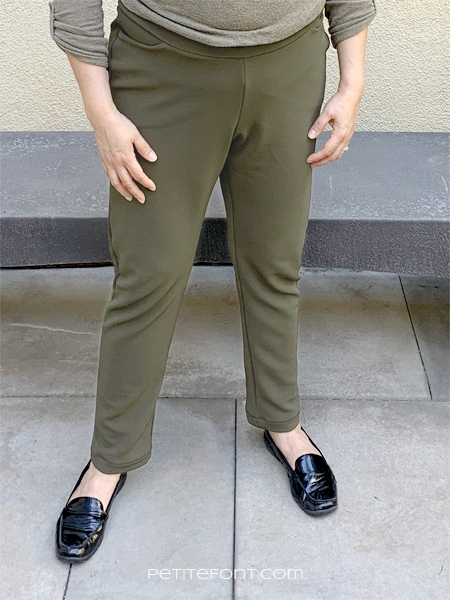
Original in size 20 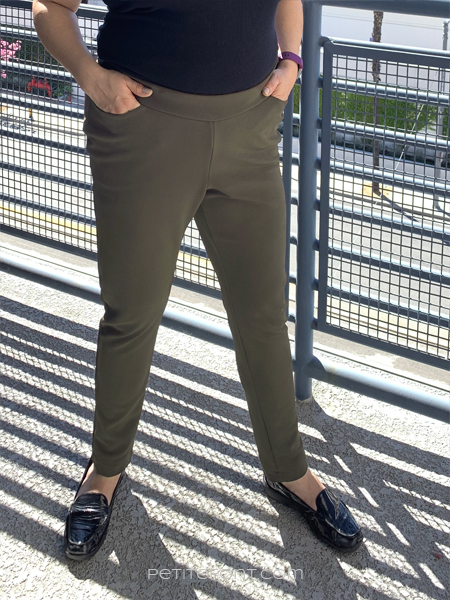
After trimming the side seams
I have a short pelvis so I always need to take an inch or two out of the rise in pants. This can be really tricky. But between the fitting help in the included workbook and my copy of Pants for Real People, I thought I figured most of it out.
Still looks like I have some bagginess in the front crotch though. Ugh.

At least I like how my rear end looks in them!
Tissue fitting a knit pattern with negative ease is nearly impossible, so that’s why having extra margins on the seams are helpful. Better to cut too big than too small!
Ultimately I made the following adjustments:
- lowered my front rise below the maternity line for my size
- scooped 7/8″ (2.22 cm) from the back rise
- removed 1″ (2.5 cm) from the back for a swayback adjustment
- took 5/8″ (1.5 cm) out at each side seam right about at the pockets. That’s a total of 2.5″ (6.4 cm) removed at the hips.
- slimmed the legs down another 1/4″ (6 mm) below the pockets
And that’s where I stopped. It isn’t perfect. There’s still some wrinkling in the side seams along the hips. I think I need to remove even more length there.
But then two sayings come to mind: perfection is the enemy of good. And done is better than perfect.
Pattern Difficulty Rating: 3/5
Due solely to the difficulty that fitting pants can be, I’d rate this an intermediate pattern. A looser fit pull-on pant such as New Look 6399 is far easier for beginners or anyone who shies away from pants patterns.
Final Thoughts
I’m glad my blogger friends convinced me to try this pattern. I’m also glad I took the time to attempt all the necessary adjustments. This took a few extra days but it was worth it. I’m pretty confident I could make the sexier View B now and have them fit even better.
In fact next time I think I’ll definitely add the side slits at the ankle. Plus, once all the fitting is done, these sew up rather quickly, especially on a serger (which is not at all a requirement).
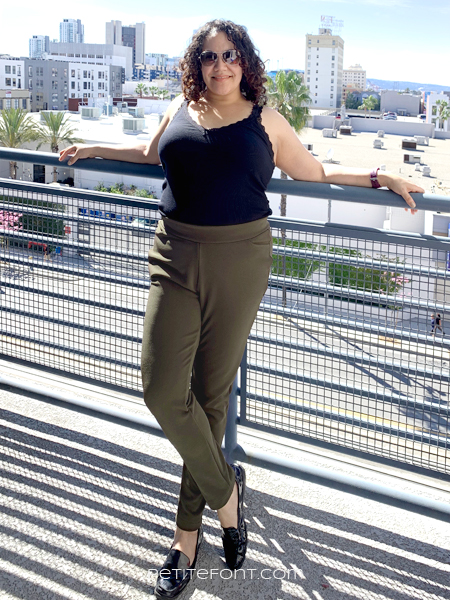
Fitting Experiment Giveaway
A special thank you to Love Notions for sponsoring The Fitting Experiment bloggers with patterns so that we can share our thoughts with you. Love Notions has kindly provided a 20% off shop discount code for all our readers. Please use this code at checkout: FittingEXPSabrinas
In addition, Love Notions has given us TWO copies of Sabrina Slims to giveaway. For a chance to win, comment below. For more chances to win, comment on the other blogs too! You can check out their posts below:
- bigflynotions
- Diskordia’s Curvy Sewing
- SequoiaLynn Sews
- Petite Font (you are here!)
- Liviality
- Jong Design
- Jot Designs
- Stitched by Jennie
All comments for entry must be made by 11:59 pm EST on Friday, March 13th.
Pin & share for later!


[…] Petite Font […]
[…] Petite Font […]
Great blog post, i like your extra seam allowance tip, I’m going to adopt that idea for definite.
It can be quite the lifesaver!
Good post including positive and negatives given your fit test 😊
Thank you! I like keeping it real. It’s not all roses and sausages when you’re making something new.
I haven’t had a want or need to sew pants. But now I kinda want to.
We’re such naughty influences, aren’t we?
Such a thorough review thankyou! They look like my ideal pant
I hope you make them and they DO become your ideal pant!
I always have that problem with the front crotch! And I have a flat behind so need to address that too! But these look good and seem like a great “secret pyjamas” pattern when you want to be comfortable but more stylish than you would be in leggings or joggers!
Oh, it’s so good to know I’m not the only one with the front crotch issue! Helps to feel not so alone in all these adjustments. I think it’s a flat pubis adjustment that it needs…will post when I make that adjustment in my next pair!
Thank you. I’d love to see your next pair in view B. I ultimately want to recreate an inspiration photo I have using view B, but I need to nail down the fit of view A first.
I think I have to reprint the front so I can redo a lot of the adjustments…which just puts me off. I hate reprinting! But I really do want to make View B, so stay tuned!
I am a beginner sewer and this post us great. It helps to see the process of finding the best fit for your own body shape. I always thought that sewing a garment was quick and easy but there’s a lot of work that goes into creating beautiful things.
We were all beginners once! But yes, once you start refining fit, the process becomes a little longer. The nice thing is that once you know how to fit for your body, the refinements go a little quicker each time!
Loving the comparisons between the different sewists!
Thanks! I’m enjoying it too!
Thank you for this. Pants are a bit of a daunting project!
They can be. But the fit guide is a really great source for helping get them right!
I love the pockets.
Aren’t pockets the best???
Really appreciate the advice about increasing seam allowance to accommodate fitting adjustments.
I got that from either a pattern early on or a fit guide, and it’s invaluable!!
I like it in this plain fabric! I think the slits would be really nice to add!
Thank you! Also zippers to get my 80s girl vibe on!
Very detailed post, thank you for this! It makes it so much easier to decide whether the pattern is right for me 🙂
I hope it is right for you!
Oooh, I would love that much fitting guidance! I’m so frustrated with pants that don’t fit! Thank you for sharing, they look great!
It can be really frustrating. It takes a lot of time to get it right. But when you do, it’s like magic!
Lovely job! Thanks for all the extra work posting about your experience!
Thank you! Are you going to make a pair too?
Thanks for your honest review. I haven’t seen pants in awhile.
You’re welcome. I hope you make a pair soon!
Great post…
I personally think my bee-hind would look fine in those slims!!
Of course they would! I think everyone’s does 🙂
These look like something I could wear to work. Stylish and comfortable.
I agree, they’re perfect for a business casual environment!
These pants look fabulous on you.
Thank you, that’s so sweet of you!
Wow this are fab on you and never made pants before though 🙈
Before this, I had only made a pair for myself (the New Look ones I linked) and one for my dad. My recommendation is to start with shorts! I’ve made plenty of those and they’re a lot less intimidating.
I love how dedicated you are to getting a good fit! Your changes are such an improvement and I totally agree, your rear looks amazing! ❤️
Thanks, Jennie! I think ALL of our backsides look pretty good in these!
I’ve been looking at this pattern for weeks and I am admittedly scared of doing pants but everyone’s look so good
I think it’s a great pattern for all bodies! Don’t be scared, just go for it knowing you’re going to have to make some tweaks here and there!
Love the color and all the great insight on the pattern can’t wait to make a pair
Thanks, what color will you choose?
love your pants and your honest review and experience in fitting!!! it is easy to overlook the process, it can be a longer road than anticipated, but your pants turned out great and your website is very cool! thanks for sharing
Thank you for stopping by!
Thank you for your tip about adding extra seam allowance to your muslin, to allow for letting out if necessary – such a good idea & definitely one I’ll implement in my next attempt at sewing up a pair of pants… my first attempt at a pants pattern definitely did not go well, but I feel like this tip will really be helpful going forward…
You’re welcome! I hope it makes it easier for you.
I am really enjoying the fitting experiment! Great tip on the extra seam allowance. I have a brown scuba I’m eying up for this pattern, would be great to win it x
Scuba sounds like it might be a fun fabric. Just make sure you have 20% stretch in it!
Pants look great on you! Thanks for the write up.
Thank you for stopping by!
Nice looking pants, I like the idea of slits at the ankles!
There are so many ways to make this pattern your own, including those slits!
This was really helpful! I’m hoping to start these pants for the fall! Thank you!