Learning to sew is fun and all, but learning to fit garments is a whole different animal! I’ve mentioned a high round back adjustment in my post about my typical adjustments, but what exactly is one? And what do knits have to do with it?
What is a Round Back Adjustment?
You hear a lot about full bust adjustments, but what the heck is a round back adjustment? It’s just another way of fitting a curved upper back. There are also two types of RBAs: the high round back adjustment (HRBA) and the low round back adjustment (LRBA).
The HRBA is a little more common because the amount of length needed to add can usually be done in just one slash line.
Back adjustments address the fit issues that crop up from our new sedentary, hunched-over-a-computer-screen posture. If your upper back is beginning to round, you might experience gaping at the back neck. Worse, you might also experience your front neckline riding up and feel a bit choked.
I drew a haphazard picture of myself to illustrate both of these issues:
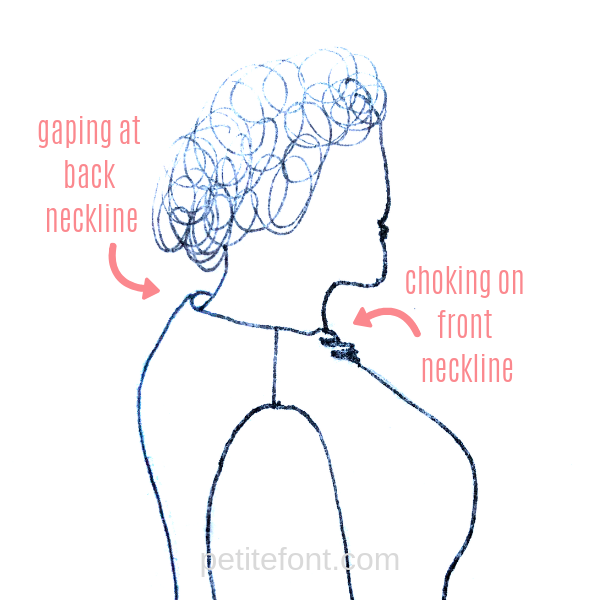
My line drawing is having a good hair day!
If you are experiencing either of these issues, the HRBA can fix it!
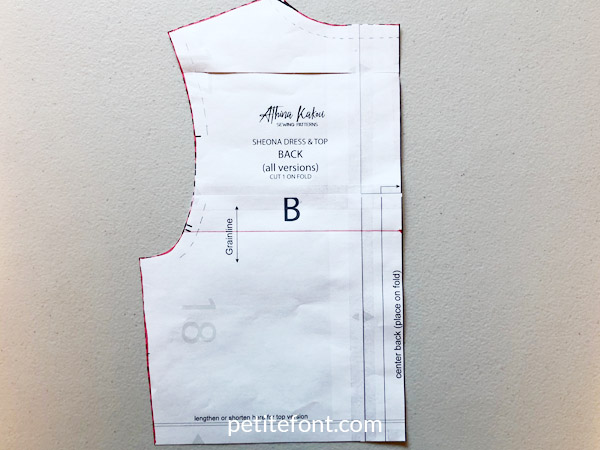
Because we are sewing knit tees for #sewmystyle2019 this month, I’m going to show you 2 HRBA methods and 1 LRBA for this using each of our featured patterns: the Athina Kakou Sheona and the Deer & Doe Givre (full disclosure: I received these patterns for free as a member of the #sewmystyle2019 leadership team).
There are several different ways to approach HRBAs. Some can produce a dart, which we usually want to avoid in knits (since the fabric naturally stretches and molds around curves). These are dartless slash-and-spread methods!
All of these methods put a slash line (or 2) across the back of the bodice. The older Fit for Real People method suggested starting 1″ (2.5 cm) down from the seam line. The newer version, The Palmer/Pletsch Complete Guide to Fitting, suggests making the slash at the seam line instead. Either method works. I’ll illustrate one in each method but you could interchange them.
What do you need to do an RBA?
Materials required:
- pattern
- extra paper
- ruler
- tape
- pencil
- a buddy to help measure
How to Determine How Big an HRBA is Needed
It’s helpful if you have a buddy for this! You’ll need them to measure your round area and the same distance if you were straight up and down. These two delightful ladies show you how!
If you don’t have a helper, you measure your own back from the spot where a necklace lays around your neck down to your waist. Measure the pattern you’re using the same way. It will be shorter because it’s probably a straight and not curved line. The difference between the pattern length and your back length is how much you need to add to your pattern at center back.
I always need about 5/8″ (1.5 cm). In case you can’t get an accurate measurement from either of the above, Palmer & Pletsch recommend this amount as a starting point.
If you need more, you can add it in 2 or more segments along your back. This is then called a low round back adjustment!
Because 5/8″ is my go-to adjustment, that’s what I’ll use in these examples. Use your own measurements when doing this to your patterns.
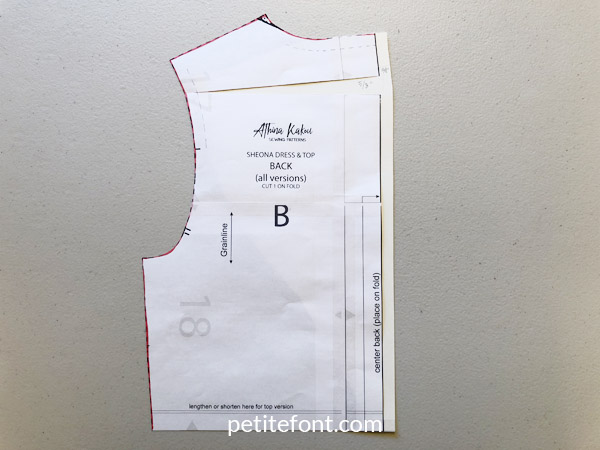
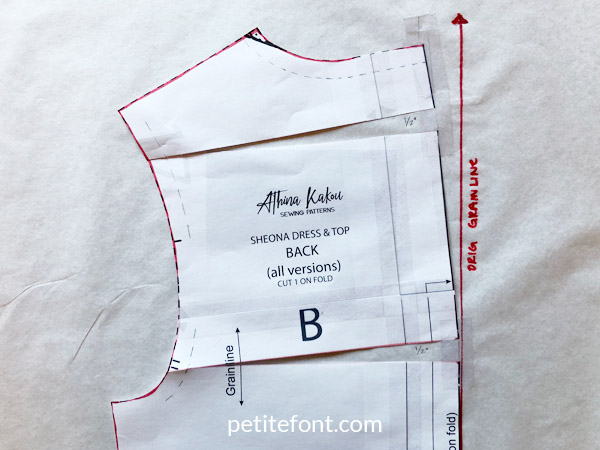
Note: I am only using the upper parts of each pattern, in order to save some printing paper. When doing this at home make sure to use the entire back pattern piece!
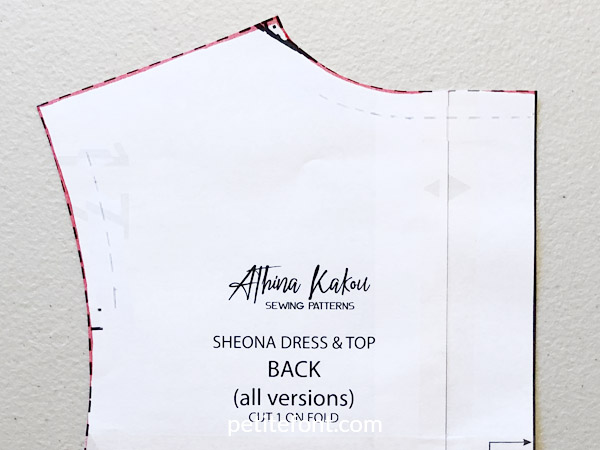
Method 1: How to Do a High Round Back Adjustment with a Center Seam
This method adds a center back seam, which can be helpful in determining front from back (especially if you don’t sew tags into your garments). Note that this does add a tiny bit of width to the neckline (approximately 1/8″ for this example).
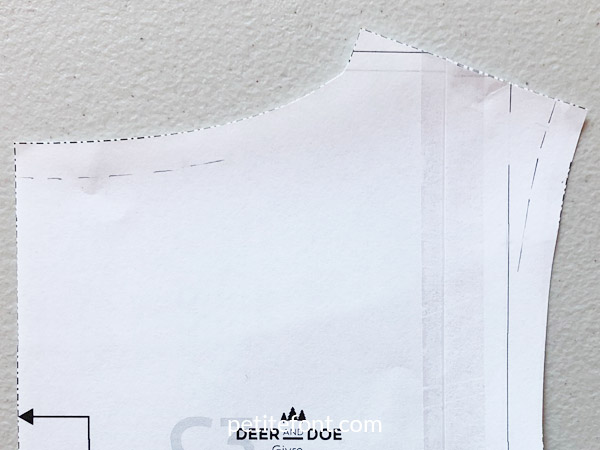
- Mark the seam allowance on the neckline at center back (CB) and along the armhole.
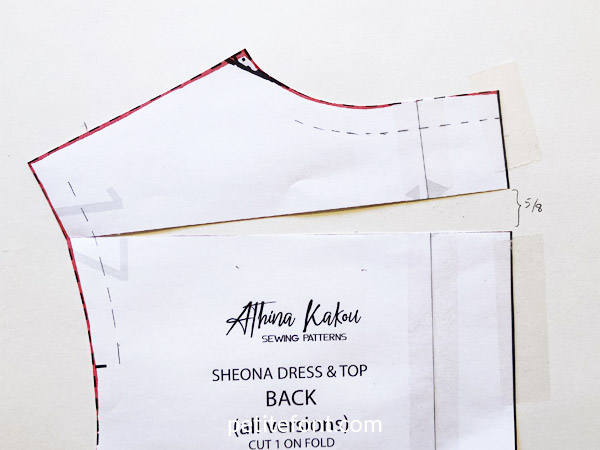
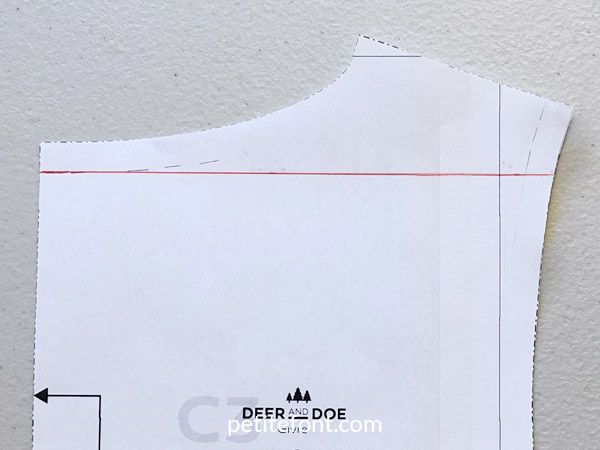
- Measure down 1″ (2.5 cm) from this mark and draw a straight line perpendicular to the CB fold/grainline from CB to the opposite armhole.

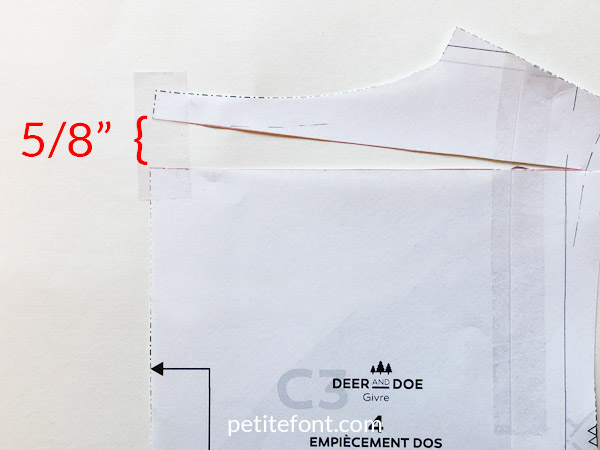
- Slash from CB to the seamline at the armhole. Cut into the seam allowance from the armhole just to the seamline, leaving a little hinge. Spread open until you have a wedge that equals 5/8″ at CB. Slip paper underneath to fill in the opening and tape your pattern piece down.
- In order to create a center seam, you will need to add a seam allowance to CB. Because the seam allowance for Sheona is 3/8″ (1 cm), this is what I added to the pattern.
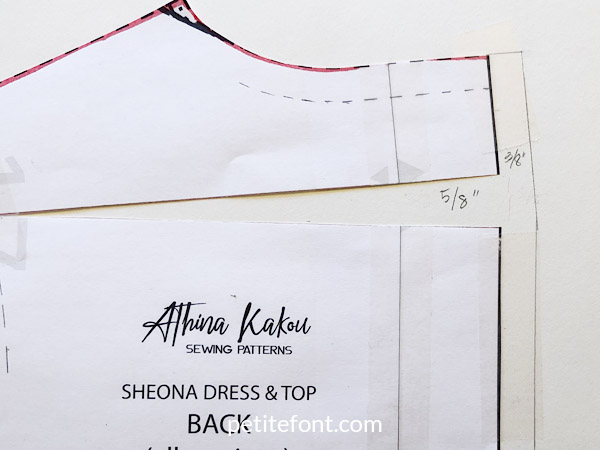
- Cut two mirrored back pattern pieces with your new pattern piece, and sew/serge them together to create one back bodice. Continue to follow the instructions as written.
Method 2: How to Do a High Round Back Adjustment WITHOUT a Center Seam
What if you don’t want a center back seam? Maybe you’re using a fabric with a special print or stretch lace and don’t want to interrupt it with a seam. No worries!
This method does not add width to the neckline.
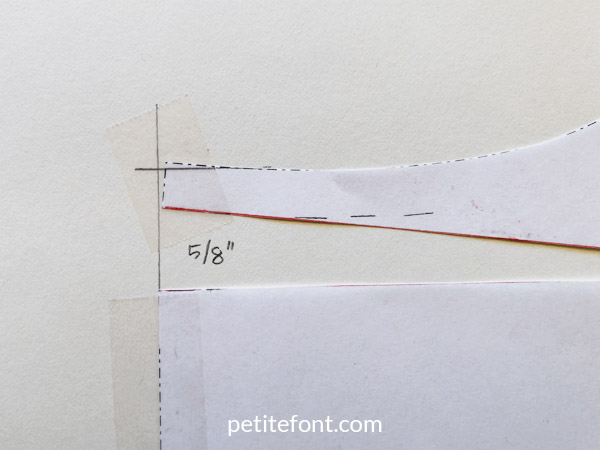
- Mark the seam allowance on the neckline at center back (CB) and along the armhole.
- At the CB seam allowance, draw a straight line perpendicular to the CB fold/grainline from CB to the opposite armhole.
- Slash from CB to the seamline at the armhole. Cut into the seam allowance from the armhole just to the seamline, leaving a little hinge. Spread open until you have a wedge that equals 5/8″ at CB. Slip paper underneath to fill in the opening and tape your pattern piece down.
- Extend the CB line and straighten out the neckline so both lines meet at a 90-degree angle. This is called “truing” the seams.
- Cut off the excess paper.
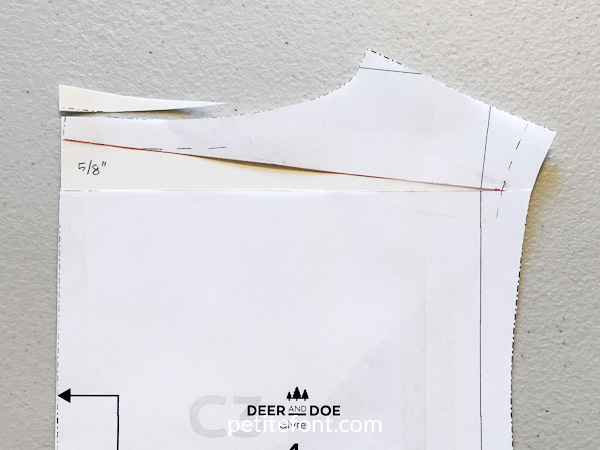
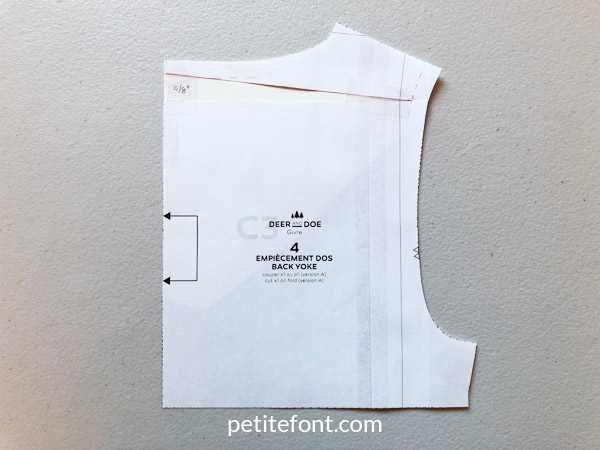
This is your new pattern piece. Continue to follow the instructions as written.
Method 3: How to Do a Low Round Back Adjustment
What happens if you need more than 5/8″ at center back? You can do this in 2 slashes instead of just 1! Because the second slash line is a little lower, it gets the name low round back adjustment.
- Instead of drawing a single slash line at the neckline seam line (or an inch/2.5 cm down), you will need to add a second one across the shoulder blades. If you’re having trouble determining where that might be, you can use the back armhole notch as a guide.
- Divide the total distance needed over both slash lines. In this example, I’m adding a full inch (2.5 cm) of length to the center back. Spread 1/2″ at each slash line. (Note: Palmer & Pletsch recommend a max spread of 5/8″ at the high round slash line and the remainder at the low round/shoulder blade line.)
- You’ll notice the center back is no longer perpendicular to the grainline now. Add a center back seam as detailed in Method 1 to preserve the fit changes, and add a new grainline parallel to the original grainline.

As an added bonus, adjusting for a round back also rotates the shoulder seams forward slightly. This is why, if you have forward shoulders, adjusting for a round back will usually fix the problem! So do the HRBA or LRBA first before adjusting shoulders.
If you still have questions about back adjustments, leave them in the comments below. Have you had to do either a high or low round back adjustment before? How did it work out?
Pin for later!


Re: the HRBA without a CB seam. It looks like you are adding 5/8” to the CB length, but then cutting off 3/8” of what you added to level the neckline. So you end up with about 1/4” increase in length at the CB and have mostly changed the orientation of the back shoulder/front shoulder seam. Do I understand this correctly, and does changing the shoulder seam help or just cause another problem down the line?
Hey Maria. Look closely at the picture under #4. The excess (that is cut off in step #5) is actually only a smidge of paper, maybe 1/16″. It looks like more in step #5 only because I had a lot of excess paper. Sorry that isn’t clear. So you do add a full 5/8″ to the center back seam. This does move the shoulder seam forward slightly, as well as lowering the front neckline. If you have the Palmer/Pletsch Guide to Fitting, you’ll see a very good illustration of this in a box at the bottom of page 143. They… Read more »
This is a great illustration! Great tips! Thank you for this insightful adjustment!
[…] Three ways to do round back adjustments on knits from Petite Font […]
Thanks a lot for these tips. I have been looking for clear explanations since a long time and now it’s done 😊. But do you need to modify the front of your pattern when you make a RBA ? Because it seems i have too much fabrics in front of my pattern between neckline and armhole 😔. Thanks a lot !!!
Hi Valerie, glad you found this useful. The extra fabric in the front may indicated that you need a petite front bodice adjustment, which takes out some of the extra in the front. My good friend Whitney of TomKat Stitchery on YouTube has a video about it! Here you go: https://youtu.be/IxQVU5V-pD0