To draft a keyhole neckline all you need is a little imagination.
I had an extra yard of the gorgeous Figo Sangria rayon is used for my Misty Cami. But I didn’t want to make yet another camisole, so I got creative.
The Confident Stitch is offering a 10% discount on the entire line of Figo rayons in their catalog. Use SANGRIA10 at checkout. The discount is good through June 21, 2020.
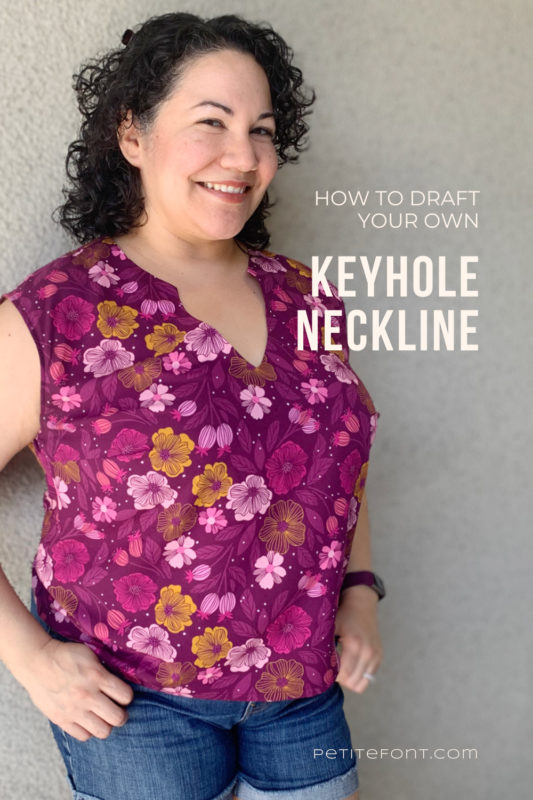
This particular garment is actually a frankenhack of two patterns. I added the keyhole neck from the Chalk & Notch Fringe to the Laela Jeyne Cosette blouse (then made cap sleeves, but that’s a different blog post).
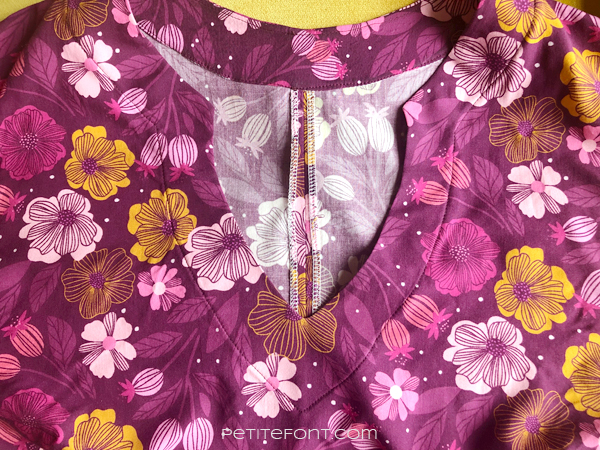
Note that the neck on the Fringe is an open notched version of a keyhole. For more variations, here’s a list of 10.
What if you don’t have an existing keyhole neck in your pattern collection? Drafting your own is easy!
How to Draft a Keyhole Neckline
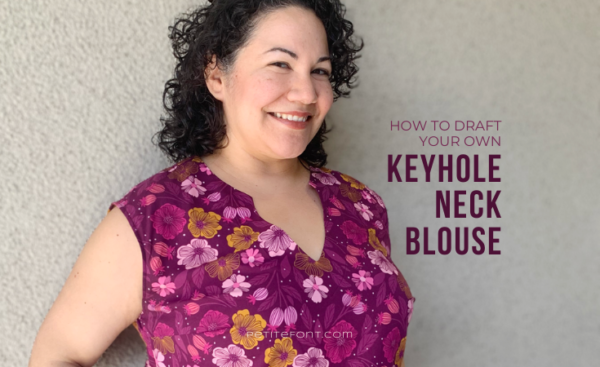
Start with how low you want your neckline to drop. The Cosette neckline is pretty high, so I dropped it down 4.75″ (12 cm). This is the bottom of the keyhole.
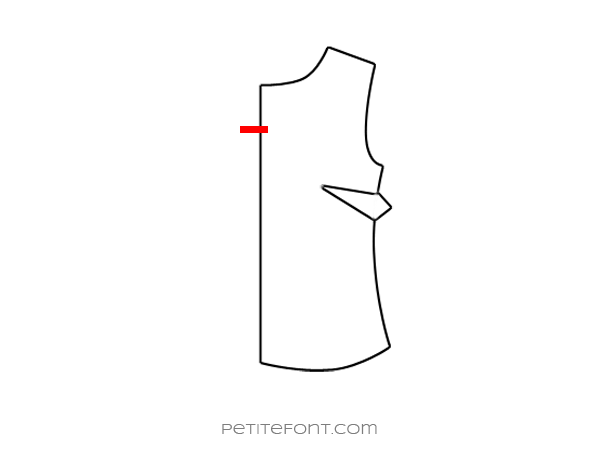
Then decide on the most visually pleasing shape to your keyhole. I imitated the Fringe version, which doesn’t connect back up at the top. Blend this back up to your existing shoulder line.

Now you have to draft facings. I use medical tracing paper for this as it’s easy to see through.
A facing is typically 2” (5 cm) wide around, inclusive of seam allowance—which for both of these patterns was 3/8” (1 cm) so I kept it the same for the facing.
Draw the outside shape of your neckline for both front and back bodice. Then copy the curves again about 2” (5cm) away. At the bottom of the keyhole they may extend a little further just to be a bit more visually pleasing. Mine ended at about 2.75” (7 cm).
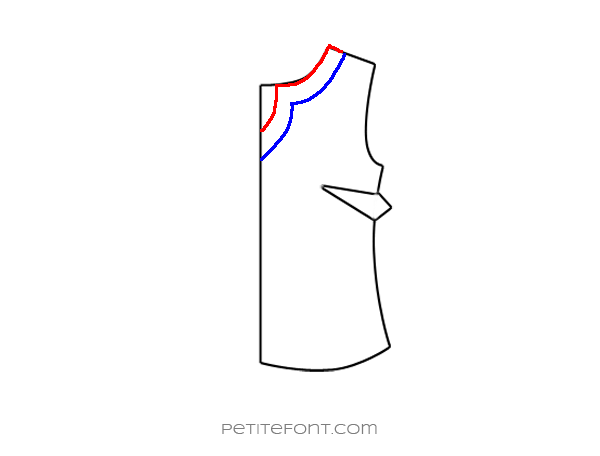
Do the same for your back neckline.

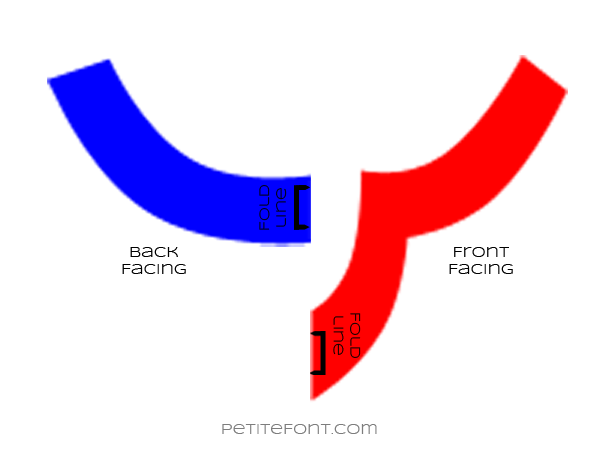
When you’re done, you should have a new facing piece for both the front and back. Make sure the back and front facings are trued at the shoulder seams. Label your fold lines and seams. (Trued means they match at the seam lines.)
Now it’s time to cut fabric! And interfacing!
Always interface your facings. For the Figo rayon, I used Pellon SK 135 light tricot interfacing. (Hat tip to Gabriela of Chalk & Notch who says that’s the only kind she ever uses.) I also only used it on the facings, not the blouse itself. You can interface both or simply staystitch the blouse neckline.
Once all your pieces are cut, interface your facings immediately! I prefer block fusing with a lightweight fabric like this. Also finishing the edge and folding it over 1/4” (X cm) makes a perfect finish. The edge will be sewn down.
For how to attach the facing to the neckline, this is a great tutorial from Made to Sew:
One thing this tutorial doesn’t mention is the corners of this specific keyhole neckline. In order to get nice pointy corners on your neckline, you’ll need to shave down the seam line to get all the extra bulk out of the way.
Here’s another video for how to do that!
As I mentioned above, I sewed the facing down. You don’t have to do this, you can simply secure it at the shoulder seams and such. But I like the added subtle topstitching detail.
Sew the rest of the blouse as normal and you’re done!

Pin these to save this for later:


Hi ! Thank you so much, this is such a helpful article !
I’m glad you enjoyed it, Sarah. Thanks for stopping by!