
How do you make a flannel shirt fail?
It’s been unseasonably cold again in Los Angeles, so making a flannel shirt in early May made perfect sense. Failing at making a flannel shirt sucked really hard, though.
*Housekeeping: there are affiliate links in this post, and I received this pattern for free as a member of the #sewmystyle2019 leadership team.*
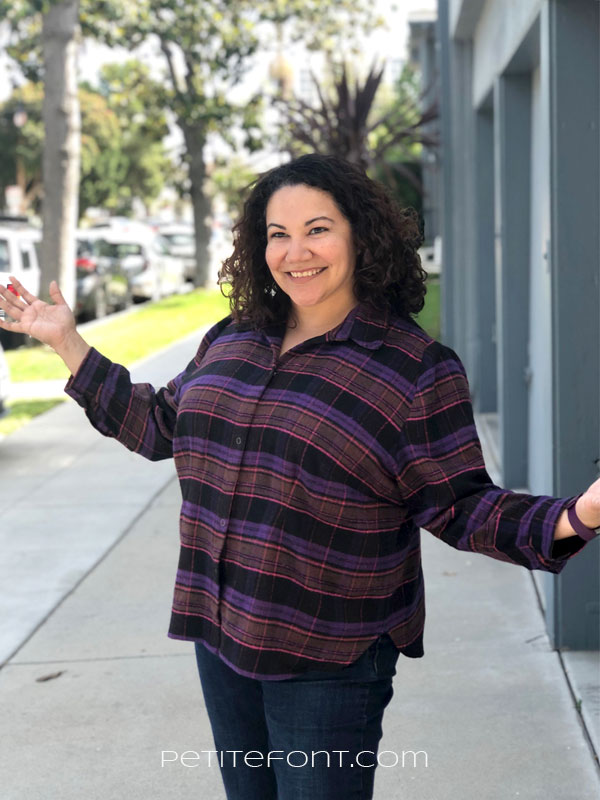
That’s my “I’m trying to smile but wtf” look.
Let’s start with the fabric, which I bought waaaaaaaaaay back in March! It’s cotton flannel. I have one existing flannel shirt that I bought at a thrift store for a Halloween costume (El Hubo and I were lumberjacks, but everyone thought we were a grunge band—which kind of led to this entire debacle). It’s too big because it’s a man’s shirt so the proportions are off and the buttons are on the opposite side, which is always a little weird.
So here I was holding this beautifully soft cotton flannel with visions of a well-fitting button-up shirt dancing in my head.
Side note: did you know a button down shirt refers to collars with buttons? If the shirt has a button placket but no button down collar, then it’s a button up. Now you know!
Anyway, I kept putting off the task of actually making the shirt because I didn’t want to match the plaid across seams. It seemed like a lot of work. Turns out it really wasn’t and I was just being a dummy.
Then I went through several of my patterns and even tried to make McCall’s 7251 but that has a dropped shoulder and that’s not what the 90s inspired flannel should look like! Finally, the button up shirt month came up for Project Sew My Style and the Designer Stitch Sedona Shirt fell in my lap.
Why did I choose the Sedona over the other pattern for the month, the Novelista? Because I didn’t want to deal with princess seams. Remember how hard it was for me to do that on El Hubo’s anniversary shirt last year? Yeah, not doing THAT again. I know I could have cut parts on the bias, but that’s not what I was after. The only bias cutting I planned was for the outer back yoke.
Also, Sedona comes with built-in cup sizing, which is a nice plus. I figured the fisheye darts in the front and back would be flattering and keep the silhouette from being too boxy.
I cut a size 9 with a DD cup. Designer Stitch sizing is based on 1-11, with 9 corresponding to a 48” bust.
The pattern is…interesting. I’ll get to that in a bit, first let me tell you about my adjustments because there was still a LOT for already having a built-in FBA:
- Shortened the waist 3” (not at the lengthen/shorten line, which is below the fisheye darts), of course, this shortened the length of the dart
- 5/8” high round back adjustment in the yoke
- Moved the bust point up 5/16” (I wanted that dart in the right place!)
- 3/4” narrow shoulder adjustment
- 2” off the sleeve length
Ann is the designer behind Designer Stitch and her bio shows off a wealth of knowledge for drafting and teaching sewing. Because of this she drafts “to industry standards.” To quote:
Designer Stitch Patterns use industrial construction methods to give you a professional finish so there will be steps where the seam allowance may vary.
That means some pieces (collar, stand, neckline, cuffs, and sleeve bottom) all had 1/4” seam allowances. I can’t work with that small a margin so I made them all 1/2”.
The armholes have 3/8” seams and I left those as is. However, I had a big problem with the armhole. I thought it came from the myriad of adjustments I listed above, but that’s not it. It’s drafted to be large. But it was comically so on me. I don’t care for it.

The red lines show where I’d prefer the armhole to end, instead of 2″ below that point.
So that was big issue numero uno. The rest were all caused by me:
- 2” was too much too take off the sleeves. I should have left them alone.
- I used a contrasting fabric on the inner yoke and I think it’s too heavy for this flannel. The shirt keeps falling back, as if I didn’t do a high round back adjustment, so I’m blaming the heaviness of the grey linen.

- After shortening, I probably should have ignored the front fish eye darts. They’re too short and actually too narrow. But when I tried widening them per my sewing group, I got this very weird boob enhancement that even my husband agreed looked…interesting.

- My sewing ladies also suggested making the back darts longer, but that interfered with my ax-throwing abilities, so I left them as is.
- When narrowing the shoulders, I didn’t alter the sleeve head. This left me with really poofy sleeves.
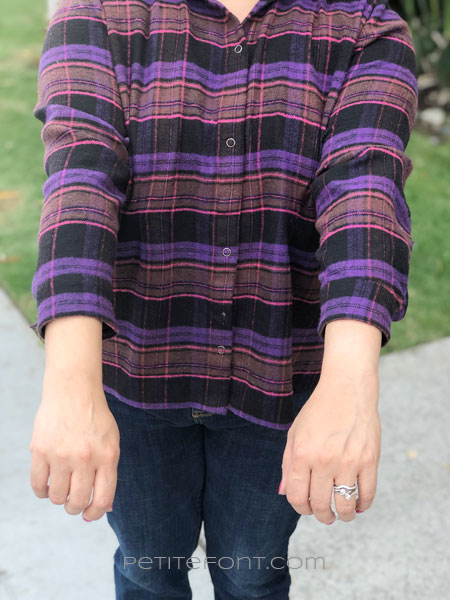
Two things I did do right were the back yoke and hacking the button placket. I couldn’t be bothered with either the concealed button placket (that’s just more work) or the separate placket hack on the website. Instead, I made the right placket the same as the left placket, which is a simple extension. I didn’t even bother topstitching because, again, that’s more work.
That yoke though:

Overall the shirt feels ugly, even if the pattern matching is near perfect. I like the snaps and the 90s vibe. But the low armhole is uncomfortable, as are the damn sleeves. This shirt looks nice on lots of other people, but it’s just not right for me.


Awww that’s a shame with all of your hard work. It’s lovely fabric makes me feel like I’m back in high school!!! Hahaha.