This post contains affiliate links. For more information, please see my Disclosure Policy.*

Fabric storage shouldn’t be controversial, right? It’s fabric for crying out loud!
But I like a little bit of harmless controversy. So let’s do this.
Pinterest is littered with beautiful rainbows of posts like these:
Well I contend that storing your fabric all pretty and visible like that is terrible and you shouldn’t do it.
Before you come after me with pitchforks, hear me out.
So what’s wrong with this method? After all, fabric stores have bolts on display out in the open!
Well for one, it leaves the fabric exposed to light and dust. Your fabric is going to fade, especially at the folds.
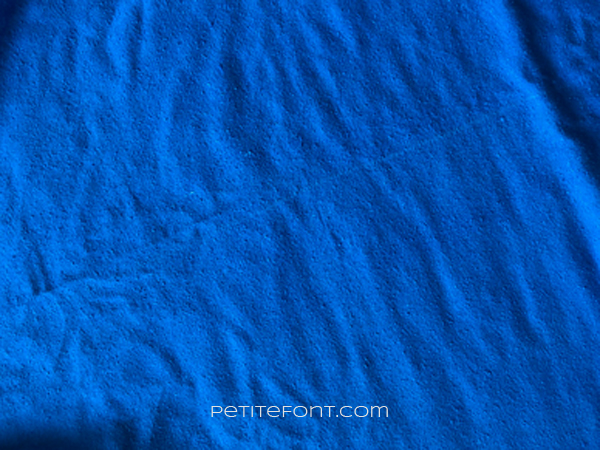
Don’t believe me? Behold this blue silk noil with a white fade line down the middle. Some poor soul left that fold exposed to sunlight long enough to bleach that line in. Is that what you want for your fabrics?

Not to mention the bugs, pets, or even children that can get into it your stash and ruin it—or at lease foul up your display.
What if I told you there’s a better way? One that is still orderly and nice, but actually protects your precious fabric?
See fabric stores can get away with it because they’re presumably turning stock over fast enough that they don’t have to worry about fading or even dust.
But you and I, who probably hoard fabric like it’s gold, we don’t do that. Do we?
If you do, then great. This post isn’t for you. You’re a better person than the rest of us fabric hoarders. But we also have meetings. And there are cookies. So it’s cool.
So what are the do’s and don’ts of fabric storage?
Let’s start with what you shouldn’t do.
Fabric Storage Don’ts
There’s a lot of things you shouldn’t do to your fabric. Most of them are common sense.
- Avoid exposing fabric to sunlight. This will fade your fabric, especially at the fold lines. Leaving it exposed to light also leaves it exposed to any bugs!
- Don’t expose fabric to smells or smoke. You don’t want your fabric stash to smell like…anything but fabric.
- Don’t let your pets get into your fabric (or projects)—especially if you gift fabric to people outside of your home or immediate family. You never know who might be allergic (or just is plain grossed out by pet hair).
- Don’t store fabric haphazardly or in a crumpled mess. That’s just asking for lots of ironing to be done and doesn’t everyone hate that?
Fabric Storage Do’s
(Don’t @ me about the way do’s is spelled. I know it’s wrong. It’s a weird English convention…I didn’t make it up!)
- Wash your fabrics before storing. This means you can use it right away when you take it out! (I also recommend serging the ends of fray-prone fabrics before washing.)
- Fold fabric to minimize wrinkling during storage. That means less ironing for future you!
- Lay fabric as flat as possible. This allows you to maximize your storage space.
- Keep similar fabrics together. Categorize as knits vs. wovens or lightweight vs bottom weight. This will help you find them in the future.
- Store in drawers or closed bins with cedar blocks. Closed drawers and bins will keep sunlight and odors from penetrating the fabric, while the cedar deter bugs like moths and spiders.
My Fabric Storage System
If you’ve been a subscriber to my blog, then you probably know about my fabric inventory system. You get this freebie when you sign up for my newsletter.
(If you’re already a subscriber and missed it, drop me a line!)

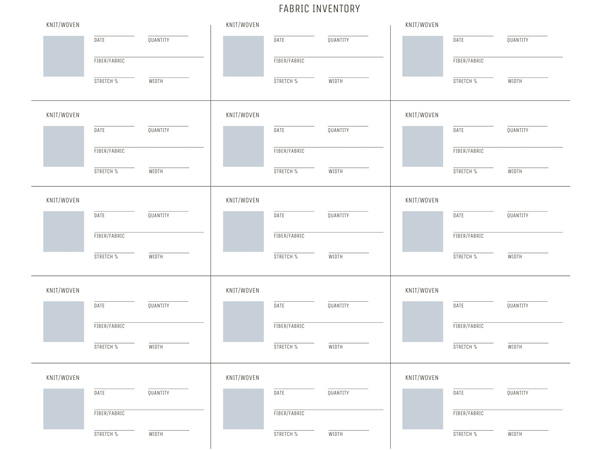
My fabric inventory sheet is super simple and I can add up to 15 different fabrics on each. I only use the data that I’m most concerned with. I don’t worry about where I bought it, though stuff from Fabric.com, The Confident Stitch, and Minerva tends to get used quickly and doesn’t ever really make it into “the stash.”
If I put more than 15 fabrics in a bin, I merely start a new sheet and fold away the unused portion.
In each section I catalog:
- if it’s a knit or woven fabric
- the date I acquired it
- how much yardage I have on hand (always written in pencil and updated per project)
- a short description of the fiber content or fabric type
- any stretch, both horizontally and vertically
- how wide the fabric is
- a square for attaching a small swatch
The fabric swatch is the single most important part of this whole system. I’m a visual person, so when I put this in my bins, I need a very quick way to determine which fabrics are where. I cut a tiny 1″ square from my fabric before it goes into the bin, then staple it onto my sheet.
I use clear bins with locking handles. Yes, clear ones will let in some light. This is okay if you’re storing them in a dark place without direct sunlight. But if you are lucky enough to have a brightly lit storage space, definitely go for opaque bins!
I like these heavy duty 66 quart Sterilite bins with locking purple handles.
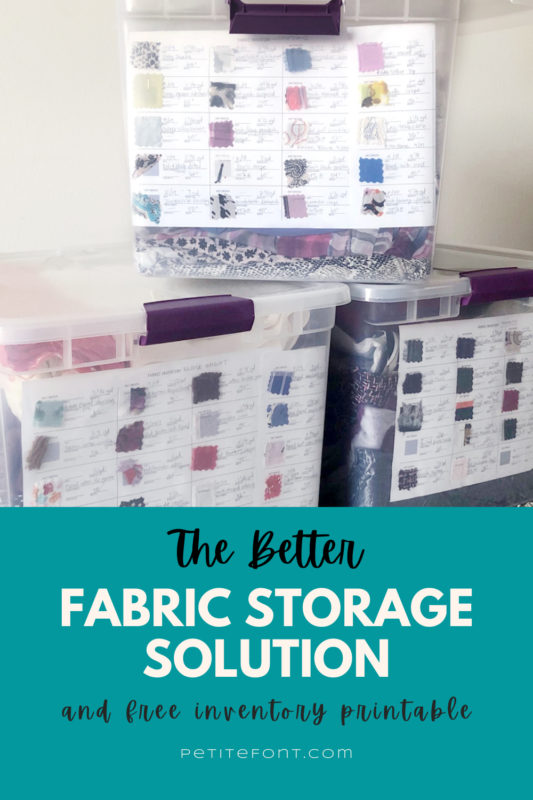
They’re clear so I can see what’s in them (and put my inventory sheet inside too), lock to keep bugs and odors out, and look really nice all stacked away in my studio.
The dimensions are (L x W X H): 23.625″ x 13.25″ x 16.375″ (60 x 33.7 x 41.6 cm). I paid about $8 apiece.
I’m also a big fan of these cedar blocks. These repel bugs!
If you’ve ever been disappointed by moth chewing holes in your fabric (or clothes!), these cedar balls and discs are a life saver.
I use 3-4 per bin. I also put the disks on hangers in my closets. Gotta protect the already used fabric too, right?
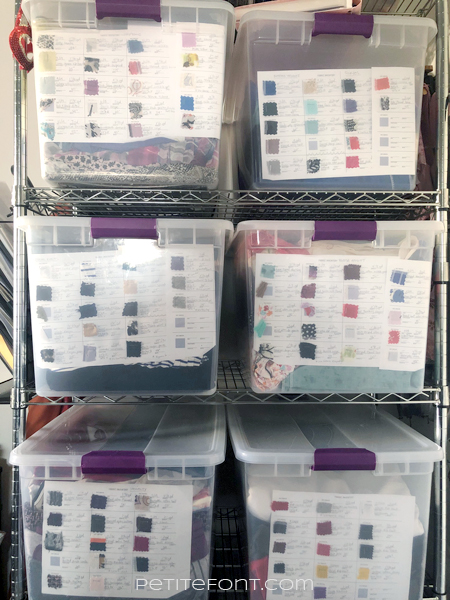
Two of the fabric- and cedar-laden bins fit side by side on this metal rack.

My stash has grown comically large, especially for someone who hasn’t sewn in 2 entire months. There are 8 bins in this rack, plus another 2 in another corner.
This system works great. I have all of my fabrics separated by type (knits and wovens), then by weight (lightweight like silk, apparel or medium weight, and then bottom weight). So all of my silky fabrics are together, and all of my pants fabrics have their own tubs.
Keeping all the quilting cotton in one bin made it easy to only take out the necessary fabric for making masks.
And that’s the point. When a sewing pattern calls for a specific type of fabric, I don’t have to rifle endlessly through a mishmash of unlike fabrics. Instead I can concentrate on one or two bins and shop my stash so much easier!
This storage method works especially well for me because my studio is connected to the kitchen. Which means that those lovely cooking odors waft right on over and can take residence up in my stash. Ick!
I also like to use scented candles in my space. The bins also protect the fabric from the smoke and scents, too.
Of course there are plenty of options for safe fabric storage. Anything that keeps the dust, fading, and bugs out of it AND allows you to enjoy your stash is what you should use. It’s the best way to store fabric, period, but especially long-term.
I even keep a smaller bin or two for scrap fabric. I like these 16 quart ones for that, and also for my collection of interfacing. I even use these smaller bins for WIPs (works in progress)! I can stash the pattern in there with the fabric until I’m ready to finish it.
Still have questions? Here are some common ones about fabric storage:
What is the best way to store fabric?
Away from sunlight, washed, folded, and in a container or drawer with cedar chips.
How do you store fabric in a sewing room?
If you have space to stack plastic bins, then use this method: stack it in locking plastic bins or large tubs away from sunlight. You can also use a chest of drawers or an armoire. Don’t forget to add cedar to keep bugs away!
Can you store fabric in plastic containers?
Yes, of course. This is a perfect solution for keeping pests and dust out of your fabric, and protecting the fabric from fading.
How do you store fabric long term?
First make sure your fabric is clean and dry. Use storage bins that have a tight closing lid. And add cedar blocks inside your storage receptacle to repel pests.
How do you store scrap fabric?
Store scraps like you would store my regular fabric, in plastic bins. I keep them separated by fabric weight and type (knit or woven). That way I know which box to grab from when a scrap busting project presents itself!
How do you store your stash?


Very thorough – thanks!
There are new bins/tubs available with gaskets that further protect your precious stash from bugs, moisture & other ick. I’ve started investing in those as I need new tubs. The other life saver for me is sticking with one brand, one or two basic sizes so they stack & nest well.
That’s a great tip!
I absolutely LOVE those bins! I had to store a lot of fabric in a storage area, and they were all flawless when I was able to retrieve them. I’m embarrassed (not really) to say that I have accumulated 21 for fabric, and 3 of the smaller ones for my “special” patterns. Whew. My daughter tells me that I need to have sewn up all of my stash before my demise, because she does not want to go through them!
The same reason I store my fabric similarly to yours, though mine is on shelves in a closet. I do like the sheets you use. But I cut two larger squares of each fabric so that I can use one in my mood boards for my seasonal wardrobes and still know where the fabric is stored. Every time I see a stash stored out in the open I wonder how much gets damaged. Maybe if they sew in a basement, but I sew in a large loft with a wall of windows and a skylight and two more in the… Read more »
Oh Nancy how I wish I had a closet to hide the stash behind!! I used to but my new space is devoid of storage. We make do. I love that yours is filled with light!