This post contains affiliate links. For more information, please see my Disclosure Policy.*

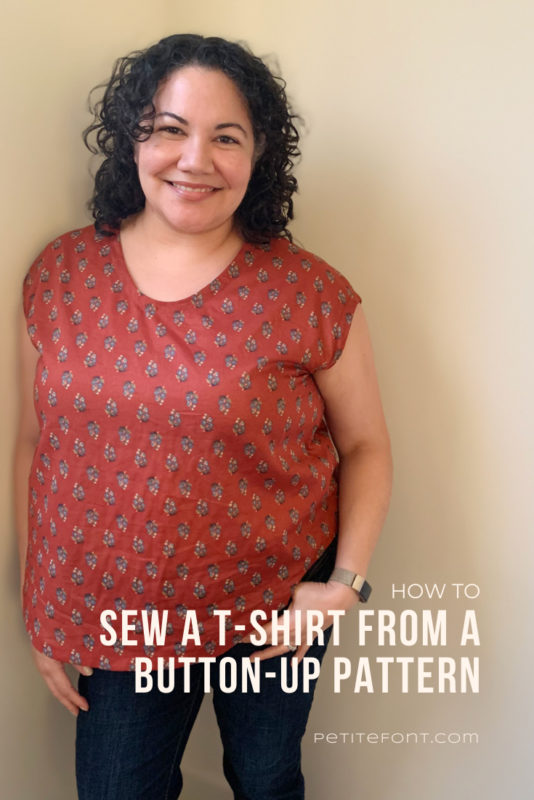
I learned I could sew a woven t-shirt from a button-up pattern when I thought I’d screwed up a recent project. Turns out this is a pretty useful hack for a lazy sewist like me!
I was working on the Melody Dolman pattern which is a woven button-up shirt. It’s a pretty simple shirt because the sleeves are part of the bodice, which I love. Fewer seams to sew makes for a faster project!
Sleeves attached to a bodice are the definition of a dolman shirt. This is also sometimes referred to as a “cut on” or “grown on” sleeve.
Dolman tops can also be called batwing tops, when the armhole is exaggeratedly low and narrows along the arm towards the wrist. You can see an example of this in my Simplicity 8089 Flashdance sweater.
But you can sew a woven t-shirt from just about any button-up pattern that isn’t too fitted. The keys to doing this are:
- getting rid of the button band on the front
- extending center front a little bit for more ease
- lowering the neckline
- cutting front and back on the fold to get your t-shirt
How to Sew a Woven T-shirt from a Button-Up Pattern
I’m using the Melody Dolman pattern for the example here, but as mentioned above you can do this with just about any button-up pattern. The Melody is a loose fit camp shirt without any darts.
To sew a woven t-shirt, you’ll only need the front and back pattern pieces. And because of the nature of collared shirts, you’ll likely have to enlarge the neckline so it fits over your head (or add a closure, if you want).
The Melody Dolman has a cut-on or attached facing to the front pattern piece. Cut this off at about the center front line denoted by the red line (where the buttons and buttonholes would have gone).
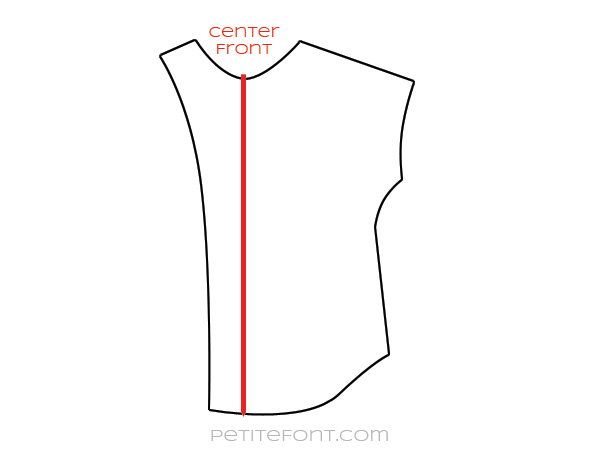
If you want to have a teeny bit more ease in the front of the shirt, cut the facing off just outside the center front line. This will give you a bit more roominess in the front. I kept about 1/2″ extra ease in the front, denoted by the blue line.

What do you do if your button-up pattern doesn’t have an attached facing, or if the button band is a separate piece? You’ll want to extend the center front of your bodice the same way I did above. Add as much as you need to center front, at least to where the buttons/buttonholes would have gone originally, and then maybe a smidge more.
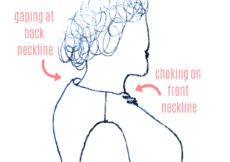
Like I mentioned, the neckline has to change. A button-up shirt can have a small neckline because it doesn’t need to go over your head. It literally just wraps around your body. But this t-shirt will be pulled over your head, so you need room to accommodate for that.
I did the exact same neckline change to this as the one I did for my Lou Box top. I even pulled out that pattern to trace the neckline. I love it when I can reuse an existing hack!
You can see this as the green line.

Now you can cut both the back and front on the fold. After you cut out your two pieces, staystitch the necklines! I know it’s tempting to skip this step, but it really does help keep your necklines from stretching out. Even this lazy sewist staystitches!
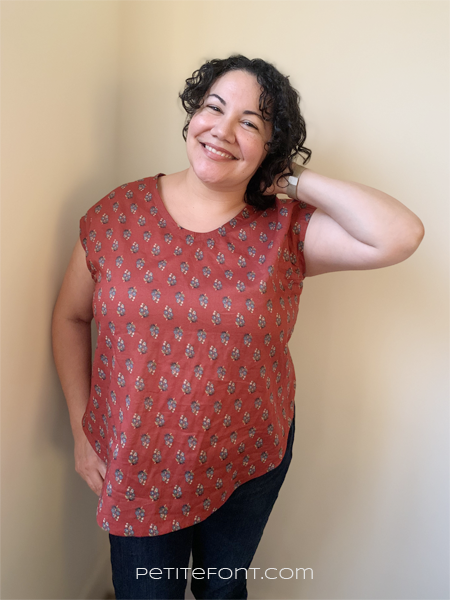
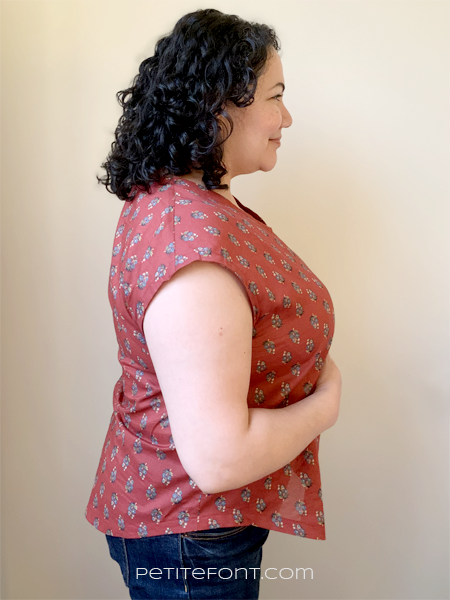
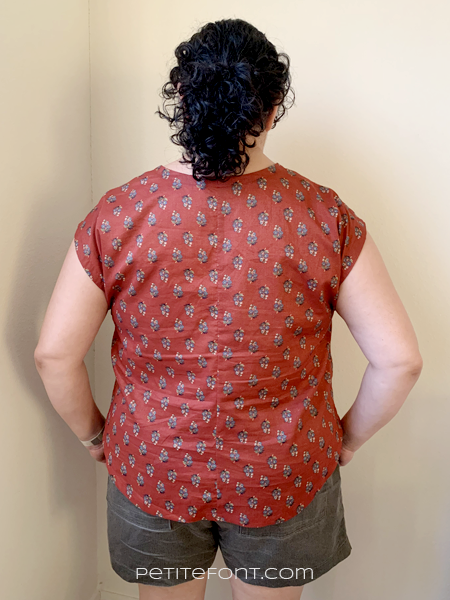
After staystitching, sew the shirt how you normally would: shoulder seams then side seams (and sleeves if you have them). For this project I finished my neckline, armholes, and hem with single fold bias binding. You can simply finish yours however your pattern calls for it.
And that’s it!! That’s how you sew a woven t-shirt from a button-up pattern. Pretty easy, huh?
Which button-up pattern will you turn into a woven t-shirt? I might have another camp shirt in mind for this!
Share and pin for later!


I was reading another one of your posts and saw this one and it’s such a great idea. I also like the photos of you wearing your creation. Thank you for taking the time to post these.