
First, can we talk about the confusing pattern numbering systems sometimes employed by these companies? There’s one pattern number on the package, depending on where it is sold, and then another on the actual pattern itself, which is the one that corresponds to the company’s website.

This isn’t limited to just one company either. I’ve found this in both McCall’s and New Look patterns. It’s frustrating and annoying. WHY IS THIS DONE?!!!
/rant
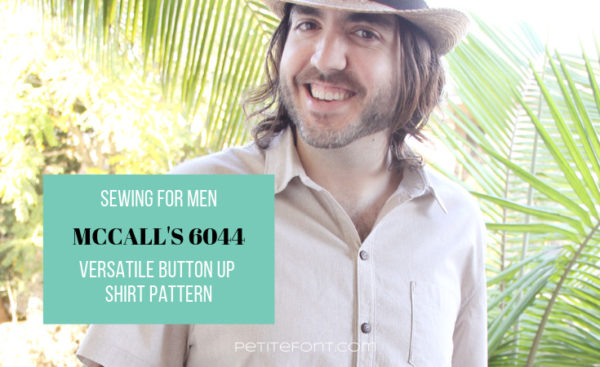
Second, can a pattern be considered “tried and true” if it’s only been used once? Twice? I think at twice, the answer is yes. And so I present these two similar shirts I made for my husband from M6044 (or is it M9234????):

There is a serious lack of menswear patterns, possibly because men’s clothing is actually pretty simple. You can have a short-sleeve button-down or a long sleeve button down; one, two or no pockets; and a yoke or no yoke, but the main shirt piece is pretty much the same. There are only so many ways to make this new and exciting enough to necessitate a brand new pattern.
These shirts actually look like all the other short-sleeved collared shirts in his closet.
Except these were made with love, not in a sweatshop with…sweat.
I mean, maybe I sweated the fit a little…

This particular pattern is a straight forward button-down collared shirt without a yoke. I lied, it does stand out from everything else in his closet for not having a yoke since all his ready-to-wear shirts do. Maybe in the future, I’ll make one of those too.
The blue version is the first one I ever made, only about 4 months after starting to sew. And wow, does it show! I picked up some really cheap broadcloth from Joann’s so as not to waste money on what would be a muslin. Despite the pattern touting itself as easy, it isn’t.
Collars, buttonholes, and shirttail hems, OH MY! The collar especially proved to be REALLY tricky. I completely screwed it up!
Check out those puckers:
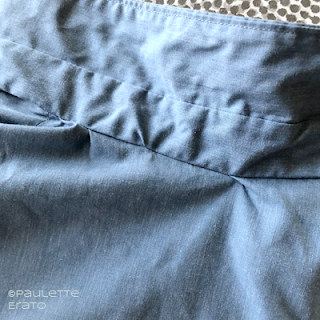
I thought that damn collar was going to be thedata-pin-nopin=”true” death of me. I had juuuuuust enough fabric to make it twice. What you’re seeing is my second attempt to attach it. It was that much worse the first time!
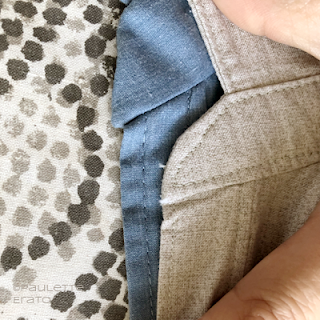
The sleeves suffer from the same puckering. I really struggled with putting round things in holes, apparently.
I didn’t even bother finishing the seams on this piece. I also screwed up the button band and the shirttail hem (more puckers AND how it’s attached under the button band). It was truly a learning piece.
But he loves it. He wore it to Thanksgiving last year. He would wear it more often if I let him, too. And even though I know no one else will notice the mistakes, I do. They’re glaringly bright to me.
The second time around I had a little bit of distance from that first harrowing experience, a bit more sewing know-how, and a bit more patience.
The collar was still a bitch, as you can see, but less so. The collar stand and button band lined up a little bit more cleanly.
My topstitching still needs a bit of work, though.
After suffering through this process a second time, I came across a tutorial on four square walls to do this in a different order. This seems soooooo much easier. I’ll try it for shirt #3.
I took a bit more care with shirt #2, made out of quilting cotton that was deemed “masculine” enough for the husband. It was also a gift to him for our first anniversary, which he would wear on our vacation to Cabo San Lucas. So it had to be breathable. Hence, the cotton on sale at Joann’s.
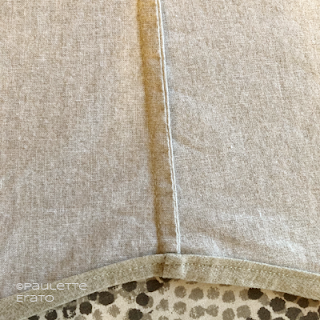
The seams are all French seams, even the sleeves! They were much easier to ease in the second time around. I’d had a lot more practice by that point.
I did learn a very valuable lesson this time around, regarding buttonholes. First of all, lining them up on my very basic machine wasn’t very easy. But the ones on the first shirt were way too tight. So these were made a little larger.
Second, the husband didn’t like how the buttons lined up on the first one, so he picked their placement on the second (which is why there are fewer buttons on it overall).
And finally, I learned that ripping open buttonholes that have a pin at the end to safely end the “rip” will completely destroy your seam ripper. My nicely ergonomic seam ripper was absolutely useless after making this shirt. So sad.
But there’s a buttonhole punch that will do the job without needing a needle! It’s sort of looks like a chisel with a flat blade that you just push through buttonholes. No more ruining seam rippers! There is a bevy of them on Amazon.
I got one almost immediately…and it’s still in the package. I don’t like buttonholes. They’re a pain in the ass. So I haven’t needed my fancy tool. But I just recently got a new machine with an automatic buttonhole maker that is absolutely amazing!
So maybe there are buttonholes in my near future…?


I’m curious what the inside of the shoulder seams looks like in this pattern – your first attempt. I’m reading the pattern and it doesn’t say anything about finishing the seams. Are they serged? raw? I see in your second version you did french seams, which I’m going to try, but I’m still curious about the way the pattern is written.
Hey Julie! Your comment inspired me to post a view of the seams on IG: https://www.instagram.com/p/BzOVKa3AhC2/?igshid=1inz7ul93yssj Even though the pattern is marked easy, it doesn’t really hold your hands through the construction process. I say finish the seams any way you want, but absolutely do finish them. You’ll see in the pic I linked that the blue muslin version isn’t finished on the inside. Eventually those are going to fray and fall apart! Even just an overcast stitch on a regular sewing machine is a decent finish (if you don’t want to do French seams—which are my favorite!). Hope this… Read more »