This post contains affiliate links. For more information, please see my Disclosure Policy.*
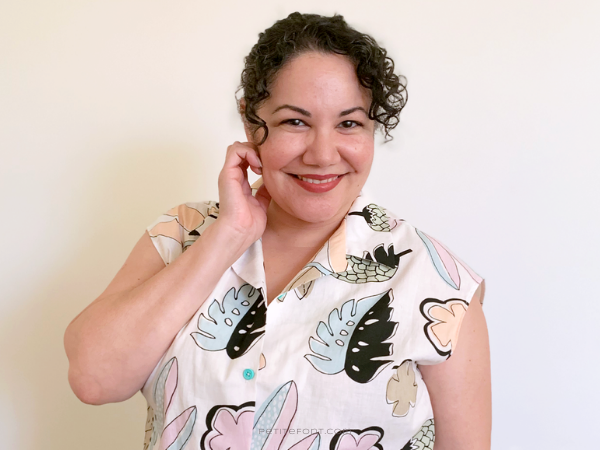
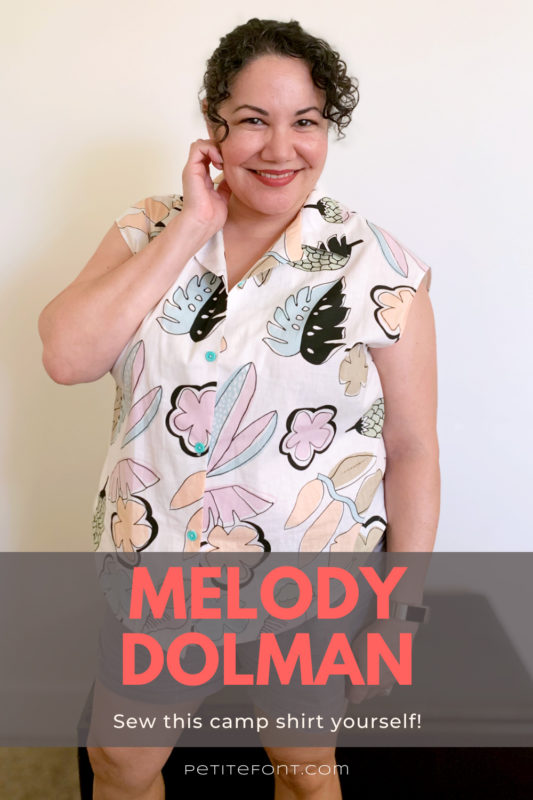
The Melody Dolman rocketed to the top of my list recently. I wanted a camp shirt for summer, and I’ve made the men in my life 4 of them, so it’s my turn!
What is a camp shirt? Think of a Hawaiian shirt or a bowling shirt. It’s a very casual button-up shirt. The big distinction between a camp shirt and a regular button-up is the collar stand. Or more accurately, the lack of collar stand. On a camp shirt, the collar attaches directly to the neckline, which makes it infinitely easier to sew!
I’m an affiliate with Love Notions because I genuinely enjoy making their patterns. And though I have 3 camp shirt patterns total, I chose to make this one first.
Don’t worry, the other 2 are in the queue! I’ve already printed and taped together made the Helen’s Closet Gilbert and I’m also considering the Seamwork Natalie.
It wasn’t all fun and games though. I had a few hiccups thanks to my unique body shape, detailed in the Pattern Adjustments section below.
Melody Dolman Description & Cost
From the Love Notions site:
The Melody Dolman is a woven button-down dolman with shirt-tail hem that can also be knotted at the waist. This dolman gives you a polished look without a lot of effort. If you’re new to sewing button-down shirts, this is a great beginner pattern. The camp-style collar looks clean on the inside and out, and bonus- it’s easy to do! This dolman is meant for apparel weight woven fabrics. Also included are a breast pocket and sleeve cuffs.
The Melody Dolman pattern is $12. That’s about average for a higher-end pattern, especially from an established designer or pattern company. The real advantage of Love Notions patterns is that they come with a built-in full bust adjustment, so that’s one less thing I need to worry about.
Size Chart
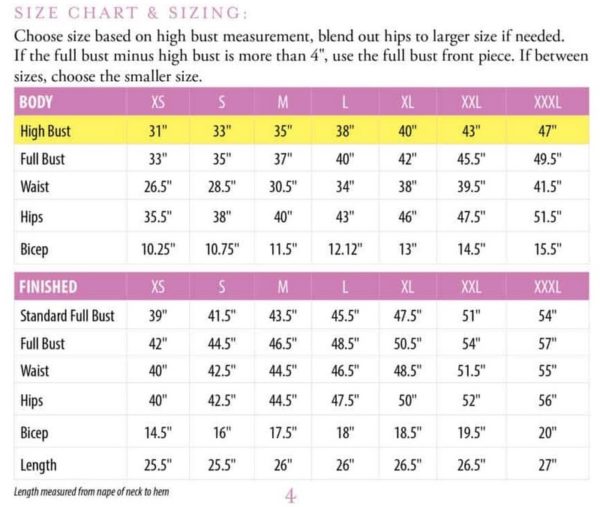
The size range for the Melody Dolman is not currently as extensive as other Love Notions patterns. Newer patterns go up to 5X while this one ends at XXXL.
That said, I normally make an XXL in Love Notions tops and this time I sized down to XL with few issues.* I just didn’t want to be overwhelmed by the very loose fit.
Fabric
The recommended fabric for a Melody Dolman is apparel-weight wovens. From the website:
Light to medium weight apparel wovens such as linen, chambray, rayon & shirting.
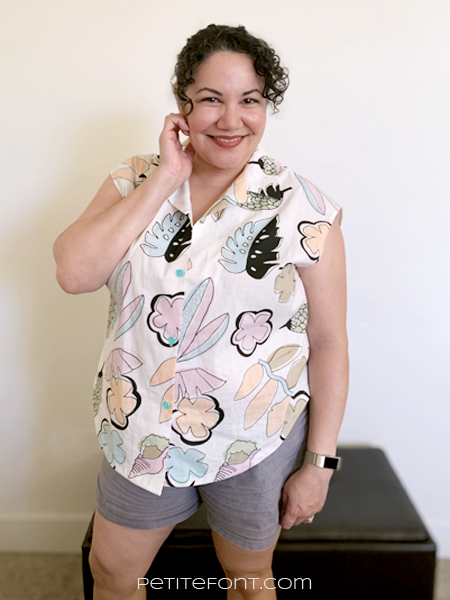
Between 3 summer-weight cottons, I chose this shirting with a large scale print. It’s kind of kitschy, just like a camp shirt should be!

PDF Criteria
Here is how the PDF stacks up
- Layered sizes: yes
- Colored lines by size: yes
- No trim pattern: yes
- Prints to edge of paper: yes
- Print layout included: yes, page 3 of the file
- A0 available: yes
- Number of pattern pieces: 4 required and 2 additional optional pieces
Another reason I really like Love Notions PDFs is because they don’t require cutting any margins off! You can simply overlap the paper at the guidelines and you’re good to go. One less step in piecing a pattern together!
The optional pattern pieces are a front pocket and sleeve cuffs. I didn’t use either one. I did make bias binding from my off cuts, and ended up only using 1.625 yards (1.5 m) of fabric total.
Pattern Instructions & Tips
The Melody Dolman instructions are 12 pages long. The PDF print layout is on the third page of the instructions, and includes a print list for either the regular bust or full bust piece.
My best tip for making this pattern is to use bias binding on the bottom hem. The shirt-tail (or baseball) hem comes up pretty high on the hips, so that’s a LOT of curving to try to turn up like a normal hem. Save yourself the headache and just use binding.
Also I always forget which collar is supposed to get interfaced. It’s the “under” collar, or the one that faces down closest to your back.
This collar construction is very close to the one used for McCall’s 7206, so I highly recommend this video by Norris Danta Ford:
Pattern Notions
Because there is a button band, you will need interfacing! And buttons!
The pattern calls for 5 buttons, but I shortened mine so I only have 4.
Pattern Adjustments
*This is where things got interesting. Remember my woven t-shirt hack? That was born out of the issues I ran into this shirt.
Not having to do an FBA saved a little time, but I did all the rest of my standard adjustments—minus the narrow shoulder adjustment. I figured I’d sized down enough (consider this foreshadowing).
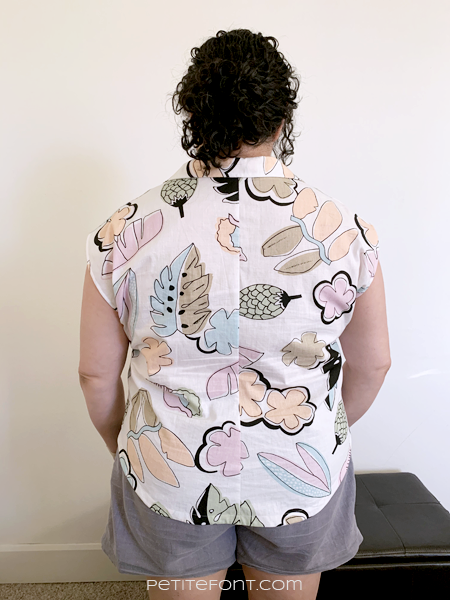
The swayback created a center seam, which makes it easy to mark the center back and match up the collars. Big plus!
And I finally learn how to do a sloped shoulder adjustment, which was super exciting! I lowered the slope by 1.375″ (3.5 cm), which felt really extreme. But I guess that’s just how my body is!
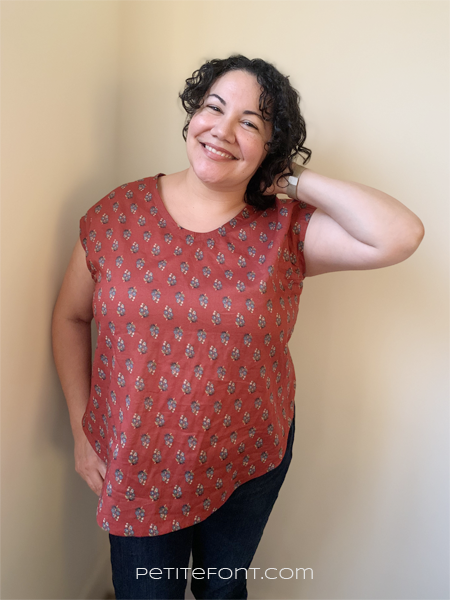
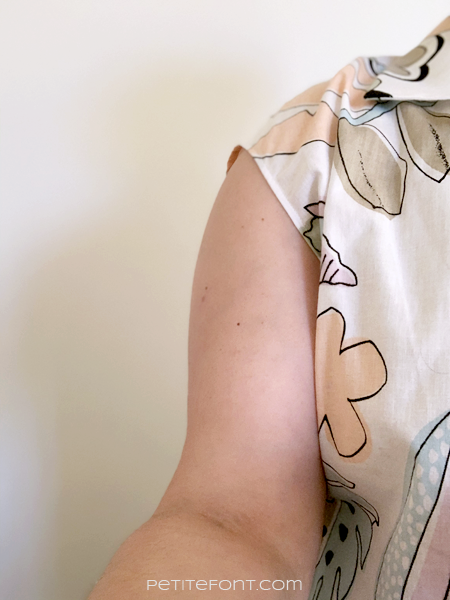
I made the whole thing up, no muslin, and then put it on for the first time. That’s when I ran into a big problem: I couldn’t move my arms forward.
The armhole came down too far down my arm, restricting any forward movement. It was wide enough for my bicep to go in, but not move forward. Anytime I tried to reach for something, the shirt cut into my arm like this:
So I cut into it, trying to relieve the pressure. I got irritated and just started shaving off chunks…and then felt like I went a little too far.
People on Instagram suggested I make it sleeveless. I was afraid because I’d moved the armhole down so much (because of the shoulder slope change), that wasn’t going to be possible!
I was pissed. I let it sit for a week to see if I could figure out a save. Sometimes sleeping on a problem helps me solve it.
That’s when I realized what I was originally trying to do was a kind of kooky narrow shoulder adjustment. Shaving back the length of the shoulder seam made sense.
But what about the deep armhole? Luckily because this pattern is so boxy, there was enough extra fabric under the arm to make that possible. Finally I transferred all the work back to my original pattern pieces, which ended up looking like this:

Front pattern piece 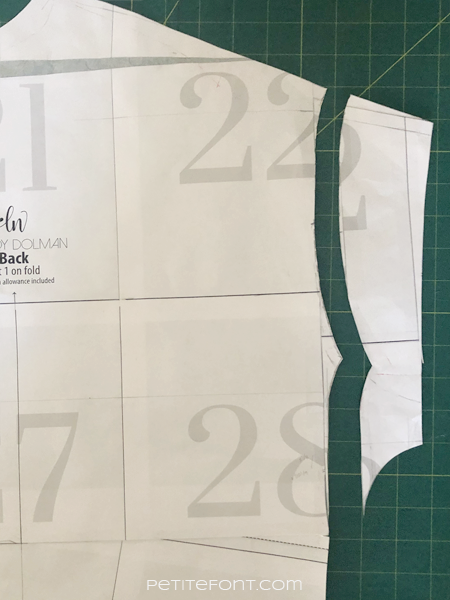
Back pattern piece
In the end, I cut off a total of 2.5″ (6 cm) from the shoulder and sewed up the side seams about 2″ (5 cm) so the armhole was a bit more modest.
And now I can move my arm!
After shoulder adjustment Before shoulder adjustment
You can see the difference in the amount of fabric down the arm comparing the before and after pics. It looks a little more like a cap sleeve now.
[I also should have done a 3/8″ (1 cm) forward shoulder adjustment, which I learned when I mocked up all my changes in my woven t-shirt hack. But whatever. Done is better than perfect!]
Pattern Difficulty Rating
This is not a hard pattern, but it does require closures so it’s not a strict beginner pattern. It is a great pattern if you’re a confident beginner and want to dive into button-ups, especially since you won’t have to ease sleeves in. They’re already attached!
I’d rate this a 2/5.
Final Thoughts

This experience taught me that I HAVE TO make a mock-up when I try new adjustments. In a stretchy or even more fluid fabric, this probably wouldn’t be an issue.
But I’m glad I figured out a way to salvage this garment. I like my funky Melody Dolman. But it was a few dark days after I started cutting the sleeves up…I really thought it was completely FUBAR.
The pattern matching is non-existent and in fact, the pattern repeat is really terrible if I stare at it too long. So I don’t. I just enjoy the kitschy print!
I might make this again, now that I’ve taken so much time to get the fit more or less perfect.
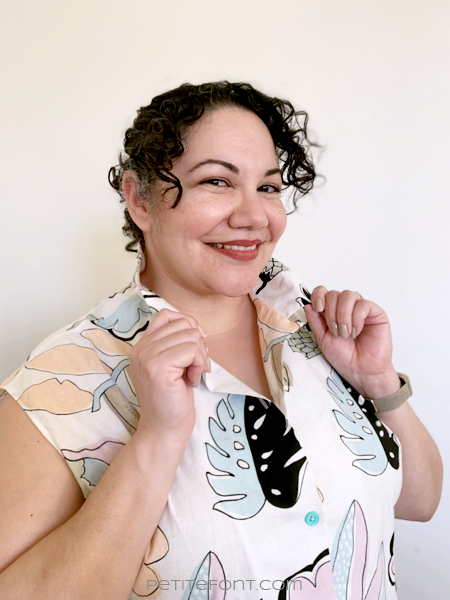
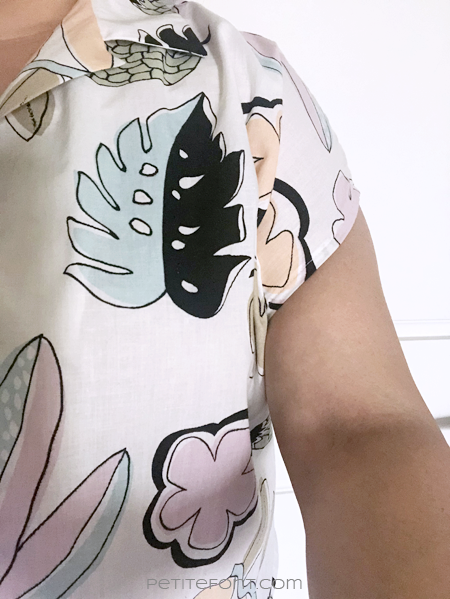
Plus look at how awesome it looks when you pop the collar!
Have you made a camp shirt? I recommend trying the Melody Dolman! Buy yours here.
Save this for later by pinning this image below.