Ogden cami hacks were all the rage this summer. My favorite #ogdencamihack is the one I mentioned in my first post about them: the shelf bra!
But I was inspired by a ruffled tank I saw out in the wild to try to do that to the Ogden cami, too.
To be perfectly honest, it wasn’t the most successful hack. I now realize that I need more length, and especially around the armhole. It has this little wing effect under the arms.
Which is exactly the wrong place for women and flappy wings, amiright???

But let’s talk about how to make a ruffle anyway, yeah?
The good news is you do not need to recreate the wheel. Simply use the existing facing piece for this!
Make an extra facing pattern piece for both the front and back. If you want to be technically correct you should probably remove the seam allowances too. But if you’re lazy like me, don’t and then futz it later.
I used the slash and spread method for this. It’s where you slash up your pattern piece and then spread the desired amount. Get it?
I also decided I wanted the finished piece to be about 3” long at the shortest spot. Because I left both the seam allowances and hem on (and both are 1/2”) I measured down 4” from center front and cut across the pattern piece.
You have to decide how fluttery you want the ruffle to be. At first, I divided the facing into 2” sections and spread them out. This didn’t make for very many folds falling around the neckline. It was almost like just putting the normal facing on the outside. Not the look I was going for.
Back to the drawing board.
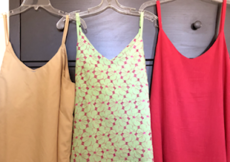
Next I decided to double this. I sectioned it into 1” pieces and spread each of those by 1”. You can see the difference between the two:

To attach the ruffle AND my shelf bra, I basted the ruffle to the bodice and treated it as one piece. The straps were then attached to the front of the ruffle and sandwiched between it and the shelf bra (or facing if you didn’t convert your facing into a shelf bra).
Badabing badaboom, I have a new top!

When I pulled out the Ogden cami pattern again, I realized that I never shortened the length on this pattern. I didn’t do a swayback or high round back adjustment on it either.
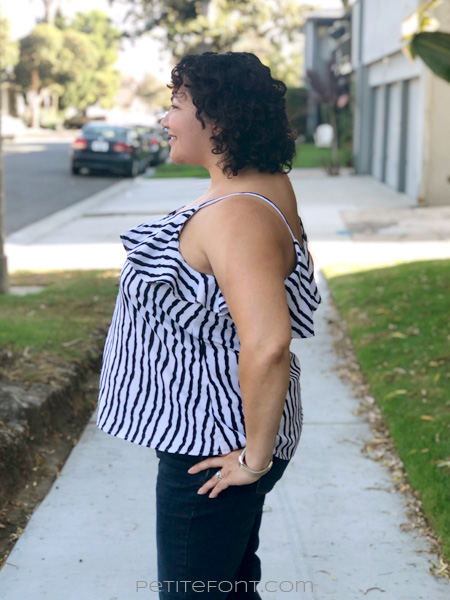
You can see from the side view here, that I clearly need a little more space for the boobage. Check out the drag lines from the bust apex:
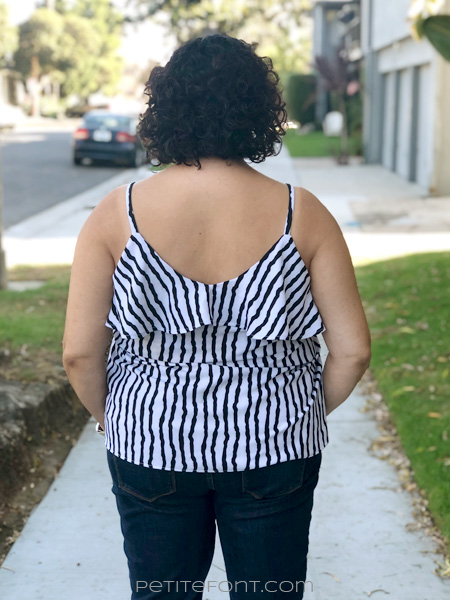
And the back view is screaming for a swayback adjustment. Look at all the fabric above my butt!
Honestly, I could call this whole experiment a sewing fail, but you know what? I actually LOVE it!
The fabric is a leftover poly-crepe remnant from the zebra shirt I made way back when I was learning to sew. I didn’t know then that my petite stature meant I couldn’t make things to fit my boobs and expect them to fit both my shoulders AND not show my bra. The armholes on that old shirt are massive!!
(It’s the same problem with my ill-fated 90s-inspired flannel shirt…so I guess I’m still learning this lesson!)
Anyway, I’m considering this a wearable muslin. I now recognize that since the Ogden is a v-neck cami, the ruffle should also dip in the center front and back. So cutting straight across at the 4″ mark was silly.
It definitely needs to be longer at the side seams too!
So the next time you see this, not only will my ruffles be on point, all the adjustments should ALSO be corrected. I think I have a pretty lavender crepe waiting for this…
Stay tuned! Are you a ruffles person? Have you hacked an Ogden cami?

Hey Paulette,
I don’t sew, but your top is super cute! Thought I’d just let you know. Great job! Mona
You’re sweet Mona. Thank you!
[…] also: Sew North, Petit Font, The Pug and […]