Sometime over the summer I decided that what my wardrobe needed most was tops. Easy ones. I’d had a run of projects that didn’t work out, stuff that was fitted and needed special attention in the boobs, in the short waistness, in the everywhere. I was out of patience and really just wanted a “win.”
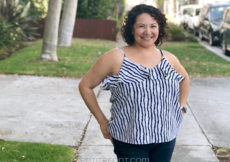
I’ve been a Seamwork subscriber for a while but never cashed in credits for a pattern. However when the Loretta came out, I instantly loved it. I also loved that they used an older woman as a model. Diversity, yay!
Plus it was flowy, had only 4 pieces (plus the bias binding on the neck), and probably didn’t require mathing through an FBA (spoiler alert: uh, it did).
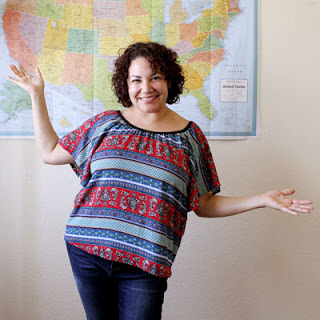
I had a mystery fabric that reminds me of Spain (don’t know why, as I’ve never been there), so I started calling it my Spanish Loretta. It some sort of poly chiffon something—I’d picked it up at the Michael Levine Loft store where orphan fabrics are sold by the pound, so there was no info on it at all. I had actually used this once before to make a Blank Slate Blanc Tee but that was back before I knew the difference between knits and wovens and what negative ease means. Oops!
Back to the fabric. I am a sucker for a beautiful print, which is the only explanation I have for putting myself through the hell of sewing a shifty fabric like maybe-poly-chiffon—again! It also frays like the devil, so I opted for French seams. While I adore how French seams look, I ALWAYS have to stop and think about how I’m sewing the seams. Because they’re initially sewn wrong sides together, it always throws me for a loop.
The fabric also has wrong and right sides, but the difference is minute. It’s just enough that when I sewed the first sleeve on wrong, I could tell. But I couldn’t distinguish the two as I was sewing them together. I had to seam rip each sleeve—twice. Lesson: MARK YOUR SIDES. Tape works well.
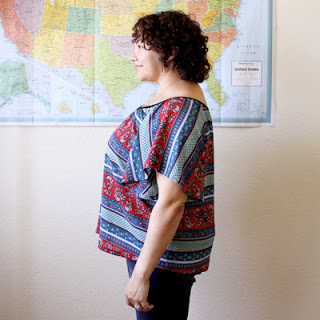
Because Meg from Craftin’ & Cookin’ had mentioned the low armholes, I attempted to raise mine up about one and a half inches. That required redrafting the raglan sleeves, something I had NEVER done. So of course I winged it! It worked out okay…I think…
Because the fabric was soooooo shifty and, frankly, a massive pain in the ass, I wasn’t about to make bias strips out of it. Hell. No. Instead, I took some trusty, plain, store bought, black bias tape and used that instead. Because of the print, I think it was a nice accent.
I also had no intention of wearing this off-shoulder, because strapless bras are a tool of the devil’s making, so I cut the elastic a little shorter than suggested.
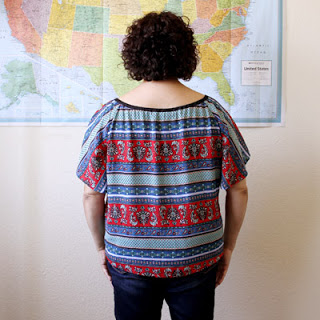
And despite this damn fabric being such a shifty thing, I still managed to perfectly match the pattern across the seams.
Well, at least one seam. The other side is ever so sliiiiiiiiiiiightly off. I didn’t even try to accomplish this on the sleeves, but somehow got them kind of close-not-really anyway.
Then I wore it on a date night to an outdoor concert. Which was, uncharacteristically for Los Angeles, hot AND humid. Did I mention this was polyester? Do you know how well this combination worked? Ask me how great I smelled after that. Thankfully I’m married to my date, so he had to come home with me.
My other regret with this is that I didn’t do a full bust adjustment. The pattern is so loose that I really didn’t think I needed it. Going by my high bust measurement of 43″ would have meant a finished measurement of 55-57″. That’s a LOT of bust space (so I thought). So I sized down to a size 12, which was still 53″ when finished. Still a lot of flowiness, so I opted out of an FBA but the stripes across the bust give away that I could have used one. Oops again.
Pattern Recap:
Seamwork Loretta Version 2 with the curved back hem of Version 1
Size: 12
Modifications: raised armhole 1.5″, shortened elastic length because I didn’t want the off-shoulder look.
Notes for next time: make an FBA!! Your boobies will thank you.


Proud of you for your achievements ♥