This post contains affiliate links. For more information, please see my Disclosure Policy.*
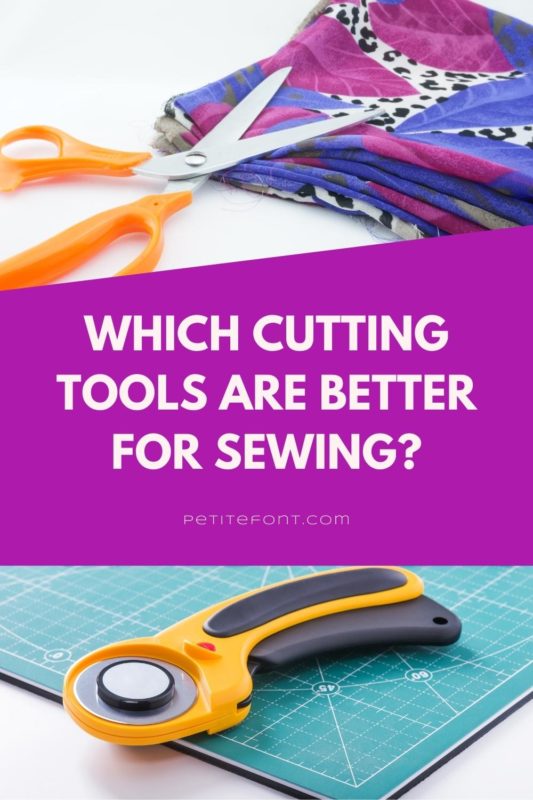
Now that you’ve settled on your sewing machine, and all its necessary accessories, what cutting tools do you ACTUALLY need.
Cutting tools? So…like scissors?
Yup! But in this case, there are specialty scissors for just about every single type of cutting you can think of. And THE MOST IMPORTANT thing to stress here is that you’ll want a separate set of scissors for paper and fabric.
But…why?
Because scissors (or in this case, dressmaking shears) need to be super sharp to cut your fabric. But if you use them on paper, they’ll wear out super fast and you’ll end up with snags in your fabric.
You don’t want that.
That’s why memes like this exist. My favorite:

But there are a lot of cutting tools to consider, some better than others. So here’s an overview of starter kit cutting tools for sewing.
Before we start, I’m going to assume 2 things:
- That if you have any questions, you will let me know!
- That you are looking to become a garment sewist (as opposed to a quilter, etc).
Okay! Like the rest of this series, there are sections to jump to for ease of scrolling!
Fabric Cutting
This one is a fun debate and totally a personal preference: are you Team Shears or Team Rotary Cutter?
What’s the difference?
When using shears to cut your fabric, you need to pin your pattern pieces to the fabric and then cut around. When using a rotary blade, you have to lay your fabric on a self-healing cutting mat and weigh it down with pattern weights, then slice around.
I use both methods but lean towards working with a rotary blade most often. As I get older, I’m finding the repetitive motion of opening and closing scissors can become a bit much for my hands. But both methods of cutting are beneficial.
In this category, brands Kai and Gingher are the top line options. Fiskars is budget-friendly and available at most hobby shops and office supply stores.
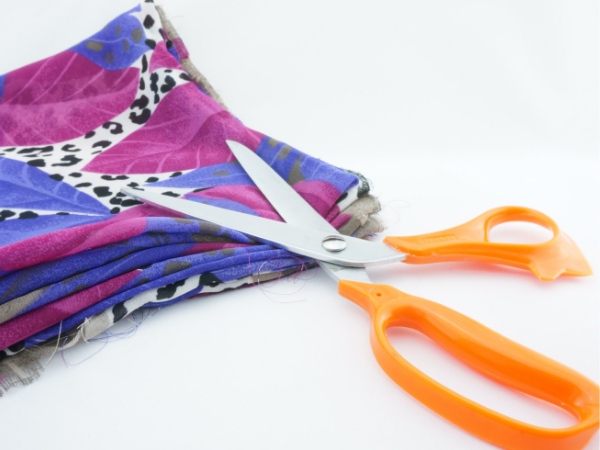
Fabric/Dressmaking Shears

Fabric shears are NOT the same thing as regular scissors. To begin with, notice how the fingerholes are different sizes.
Fabric cutting needs to be precise and done with a sharp pair of cutters. Per Martha Stewart’s website:
It’s all about the sharp edges and a clean cut. You want to be able to cut easily through the material, whether it’s a thin muslin or a thick corduroy. All-purpose scissors are generally made to cut through paper and other materials that lack the “give” and resistance from fabric. In fact, you could even break the scissors if trying to slice through a piece of corduroy, for example, because all-purpose scissors don’t have the right level of sharpness.
MarthaStewart.com
Dressmaking shears can come in a variety of styles and lengths. Most run about 8-10” (20.3-25.4 cm). The longer length means longer, more precise and smoother cuts.
But length can also add weight, which can be tiring for your hands.
Angled Shears

Some shears are angled, which make them a bit easier to use. The angle allows the bottom blade to stay flush with the cutting surface, meaning the fabric lifts up and distorts less as you’re cutting it. This can also be better on your hands.
Spring-Action Shears

Spring action shears can also benefit anyone with arthritic or easily fatigued hands. The spring-loaded design means the shears gently open after each slice, taking some of the work out of cutting.
Pinking Shears

Pinking shears have a funny serrated edge. This cuts little triangles along the edge of your fabric, which is especially helpful with fabrics that fray. It’s also useful for a seam finish if you don’t have a serger or overlocker.
Although pinking shears also come in a spring action version, they can be a bit bulkier and heavier than their non-pinking counterparts. For that reason, I prefer a pinking rotary blade instead!
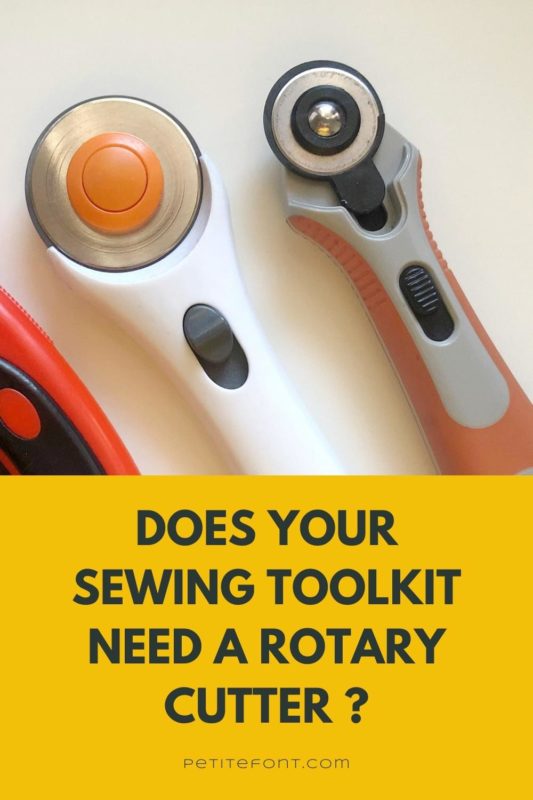
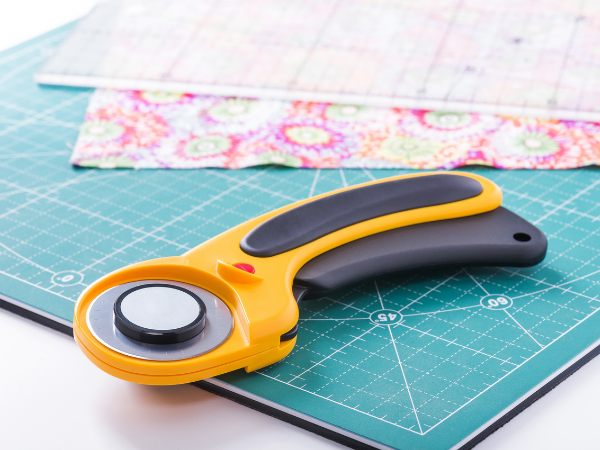
Rotary Cutter
These tools are popular with quilters, who cut very precise straight edges. But they’re great for garment sewing as well.
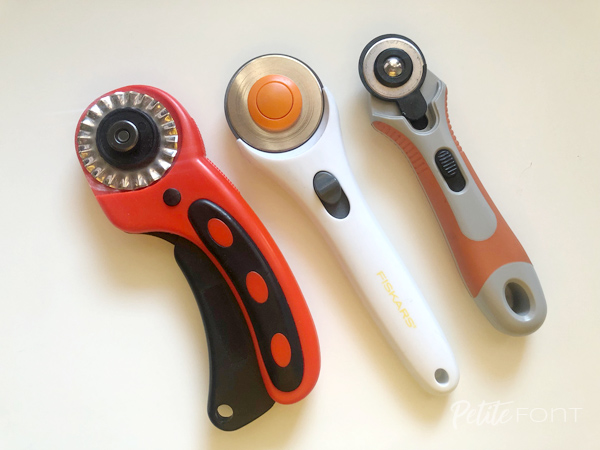
Rotary cutters come in a few typical sizes: 45mm and 28mm (1.75” and 1.1”, respectively), though there’s also a larger 60mm (2.3”) blade size (better for quilters who cut through many layers at once), and an even smaller 18mm (.70″).
The cutters themselves come in a variety of options, many with ergonomic handles. There are even electric versions, though that might be overkill for a beginner!

I find that the smaller 28mm size is great for tight curves (like cutting flounces or armholes). If you make very small clothing (like doll or newborn), then the 18mm blade might be good for that.
I keep one rotary cutter in the 28mm size, and two in the large 45mm size. One is fitted with a straight blade while the other has a pinking blade, as mentioned above.
Bonus: these blades are usually carried at home improvement or hardware stores as “carpet cutter” blades.
The pinking blade is great for cutting edges that fray. I use it whenever I have to cut a swatch of a fabric (like to take to the store for buying color matching thread), so it doesn’t disintegrate en route.
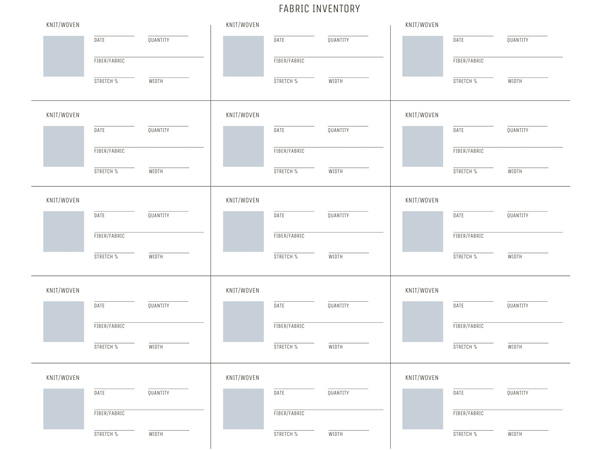
And if you have my Fabric Inventory Sheet, you might want to pink-cut your fabric swatches too! Scroll to the bottom to get it or click here to sign up.
Pro-Tip:
Make sure your rotary cutter is in the “off” position whenever you set it down! Make a habit of closing the cover on the blade whenever you let go of the cutter.
Self-Healing Cutting Mats

When using a rotary cutter, a cutting mat is absolutely necessary to protect any surface you’re working against. And you definitely want it to be self-healing so that any cuts you make into it close back up and don’t create snags for your fabric!
So it’s really important that whatever mat you buy is labeled “self-healing.” Over time, they will tend to get old and stop “healing” as much, but they will last a long time if stored flat.
My favorite cutting mat is a big beefy 24″x36″ slab that lives on my cutting table, but can fold up when I need it to.
Most mats are marked with imperial and metric measurements, but not all of them are precise! I found this out the hard way once when I thought ALL of my measuring tapes were getting stretched out (which does happen!).
No, it just turns out that the inch markings on my mat were slightly smaller than a real inch. So don’t rely on your mat for measuring, necessarily!
Pro-Tip:
Cutting mats are rarely large enough for the yardage you need to cut for adult garment sewing. Your best bet is to get the largest mats you can afford, and have enough to cover your entire cutting surface (whether that’s your dining table or a dedicated workspace). I use two 36×24″ mats and have two smaller ones to cover the small leftover section of my worktable.
Shop Self-Healing Cutting Mats
Thread Snips
Thread snips are smaller, and as its name suggests, for snipping thread. This specialty cutting tool looks like two blades held together by a U-shape. Sometimes they have a thumbhole, but not necessarily.

You aren’t limited to only this version of thread snips. You can use basically any small scissors for snipping threads, including small embroidery scissors or even small nail scissors (avoid the ones with the curved blades since they don’t cut straight!).
Pro-Tip:
Have a couple of thread snips on hand. I like to keep one by each sewing machine, one on my cutting table, and another by the iron. Some people like to wear them as a necklace, which is a great option to make sure they’re always nearby!
I also use my thread snips for cutting the notches in my pattern pieces.
Paper/All-Purpose Scissors
When cutting paper, you can use just about any pair of scissors you like. I prefer either plastic or soft-grip handles and long blades, about 8” (20 cm). The longer blades allow for longer, smoother cuts (just like with fabric).
Why plastic handles? I find them more comfortable than metal ones.

In fact, my “paper” scissors are actually a pair of 8″ Fiskar shears that I’ve simply dedicated to paper. Fiskars are usually orange-handled but also have a line with different designs on their plastic handles. I have a green handled pair for paper and a floral pair for fabric.
Because I make a lot of PDF patterns, and use heavier weight paper to print them on (so the patterns will last), cutting them out can be pretty fatiguing. I found that the handles would indent on my fingers after a while. So I solved this problem by wrapping a large padded self-adhesive bandage around that area of the scissor handles and haven’t had any problems since!
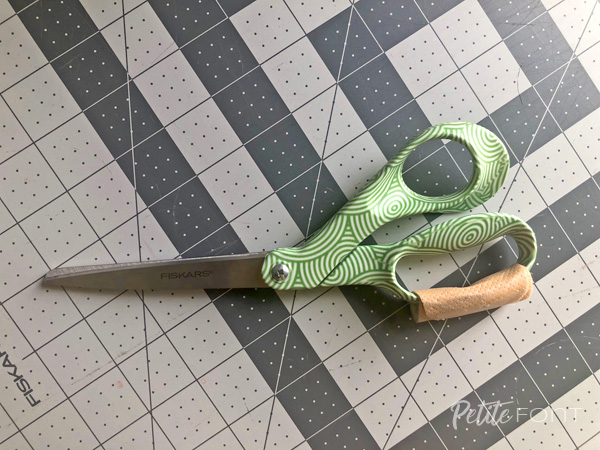
I did this about 4 years ago and haven’t had to replace it ever.
Pro-Tip:
Make sure your paper scissors are easily distinguishable from your fabric shears, especially if you’re like me and use shears for both! Either label them or get them in a different color so you don’t worry about confusing them.
Specialty Cutting Tools
There are a whole host of specialty cutting tools! But I’m going to focus on 4: three of which are nice to have but one that’s a basic requirement for sewing.
Seam Ripper
Every crafter and artist knows that they will make mistakes. Sketchers and cartoonists have erasers, programmers and writers have backspace or delete keys.
Us sewists have seam rippers!

Okay so they don’t completely erase mistakes, especially if you’re working with more advanced fabrics like silk, leather, or vinyl (holes don’t disappear in them). And if you’ve perfectly matched your thread to your fabric, this could be the cause of some headaches (another reason to never dead-on match the thread!!*).
But a seam ripper is actually a sewist’s best friend. It’s our “un-sew” tool! And they come in two versions: the Y-shape like above where there’s a little blade in the valley of the Y, and the slightly more dangerous-looking curved scalpel, below.

What do they actually do? It’s in the name: they rip thread out of seams with a little razor. Sometimes you make a mistake and sew something incorrectly. Your seam ripper undoes that mistake!
The razor is obvious on the surgical blade (look for ones with replaceable blades). On a Y-shaped seam ripper, the blade is in the little valley of the Y.
But sometimes you intentionally sew something together that you know you’ll have to take out later. This is commonly known as basting. And even though your stitches will be longer in this case, and therefore easier to pull out, your seam ripper will help here too!
Seam rippers are also great for making buttonholes, but there’s a caveat with that. The method for doing this usually involves putting pins at each end of the buttonhole to prevent ripping into the stitching. But doing that repeatedly WILL wear your seam ripper out and completely dull it. And since Y-shaped ones especially are impossible to sharpen, keep a few on hand.
Pro-Tip:
Seam rippers are inexpensive but the tiny blade in them can wear out (especially the Y-shaped variety). Keep multiple seam rippers on hand at all times since they’re easy to lose or misplace. And little is more frustrating than needing a seam ripper and not finding one.
*This small magnified light has been a life saver for detailed work like ripping out lightning stitches or black thread on black material. It’s better than my reading glasses!
Duck-billed/Applique Scissors
These funny shaped scissors are a specialty item commonly used in applique. The large “duck bill” slips under the applique and acts like a shield, ensuring the fabric below isn’t accidentally nipped.

But these are also a great little tool for grading seams!
Sometimes you end up with a lot of fabric in between a seam, like when adding a collar. There will be the fabric from the upper collar, the shirt it’s attached to, and then the under collar. That creates a lot of bulk in the seam.
That’s when it’s common to grade the seams. Each of the three pieces are trimmed to slightly different lengths. By trimming down some of the extra fabric, you’ll minimize the bulk there.
The duck-billed scissors make it possible to trim the top seams without cutting into the seam fabric below. Of course you can do this with regular scissors. It’s just that much easier with this specialty tool.
Hobby Knife
If you don’t know what a hobby knife is, maybe you’ve heard of an X-acto knife?
X-acto is actually a brand name, but lots of people know what it means when someone says it (like if I said Kleenex for tissues, or Xerox for copy machine), right? It’s that small, sharply angled cutting tool that looks like a triangular razor.

I actually use an X-acto knife to cut my button holes. Because the replacement blades are inexpensive, it’s more economical than using a seam ripper.
One drawback, and what you’ll find mentioned a lot in reviews, is that the knife itself is rather small (like a pen or pencil) and easy to lose. Because it’s super sharp, that can be pretty scary when you have fabric and/or delicate patterns sitting on your workspace!
Pro-Tip:
Always keep the knife’s clear plastic cover nearby and put it back on as soon as you’re done using the knife. Like closing the blade on your rotary cutter, this is simply a good habit to have.
There are a bunch of different hobby knives on the market. I like the typical #11 blade, and personally use the Soft Grip X-acto with the pink barrel. Replacement blades run about $8 for a pack of 120. I’ve never had to replace a blade yet, despite buying it over 2 years ago!
But if you’re looking for a more ergonomic option, here are some to try.
Buttonhole Chisel
Buttonhole chisels are probably the ultimate niche tool on this list, and definitely not necessary by any stretch.

I bought one on someone else’s recommendation and am actually not at all impressed with it. I would actually go as far to say don’t bother with this when there are so many better options available.
The trick to this tool is to hammer it straight into the center of the buttonhole into a piece of wood or extra padding because it’s sharp AF and will damage whatever it goes into.
Straight away there are 2 issues:
- This specific chisel above is 1/2″ (1.3 cm). What if your buttonhole is smaller than that? You’re not using this chisel then.
- What if your buttonhole is bigger than 1/2″? Well then the truth is that you still need to then rip the rest of the buttonhole open so why not just start with the scalpel or seam ripper in the first place?
So yeah, I find this one unnecessary despite the rave reviews. Though if I was producing a LOT of buttonholes in the exact same size, I might consider it. But mine vary across all my patterns.
If you do decided to purchase then remember: as with all blades, make sure you keep your cover nearby when using it.
Blade Sharpeners
The real tip to any and all cutting tools is to ensure that they stay sharp. Like dull kitchen knives, dull cutting tools are dangerous and cause headaches you don’t need!
Most of the time you can simply buy replacement blades for your tools, like hobby knives or rotary cutters.
But even rotary blades can be sharpened!
Look, I’m not ashamed to say that I think replacement rotary blades are expensive. Sure they’re only about $12 per 10-pack, but did you know you’re supposed to replace them after every project? That’s not so cheap now, is it?
You could use that “one weird foil trick” to sharpen them, but I’ve never had success with that. I end up with a bunch of foil confetti and still have a dull blade. Which is especially bad when working with thick fabric like denim or leather.
Your blades must be sharp!
Rotary Blade Sharpener

There are a few rotary blade sharpeners on the market, but the simplest (and least expensive) ones work just fine! They are size-dependent though, so you will need a different one for each size blade you have (18mm, 28mm, 45mm, 60mm).
Eventually you will need to replace the blade entirely. Because what sharpening does is actually shave down the edge ever so slightly, you will start losing material over time. But I’ve sharpened my one blade at least 10 times with no degradation in quality yet.
One caveat: these sharpeners only work for straight blades, not the curvy pinking blades. Those do have to be replaced completely (and they can be pricey since the home improvement/hardware stores don’t tend to carry them).
Shear Sharpeners
The absolute best way to keep your fabric shears sharp is to send them to a professional. Bar none. This is one of your workhorse cutting tools and should be treated well.
These 3 professional outfits obviously agree.
That being said, there are some at-home sharpening devices on the market. These can range in price from a $10 small plastic handheld device all the way up to $80 for the Chef’s Choice ScissorPro.
Do they work? Uh…sure. But you also run the risk of damaging the blades.
I actually bought the ScissorPro after seeing it advertised in an esteemed sewing magazine. I’ve used it ONCE. I find it unwieldy and I’m not sure I’m even doing it right. Worse, my shears were no better off after.
Pro-Tip:
I recommend instead to find a local knife sharpener as they usually do shears as well. Hobby shops and farmers markets sometimes have a knife sharpener who comes in a few times a month, too.
Obviously there is a cost involved in sending your tools to be sharpened. The cost can be as little as $5 to upwards of $20. But this only has to be done every few years and it’s worth it to keep your tools in their best working order.
Paper Trimmer
Do you need a paper trimmer when you already have paper scissors? No.
Is it nice to have? YES!

This tool is really only a consideration if you use PDF patterns, the kind that have to be taped together. Not all pattern companies follow the same printing parameters, so sometimes 1 or 2 edges of the paper need to be trimmed off before the whole shebang is pieced together.
You can do this one by one with a pair of scissors and an hour of your time (depending on the size of the pattern puzzle). OR you can get an inexpensive paper cutter and get it done in just a few minutes.
And then spend more time sewing!
You can go old school with those huge paper cutters with the big blade. You probably had one of these in elementary school, am I right? Ok, Gen Z probably didn’t. But anyone who was in school pre-1996 might know what I mean.
Anyway, those sound like a guillotine. They still exist, but a “personal paper trimmer” is a little less choppy and more slidey (and less scary).
They run about $15-$30 depending on size. While that is a little pricier for an unessential tool, it does buy back time when putting patterns together.
Mine is small but fits typical 8.5”x11” printer paper, meaning it’s also large enough for A4. It’s similar to the one in the photo and I got it at an office supply store.
This model came with 2 blades but I’ve never had to switch out the original one.
If I move on to projection-only files, this might become an obsolete tool…but I could probably still use it for paper crafting with my Cricut or something.
Now you have a lot of knowledge on what cutting tools you need and don’t!
Interested in more tool talk? Check out the rest of the The Definitive Guide to a Sewing Starter Kit series:
- Sewing Machines
- Measuring tools
- Marking tools
- Pressing Tools
- More fun tools (coming soon!)
I hope you enjoyed this! Please feel free to add your suggestions, reactions, or questions in the comments below.
Save me on Pinterest for later!