This post contains affiliate links. For more information, please see my Disclosure Policy.*
So what are pressing tools and what does pressing have to do with sewing?
Oh, just about EVERYTHING!!
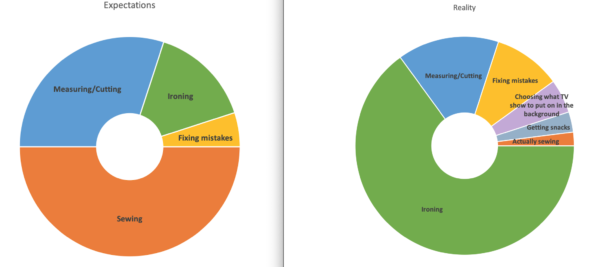
Want to know a secret? Sewing is only 10% sitting in front of your machine. The rest of the time you’re adjusting, cutting, unsewing, and most of all: pressing (aka ironing).
Most of the world calls this ironing, since it’s done with an iron. But the truth is that pressing is a slightly different technique still done with an iron. Think more downward pressure than sliding side to side.
The point being that if you’re going to take sewing seriously, you’re going to spend a LOT of time with your iron.
Which is why your pressing tools are so important!!
But you don’t have to spend a lot of money on pressing tools for your starter tool kit. The three most basic tools you’ll need are:
- an iron
- a surface to use it on
- a press cloth
That’s it!
But you can make your life easier with a bunch of other pressing tools and accessories, so let’s talk about them too, yeah?
As with the rest of the Definitive Guide to a Sewing Starter Kit series, I’m going to assume 2 things:
- If you have any questions, you will let me know!
- That you are looking to become a garment sewist (as opposed to a quilter, etc).
All right, let’s do this!
Like the rest of this series, there are sections to jump to for ease of scrolling!
Iron

You are going to need an iron. Everyone hates ironing, I know. But if you want your clothes to look good (and “finished”), then you MUST press your seams.
There is no way around it. Them’s the facts, kids.
Why is pressing important? This video explains this essential technique, but basically you need seams to lay flat in order for your garments to hang properly.
To accomplish this, you’re going to need the most basic of pressing tools: a steam iron.
Why a steam iron? Steam is a wonderful tool for most fabrics. It can help you shape sleeves and bias binding. It takes puckers out of seams. It can shrink holes in silk (this takes practice!!). Basically steam allows you to better manipulate fabrics.
But steam irons are NOT expensive. In fact, for most of my sewing time I’ve used a very inexpensive lightweight steam iron from Sunbeam that cost less than $30. It was all of 2 pounds of heft.
I knocked that iron off my ironing board once and broke it…and went out and bought the exact same one! When it happened a second time (yes, I’m clumsy), I upgraded to a slightly bigger 3 pound iron from the same brand.
Is the weight important? Remember pressing is about downward pressure, so the heavier the iron the easier it is to let gravity do the work instead of you and your muscles. But on certain fabrics, like velvet, you’ll want a more gentle approach (you don’t want to flatten the nap on velvet).
Any decent iron will come with:
- different heat settings for synthetics, silk, wool, cotton, and linen.
- built-in water carafe
- long enough cord to maneuver around larger pieces of fabric
And really that’s all you need! If there’s a dial to manage the amount of steam, hey that’s great too.
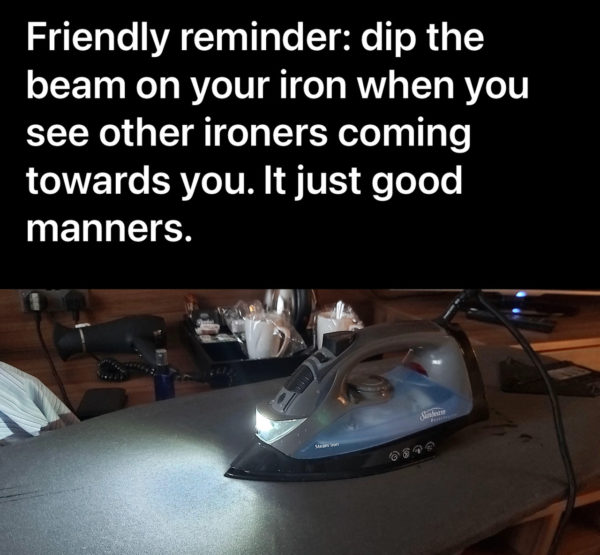
Mine doesn’t have a headlight but after seeing this meme, I think I might need one now!
Some people will tell you to make sure your iron doesn’t leak. Well guess what: all irons leak. Some are worse than others, for sure. But even the high-end Rowenta models will still leak sometimes!
Of course, if you can afford and have space for a gravity-fed system, those are considered some of the best irons ever. I’ve personally never used one because I don’t have the space, but I hear they’re awesome.
Pro-Tip:
Most manuals will insist that you only use tap water in your irons, never distilled or filtered. If you know your municipal water system tends to leave build up (check your shower or faucets for this, it looks like lime scale), then your iron will also get full of gunk. Filtered water has never caused me any issues in my irons, personally, so do your own testing!
Ironing Board

When it comes to an ironing board, I highly recommend getting the largest one you can comfortably afford and fit in your space.
I used to have a really skinny board and didn’t know better…then I upgraded to a slightly wider board and wow! When you have 2+ yards or material to press all at once, the larger ironing boards really do make this task less arduous.
My preferred board also has an iron rest off the back end, so the iron is always nearby but not taking up valuable real estate on the board surface.
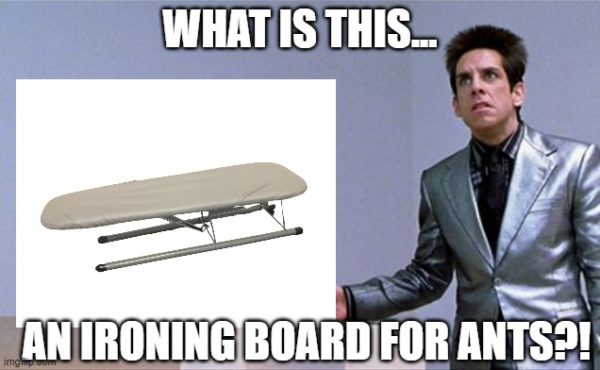
If you only have the room for a table-top size ironing board, that’s fine too! Any ironing board is better than none.
Pro-Tip:
The ironing board cover will get messy and maybe stained from fuzzy fabric, interfacing, etc. Make sure to wash it regularly, and replace if needed. Or check out Online Fabric Store’s DIY Ironing Cover video to make your own.
An alternative to an ironing board is a tabletop ironing mat. I have both and find that using my mat on my work table is sometimes easier than hauling out my big ol’ ironing board.
Press Cloth

A press cloth (or ironing cloth, they’re the same thing) is a piece of fabric that goes between your garment and the iron, to minimize direct exposure to the heat. In that way, a press cloth is like sunscreen for your skin: it protects against burning!
And the last thing you want to do when you’re working so hard on a project is to ruin the fabric while pressing. More benefits of using a press cloth include:
- Avoiding shine or scorching on fabric
- Protect the iron from scratches from buttons or zips
- Keep glue buildup at a minimum (like from interfacing).
Press cloths come in a variety of options. You can use just about any durable fabric for this task, like muslin to quilting cotton or even old bed sheets.
My preferred fabric is an organza silk cloth. Because it’s sheer, it’s easy to see my seams underneath. However, one layer is sometimes too little to avoid shine on fabric, even at low temps. But it comes in a large enough fabric to fold over easily 2-3 times as needed.
Pro-Tip:
Finish the edges of your press cloth, if it doesn’t come finished. Fraying fabric is a pain, especially when it leaves lint on your garments (and ironing board!).
Tailor’s Ham

The first pressing accessory most of us get (after the must haves: iron, board/mat, and press cloth) is a tailor’s ham.
It’s name comes from, well, the shape.
Why is it shaped like ham? To make it easy to work with curves!
A tailor’s ham is a wonderful tool for pressing curved seams like armholes, sleeves, princess seams, etc. Before I had one, I used a rolled towel. The ham was a damn good upgrade.
Hams have 2 sides (one is usually flannel). This way you can use one for light heat and one for high heat.
I also learned a great hack using a ham for setting in sleeves with a lot of ease:
- set the sleeve on the curved upper edge of the ham
- pull the ease-stitching to mimic the shape of the ham
- then steam the edge to set it in place
It usually helps manipulate the fabric to fit into the smaller armhole (sleeves in woven fabrics are usually larger than the armhole they go into so that your arm can move around).
Nancy Zieman demonstrates this technique in the video below. Click here to skip to that part.
Tailor Board

Do you need a tailor board? No.
Will a tailor board make your life easier? Yes.
How?
A tailor board is actually multiple tools in one:
- Tailor clapper: traps heat and steam in a seam
- Point press: pressing into corners of collars and cuffs
- Sleeve shaper: like a pressing ham, but solid wood
The basic job a tailor’s clapper performs is trapping steam and heat into your seams, creases, etc to make them easier to manipulate. That’s what the flat pedestal on the bottom does (that’s the “clapper” part, but you can also use it as a mini ironing board—see the video below).
A tailor’s clapper is especially great for thick fabrics like wool and denim. You’ll get super flat seams using a clapper on those!
The point press has 2 different functions, both of which will meet your pressing needs that much more easily.
The point end is great for pushing out corners, like collars. The flat top (which reminds me of a balance beam) is wonderful for pressing seams open, especially small or graded seams.
You can actually buy all these tools separately. In fact, mine is missing the round sleeve shaper portion and has a skinnier clapper base. But it still a great multi-purpose pressing tool I absolutely love.
Note this is not an inexpensive tool. It will run $40-60 for a quality made product.
Pro-Tip:
There are a few cheaper knock offs on the market that aren’t made from hardwood, which means the wood will eventually split from absorbing heat and moisture and possibly snag your fabric. Look for ones made from hardwood or oak only.
Nancy Zieman had a wonderful video illustrating all the uses for a tailor board. Unfortunately the specific product she shows is out of stock on their site but Jackson Woodworks sells a similar one.
Sleeve Board

A sleeve board is a smaller ironing board. Frankly it looks like it belongs in a dollhouse, it’s so much smaller and narrower than a regular ironing board!
But what’s a sleeve board? It’s a small ironing board specifically for pressing sleeves and smaller tubular projects.
A sleeve (once it’s sewn together) is really just a long tube. Having to press that interior sleeve seam can get tricky once it’s in its tubular shape. And that’s why the sleeve board, which is small enough for the sleeve to fit around, works nicely!
That way you don’t get a crease in your sleeve from pressing the sleeve flat. So later, when you’re ironing your finished clothes (I know, we hate doing that!), you can use it to avoid adding creases in them too!
An alternative to a sleeve board is a seam roll. Same concept, but it’s like the tailor’s ham in a tube (and they’re sometimes sold together). This might be a less expensive option. However I’ve found that I’d rather use my sleeve board than seam roll.
Bias Tape Makers

Bias tape makers are triangular metal tools that you run bias tape through so you can fold the edges to the middle very quickly.
You can also do this with a pin into your ironing board, but it’s sooooooooooo much easier with bias tape makers.
Bias tape is strips of fabric cut on the bias (at a 45 degree angle to the selvedge). By cutting them in this direction, the fabric is given a bit of give so it can stretch along curves. You’ll see it used a lot to finish necklines, armholes, and curved hemlines.
I sometimes cheat and use bias tape instead of making facings! It helps when you don’t have enough fabric for the whole project. Or I’m just feeling lazy.
They’re a nice-to-have tool, definitely not a necessity. But if you find yourself making a lot of bias tape, they’re worth the small investment.
Pro-Tip:
You can make a ton of bias tape in one go from a single square of fabric. Check out this tutorial for continuous bias binding. It even shows how to use a bias tape maker to fold it up nicely!
Iron Silicone Pad

Another nice to have tool is a silicone pad for your iron. A silicone pad protects any surface from the iron’s heat.
This is especially useful if you use a smaller ironing mat and need somewhere off to the side for your iron to sit on. This keeps your iron from eating up the valuable surface space ON your ironing pad/mat/board without fear of setting stuff on fire.
Fire is not good.
Seam Roller

Last on this list of nice-to-have pressing tools is a seam roller. It takes the place of an iron for those times when finger pressing or a lighter hand is necessary.
Seam rollers are great for 1/4 “ seams that quilters use, but garment sewers might encounter tight seams like that too.
They’re is also useful for material that can’t be ironed, like leather or vinyl. When you find yourself moving on to fabric like that, it might be time to invest in a seam roller.
Iron & Board Holder

This isn’t a so much a sewing tool but it’s definitely nice to have in your sewing space: an iron and board holder keeps your tools organized and put away.
There are types that can hang over the door or screwed into the wall—or both. My sewing space is an open-concept den with no doors, so mine now hangs on the wall. But luckily it was a two-in-one when I got it, since originally it hung on the back of a door.
If you do get one that is wall-mounted, I highly recommend the type that have a silicone pad between your iron and the wall. Helps to protect your paint!
And that’s a wrap! Did you miss a post in this series? Check out the rest of The Definitive Guide to a Sewing Starter Kit series:
- Sewing machines
- Cutting tools
- Measuring tools
- Marking tools
- More fun tools (coming soon!)
I hope you enjoyed this! Please feel free to add your suggestions, reactions, or questions in the comments below.
Save me on Pinterest for later!