This post contains affiliate links. For more information, please see my Disclosure Policy.*
Marking tools can be used on paper or fabric, and I’ve separated them on this list. They’re all also pretty inexpensive which is a great bonus!
When you’re cutting your fabric, you sometimes have to add certain markings to it to guide your sewing later. These markings require specialty tools so you don’t ruin the fabric with random markers.
But are all marking tools created equal? Oh summer child. If only it was that easy!
Some marking tools are better than others, and almost all of them depend on the fabric (or maybe even the color being used).
Markings need to be:
- thin
- precise
- removeable
Why do marks have to thin, precise, and removeable? Because most of the time you’ll be sewing over these lines and you want them to disappear under your very thin thread. And if they aren’t covered by the thread, then you want them to go away in the wash.
A lot (but not all) of the time these markings are on the “back” of the fabric. The back is the inside of a garment, the side that doesn’t show when you’re wearing it.
But what kind of markings are we making on fabric? Darts are pretty common.
You might also have
- pleats
- buttons
- buttonholes
- dots that align with seams when separate pieces are sewn together
- and more
Markings also have to be removable once the project is done! Especially on light colored or sheer fabric. And since I learned the hard way that not all “washable” marking tools actually wash out, my number one tip for this entire list is:
ALWAYS test your marking tool before you use it on new fabric!
Makes sense? Okay!
As with the rest of the Definitive Guide to a Sewing Starter Kit series, I’m going to assume 2 things:
- If you have any questions, you will let me know!
- That you are looking to become a garment sewist (as opposed to a quilter, etc).
All right, let’s do this!
Like the rest of this series, there are sections to jump to for ease of scrolling!
Paper Marking
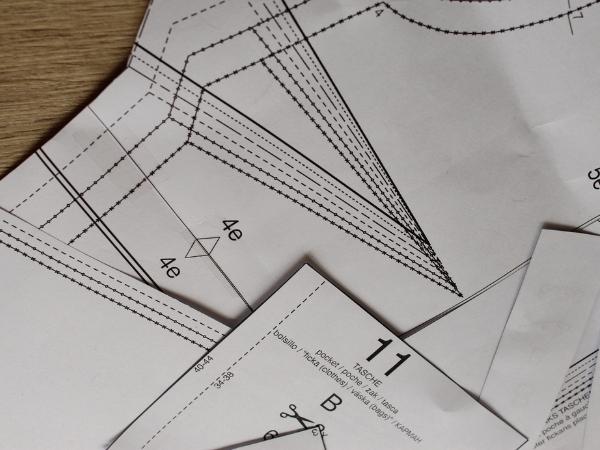
Markings start on the pattern pieces and then move to the fabric. Most of the time, some adjusting has to be done to the pattern before anything is cut out of fabric.
These are some marking tools for accomplishing that task.
Mechanical Pencils

Mechanical pencils are inexpensive and plentiful, but that doesn’t mean they’re not important!
I trace all of my patterns so I can make adjustments without ruining the original pattern piece (especially with paper patterns). In the case of PDF patterns, I usually end up transferring the changes back to the hardier paper. And all of that starts with the mighty mechanical pencil.
Why mechanical and not just a plain yellow #2? I like the lines to be thin and precise. In fact, I prefer a .5mm pencil, .7mm is fine too.
My favorite is the Papermate SharpWriter. Instead of clicking it, you have to roll the tip to extract more lead. They aren’t as easy to refill though, so clicky-pencils work too.
Of course, you might prefer a different style of pencil. That’s fine. But when it comes to thin, precise, and ERASEABLE lines, the humble pencil can’t be beat.
Colored Pencils

Sometimes you have to make the same adjustments a few times and the same grey line gets hard to see.
Enter colored pencils!
Colored pencils make it easy to see against black printed lines, especially on white paper. And better brands erase as easily as regular pencils.
Once I’ve committed to my new adjustment lines, I trace over them in a colored pencil so I can “see” it more clearly. I’ll also retrace the grainlines (if they shifted) over in a bright color, like red pencil.
I haven’t found a set of colored mechanical pencils (or colored lead) yet so keeping these lines sharp requires a separate sharpener. I like this electric one, but manual ones work too.
Crayons

It sounds like an oddball tool, but it turns out that in specific circumstances a crayon is the best tool for the job.
As a beginner sewist, you might want a lot of bang for your buck! So sewing magazines with lots of patterns for one price could be appealing. Magazines like BurdaStyle and others do have beginner-friendly patterns. But to save money, they are printed overlapping each other in large sheets.

How do you make sense of that???
The best tip I ever found was to trace the size you want in crayon, then trace through a light box (like a window) from the other side. The beefier wax line will show throw more prominently than the other maze of lines, making your pattern pieces more obvious.
I’ve only made one BurdaStyle magazine pattern ever, but this tip made that process a little less painful.
Fabric Marking
While all of the below tools can also be used on paper, they’re also great for marking your actual fabric. Of course, most depend on the color and type of fabric used. For example, white chalk on white fabric won’t work too well.
Transfer Paper & Tracing Wheel

Transfer paper and a tracing wheel are great for transferring markings to the fabric. They work the same way as carbon paper does. You place the transfer paper under the pattern piece facing the fabric, then trace the necessary marks from your pattern piece.
You can even do both sides of your pattern pieces at the same time, either by folding the paper around the fabric or using two different transfer papers.
Look for wax-free and acid-free and make sure it is fabric friendly! The Saral brand actually claims this on their packaging: washes out of fabric—won’t set with hot iron. That’s key because remember, we want these markings to go away once we’re done making the garment!
Pro-Tip:
Buy transfer paper in a color variety pack. They usually come in white, yellow, red, and blue (or graphite instead of white). Since you want contrast against your fabric, use the color that will be the most obvious against the color of your fabric.

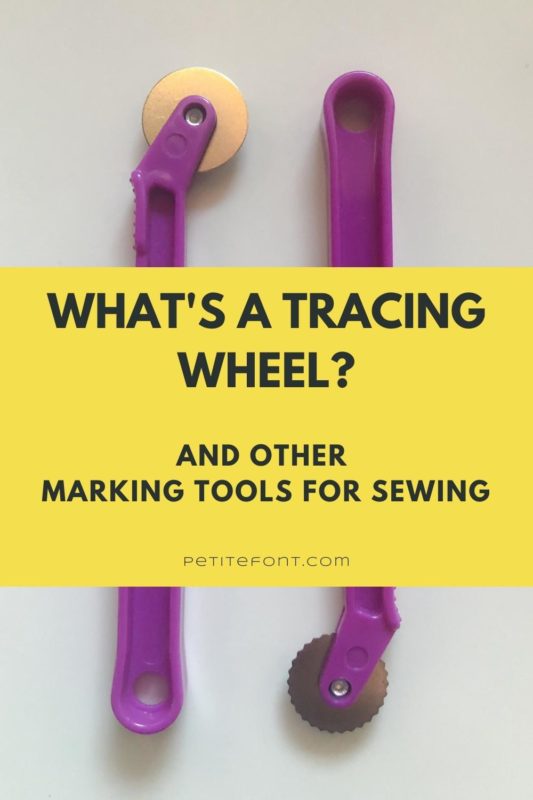
Tracing wheels come in 2 varieties: smooth and serrated. I bought a pack of both and while I prefer the smooth one for unbroken lines (the serrated one leaves dots), they both work fine.
There are also tracing wheels that have longer spikes. These are professional dressmaker tools and because they leave larger indents in the fabric, don’t require transfer paper necessarily.
Personally I prefer to see my markings very easily, especially as my eyes get older so I stick to the transfer paper kind and the unbroken line of the smooth tracing wheel.
Frixion Pens

Pilot FriXion pens write with heat-sensitive gel ink that “disappears” when heated. They’re my favorite marking tool of all time because they’re easy to use and don’t need sharpening, but of course they come with a caveat!
While the color of the gel disappears with heat it will leave behind a faint white mark. This normally washes out on all the fabrics I’ve ever used it on, from silk to denim. But do your own testing!!
These pens are also great for marking pattern pieces, especially since those marks will disappear with a little heat.
I use a red or pink pen for this, since I then trace these markings onto my new piece of paper. The red/pink is a great contrast to the existing black lines of the patterns so it’s easy to see it when tracing.
There is a rumor that under very cold temps the gel color will come back. I’ve tried to test this by rubbing an ice cube over areas I’ve used a gel pen on and then ironed off and…nothing. Of course, this is after washing them, so maybe that’s why? So I guess beware of that possibility if you live with polar bears.
Or penguins.
Tailor’s Chalk

Tailor’s chalk is an old school method of marking fabric. It usually brushes away rather easily so it doesn’t leave marks or residue on fabric.
And because chalk is available in a variety of colors, it works great on almost all fabric. For example, just about every color of chalk shows up in black fabric.
The trick to using these marking tools is to keep the edge sharp. Like all of these marking tools, the lines you’re transferring are meant usually for thread, which is only 1mm thick! So your lines also need to be very thin.
Liesl Gibson has a quick video comparing different chalk sharpening methods. You might remember her from Sew My Style! And you might also already have a few of these cutting tools in your arsenal.
So that’s cool and all but what if you don’t want to deal with the dust from that, check out the next tool on the list.
Chalk Liners/Markers

Chalk markers or liners use chalk dust and a scroll wheel to deliver a precise line. They’re also usually refillable so you only buy the liner once but refill it with chalk as needed.
While these technically work on all fabric, I find them easier to use on beefier fabric. Because there’s a little scroll wheel making contact with the fabric surface, very lightweight or slippery fabrics can be “grabbed” by it and skew out of grain.
That’s annoying. In that case I really do prefer Frixion pens or fabric pencils.
Water Soluble Fabric Pencils

Like colored pencils, water soluble fabric pencils come in a variety of colors too. But they are safe for fabric marking.
“Water soluble” means that they wipe off with water. So they’ll definitely disappear if you run your garment through the wash. Barring washing, you can also simply dab it off with a moist paper towel.
I really like these for fabrics that don’t cooperate with chalk liners, like slippery silks and polyester. Since they come in white, they’re great for darker fabrics where a Frixion pen won’t work.
Don’t forget to keep these pencils sharp!
Shop Water Soluble Fabric Pencils
Air Dry Markers

These air dry markers are great for marking fabric because the marks eventually disappear on their own!
That’s good AND bad.
It’s great because you don’t need to worry about washing out the marks. But suppose you set aside a project for a few days? Those marks last for about 24 hours before they disappear into the ether.
Yikes!
If you’re going to mark and sew a project immediately, then this shouldn’t be a problem. But it’s something to keep in mind if you break your sewing up over multiple days.
The marker pictured above has a dual tip. One side is disappearing ink while the other is water soluble. So like the pencils above, they’ll come off with a dab of water. That’s another great option…covered below!
Washable Markers

Washable markers are one of my favorite marking tools but they have their limits!!
First of all, they don’t come in white so using them on darker fabrics might not work.
Then there’s the possibility they won’t actually wash out.
I once used a purple washable Crayola marker on a ready-to-wear camisole. I was marking where I wanted my waist line to be for a petal skirt. Well the skirt came out just fine…but the marker never washed out.
Here’s what that camisole looks like to this day:
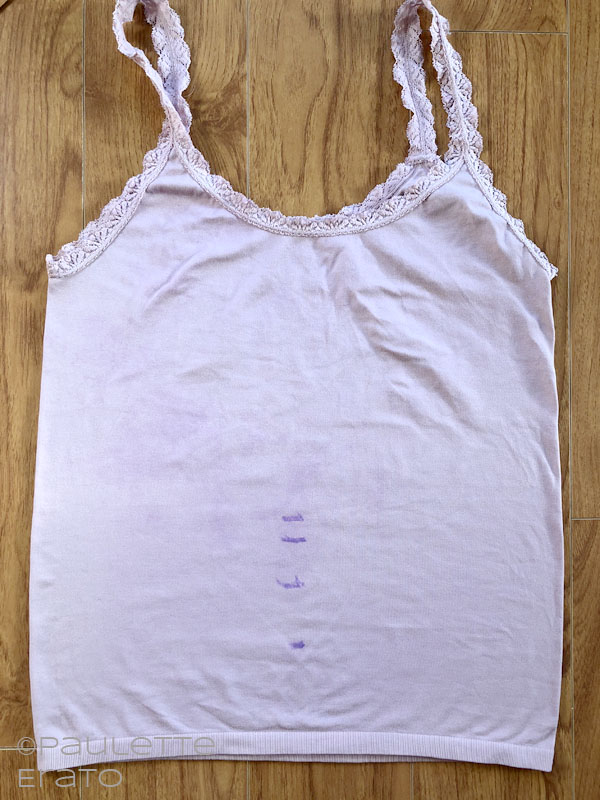
I think it had to do with the camisole’s fiber component, which was some combo of spandex and nylon. Or maybe the Crayola brand is less water soluble than actual sewing brands? Who knows.
Bottom line: this is one marking tool you must definitely test.
Also, even fine-tipped markers get dull pretty quickly on fabric, so the markings become less precise over time. But these markers still are great for marking the outside of fabric. Like where buttons and buttonholes go.
Thread tracing
Another old school method of marking fabric is to simply trace the pattern pieces with a needle and thread.
Made to Sew has an excellent library of beginner sewing videos, including this great explanation of what thread tracing is and how/when to use it:
The only tools that requires is needle and thread, which you should already have! Hand sewing needles are inexpensive and come in a variety of sizes for different applications.
Grab an inexpensive set of assorted needles and start thread tracing.
And those are all the inexpensive marking tools you can choose from! You’re on your way to becoming an unstoppable sewist now!
Interested in more tool talk? Check out the rest of The Definitive Guide to a Sewing Starter Kit series:
- Sewing machines
- Cutting tools
- Measuring tools
- Pressing tools
- More fun tools (coming soon!)
I hope you enjoyed this! Please feel free to add your suggestions, reactions, or questions in the comments below.
Save me on Pinterest for later!