This post contains affiliate links. For more information, please see my Disclosure Policy.*
When I first started sewing, I had NO IDEA how much math goes into it. There’s a TON of math. Like algebra and geometry level math. And you know what you need for geometry?
Rulers! AKA measuring tools!
Measurements are EVERYWHERE in sewing. You need to know your own body measurements, and see how they align with pattern sizing. You have to measure your pattern pieces to ensure they’ll fit, and if not, make adjustments in specific places. Which can lead to fractions and strange decimal points.
But measurements exist in all sorts of artisan crafts and this reference sheet (for nail sizes of all things) actually works REALLY well for sewing.
The most important measurements start with your own body. In order to make clothes that fit your unique shape and size, you need to know some key measurements.
Then comes pattern placement on fabric, and making sure the grainlines are straight. Rulers work great for this!
Then there are pattern adjustments and blending. Folding hemlines so they’re straight. And maybe you want to know how much yardage you have of a specific fabric.
All of this is tied to numbers.
So what basic tools do you need to get by? Not that many, but there is a variety of choice!
Welcome to the next post in the series of the The Definitive Guide to a Sewing Starter Kit Measuring Tools Edition!
Like I’ve said from the beginning of this series, it’s written assuming 2 things:
- That if you have any questions, you will let me know!
- That you are looking to become a garment sewist (as opposed to a quilter, etc).
Ready? Let’s go!
Like the rest of this series, there are sections to jump to for ease of scrolling!
Flexible Measuring Tape

I like calling these flexi-tapes because it’s funny so why not? A flexible measuring tape is going to be the number one tool you absolutely need in order to get accurate measurements. And you will want to routinely re-take your key measurements with every project!
What are the key measurements? They’re the circumference of your high bust and bust, waist, and hips. If you’re only making tops, then maybe the hips don’t matter as much (unless the top falls below your hips). If you’re making bottoms, then bust and high bust don’t come into play.
Made to Sew has a great video showing how to get your measurements correctly:
Can you use a regular old measuring tape like carpenters and construction workers do?
No!
First of all those aren’t flexible, so you can’t wrap it around yourself as accurately. Also, they’re metal and sharp, which means you also run the risk of cutting yourself!
We have enough cutting tools in sewing without adding more danger from that kind of measuring tape!
Pro-Tip:
Flexi-tapes stretch out over time. Since they’re relatively inexpensive, keep a few on hand and check them against a hard ruler periodically to see if it’s time for a new one.
My favorite flexi-tape is self-fastening, which makes measuring yourself without a buddy SOOOOOOO much easier. I found mine on Etsy for about $10, but a similar one is available on Bra Builders for only $7!
Quilting Rulers

Quilting rulers are an awesome measuring AND cutting tool because they’re clear and made of sturdy acrylic. When cutting fabric, especially pieces that need to be precisely straight, they can’t be beat (and they pair especially well with rotary cutters).
Obviously they aren’t just for quilting either.
Quilting rulers come in a lot of sizes, and thanks to the variety of quilt blocks, in a ton of shapes too. The basic 6″x24” clear guide is a great place to start (15×60 cm for metric users).
Pro-Tip:
These acrylic rulers tend to slide around on fabric if you aren’t careful. There are a few tools to keep that from happening. One is a handle with suction cups that attaches to the top, and another is clear circles you can attach to the underside. Either or both can work for you.
Clear Gridded Ruler

My personal workhorse measuring tool is my 2”x18” clear guide ruler you see above. It has 1/8” markings and 1/16” hashes for better precision, and is never not on my work table. It has a blank 1/2” at the top, then 1/8 ” lines below. This is especially great when dealing with common seam allowances like 1/2” or 5/8”!
(If you’re on the metric system, clear gridded rulers in centimeters are also available.)
I use it for:
- all pattern adjustments
- measuring AND drawing seam allowances on pattern pieces
- drawing in darts (and making sure the legs are the same length) and other pattern markings
- tracing said darts onto fabric
- measuring the grainline from the selvage
- and sometimes as a straight-edge to cut fabric
That last one isn’t so smart because it’s more flexible and not as sturdy as a quilting ruler, so I’ve nicked the edges a few times…which reminds me that I should replace it, lol.
But you can see why this is my workhorse measuring tool. It does almost EVERYTHING!!
Seam Gauge/Hem Guide

Seam gauges and hem guides are great for getting accurate measurements in key areas, notably seams and hems. That’s obvious in name, right?
But how do they work?
It depends on the type, but some are little metal rulers with a sliding doohickey. Professor Pincushion has a cute quickie video on using this type of gauge:
Others are made of heat resistant material so you can press them with an iron (especially great for hemming!).
I have both a metal hem guide and this Clover Hot Hemmer and have to give the top prize to the hot hemmer. It doesn’t get wet like the metal one does with steam. It’s my little hemming workhorse.
Regardless, they’re all great for ensuring accuracy.
Pro-Tip:
I personally like the sliding seam gauges that have a pointy tip. They doubles as a point turner for making sharp corners, like the kind you want in collars.
Curved Rulers

Curved rulers come in a wide variety of options. They’re J-curved or D-curved rulers that are essential in fashion design and pattern making, but also great for pattern adjustments.
For a beginner, a basic French curve is really all you need. I’d recommend getting 2 sizes, one large and one small.
How do they work?
You’ll notice that armhole curves, for example, all kind of follow a gentle C- or J-curve. When making adjustments in this area, a French curve is nice for “truing” the curve so there are no jagged lines. A smaller French curve is good here.
It’s the same with side seams. When blending between sizes, or adding shaping, redrawing the curved seams is easier with a French curve. Because of the longer seam lines, a larger curved ruler does the trick.
If you’re working with pants, then a hip curve might also come in handy. It’s a longer, gentler curve for blending around hips down through the hem of a pattern.
Pro-Tip:
Curved rulers usually come in metal and clear varieties. I prefer clear acrylic ones so you can see through them for adjustments. On the other hand, metal ones aren’t susceptible to breaking like acrylic ones can (and do!). This comes down to your own personal preference.
Yard or Meter Stick

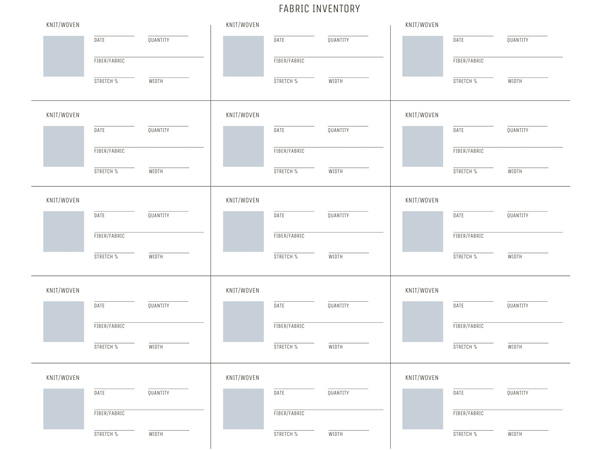
I love this measuring tool for quickly measuring fabric yardage. When I did my huge fabric stash reorganization project last year, I had many many many MAAAAAAAAAAAAAANY yards of fabric to get through.
Yes, my stash is embarrassingly large. There might be a destashing party in the future.
My yard stick made it a bit faster, and it was even a task I could get my husband to do. Even kids can help with something like that.
Because of the longer length, yard and meter sticks are good for measuring your flexi-tapes against, to see if they’ve stretched out. Once that happens, it’s time to get rid of the flexi-tape. Your measurements won’t be accurate with it anymore.
Yard sticks are also fabulous for smacking anyone who tries to use your fabric shears for random non-fabric projects.
I told you I loved these memes!
Pro-Tip:
Almost all measuring tools have a hole in them for easy hanging. Get a hanging system for your work space to keep your rulers organized! I especially like using magnetic hooks that attach to my sewing table so all of my go-to measuring tools hang within arms reach.
Magnetic Seam Guide

A magnetic seam guide is a great little addition to your sewing machine accessories. While it isn’t necessary, it’s a very nice tool to have (as are the remainder of the tools on this list).
Most machine throat plates are marked with common seam allowances but not all carry those measurements down the length of the plate. That’s where a magnetic seam guide helps keep your fabric straight and at a consistent distance from the right spot while it’s running under the presser foot.
Some people worry about using magnets around computerized machines but that’s no longer an issue with modern equipment. I keep a magnetic seam guide AND magnetic pin dish next to my machine 24/7.
Pro-Tip:
Magnetic seam guides are also great for helping find fallen pins!! If you’re like me and stuck with carpet in your sewing room, you do not want to mess with lost pins on the floor—especially if you sew barefoot! Your magnet will help scoop that right back up!
Seam Allowance Ruler

Another nice to have measuring tool is a seam allowance ruler or needle guide. And this nifty tool works in combination with a magnetic seam guide!
These are great if you don’t have those measurements mentioned on your throat plate. Or, if your machine is like mine and you can move the needle to different positions, for ensuring that your seam allowance is always consistent.
They work by sliding the acrylic guide under the presser foot then putting the needle in the down position. Let’s say you want a ⅜” or 1 cm seam. Put the needle into that hole, then place your seam guide next to it and voila! Perfect seams every time.
I got mine through Madam Sew and it shipped super fast, plus came with a surprisingly strong magnetic seam guide for about $10. You can also find them on Amazon or a well-stocked local hobby store.
Curve Runner

The last measuring tool I think is REALLY nice to have in your toolkit is a curve runner. You can use your flexi-tape for this, but I find the curve runner to be far more accurate.
See, when you’re make any adjustments to pattern pieces, you usually have to measure along the seam line—not the edge of your pattern piece. The seam line is a different length than the edge of the pattern piece, and measuring along curves like armholes and necklines can get tricky!
And that’s why a curve runner is an excellent tool for this. It’s explicitly for running along these curved seams, hence the name. It measures in 8″, 12″, or 30 cm increments, depending on which measuring system you need. I recommend the larger ones (12″ or 30 cm) so don’t have to do as much mathing.
There are 3 measuring tools I use the most and this one is 3rd to only my 2×18″ clear ruler and my French curves. I might even call it essential for the intermediate to advanced sewist!!
Buttonhole Gauge

Last on the list is the buttonhole gauge, and it’s at the bottom for a reason.
You don’t need it.
When I first saw it, I thought it was the answer to all my button placement problems! Nope, it’s just another inaccurate tool that is rarely even long enough to cover my entire button band.
See, I have to move my buttons around all the time. Because I’m petite, I can sometimes even get away with removing a button. Yay, fewer buttonholes to make!! But then I have to space the remaining buttons out properly.
You’d think this tool would be perfect for that. It’s not. Say I need 4 buttons instead of 5. It won’t stretch out far enough to give me 4 perfectly spaced buttons.
In fact, the tool is so wonky that it doesn’t even stretch out evenly each time. So my advice is to not waste your money on this measuring tool. It’s not worth it.
And that’s about what you need when it comes to basic measuring tools!
Interested in more tool talk? Check out the rest of The Definitive Guide to a Sewing Starter Kit series:
- Sewing Machines
- Cutting tools
- Marking tools
- Pressing tools
- More fun tools (coming soon!)
I hope you enjoyed this! Please feel free to add your suggestions, reactions, or questions in the comments below.
Save me on Pinterest for later!

Thank you so much for these guides! Just making my way through them now and they are so clear and helpful to a beginner! ❤